Early fall is that slightly tricky beauty moment when summer is not quite ready to leave, but suddenly I want richer colors, cleaner shapes, and a manicure that feels a little more intentional. So what happens when bright late-summer energy meets the polished mood of September? I think the answer is in the details: a flash of orange instead of a full neon set, deep navy against creamy white, classic red with delicate botanical accents, icy blue with warm red, and sunny yellow softened by animal print.
I would not treat early fall nails as a strict list of colors that we are somehow required to wear. For me, this part of the season is much more interesting. It is about taking something familiar and giving it a small twist. Want a fall manicure but cannot let go of summer? There is a design for that. Prefer short square nails? Easy. Love almond shapes or longer acrylics? There is plenty to play with. These are the kinds of ideas I would save on Pinterest now and actually show to a nail tech later.
Sheer White Nails With a Bright Orange French Edge
I love this manicure because it makes the transition from late summer to early fall feel effortless. The base is a translucent milky white with a glossy, almost glass-like finish, while a vivid orange line traces the free edge of each square-shaped nail. The orange is not heavy or traditional-looking – it works more like a thin outline around the soft white center. I also notice how the clean square shape gives the design a slightly retro feel without making it look dated. It is playful, but still polished enough for everyday wear.
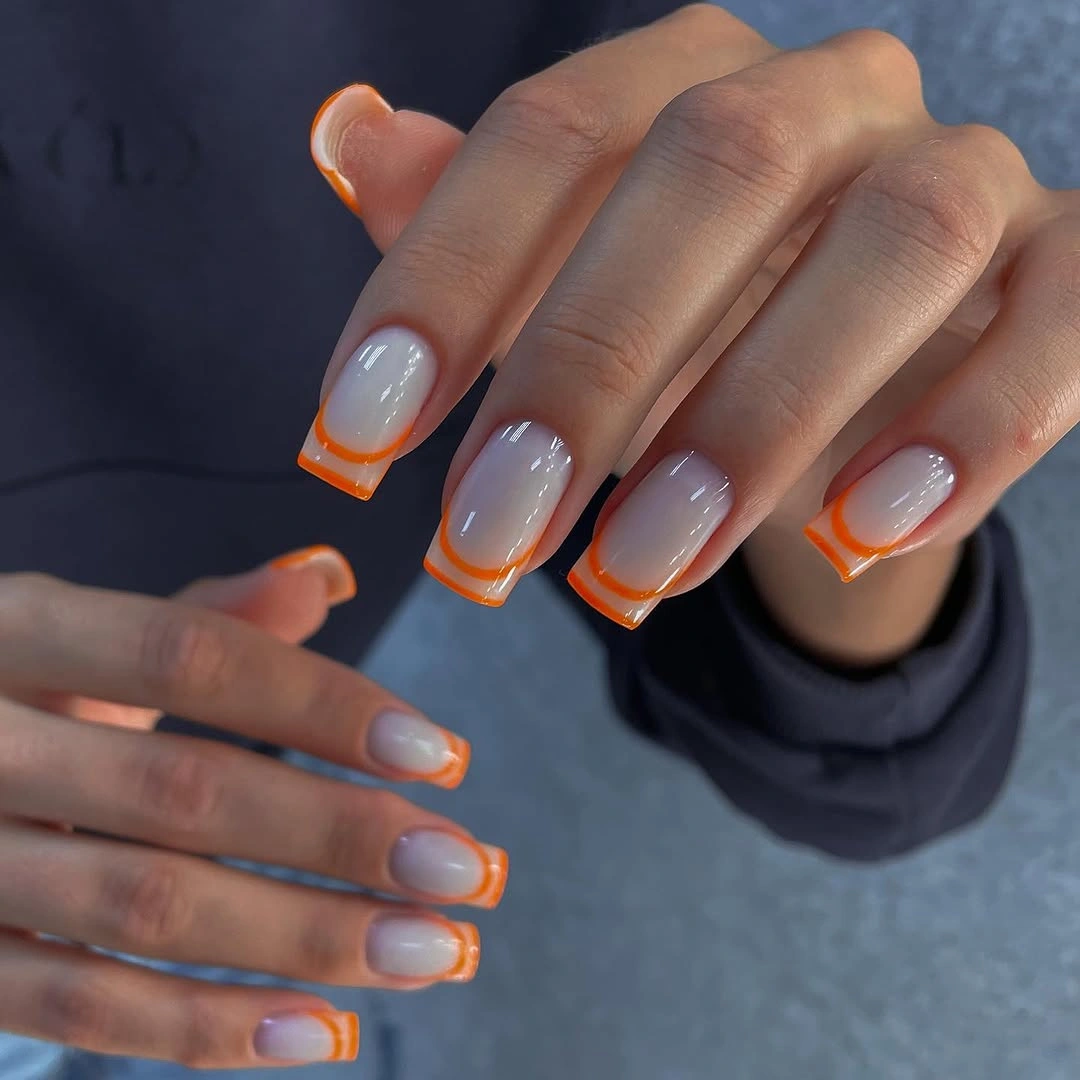
For a similar manicure, I would start with a sheer milky base such as OPI Funny Bunny or a comparable translucent white gel. For the orange detail, I would choose a saturated tangerine shade rather than a yellow-orange, because that stronger contrast is what makes the outline pop. A glossy top coat is essential here – the design depends on that wet-looking shine. If I wanted a longer extension, I would use soft gel tips or an acrylic extension and keep the square shape crisp but not excessively wide.
At home, I would first shape every nail evenly and apply a thin milky layer rather than trying to make the base completely opaque. Once that is cured, I would use a fine liner brush to draw the orange along the free edge, working slowly from one side toward the other. I would rather make two thin passes than one thick, uneven stripe. Finish with a high-shine top coat and clean the edges before curing. It sounds simple, and it is – but the precision is the whole trick.
This is probably my favorite kind of early fall manicure when I want color without committing to a dark palette. The orange gives me that first hint of changing leaves, while the translucent base keeps one foot firmly in August. I would wear it with denim, cream knits, chocolate brown, or even a simple white shirt. Sometimes the smallest detail does the most work.
Midnight Navy, Milky White and Gold Nail Art
This combination feels more dressed up, and I think that is exactly why it works so well as summer starts fading. Several nails are finished in a glossy deep blue, while the lighter nails use a creamy white base decorated with abstract dark navy shapes, metallic gold foil, and delicate ornamental details. The long square silhouette gives everything enough space to breathe. Instead of putting the same decoration on every nail, I would keep the artwork concentrated on one or two fingers and let the solid navy do the rest of the talking.
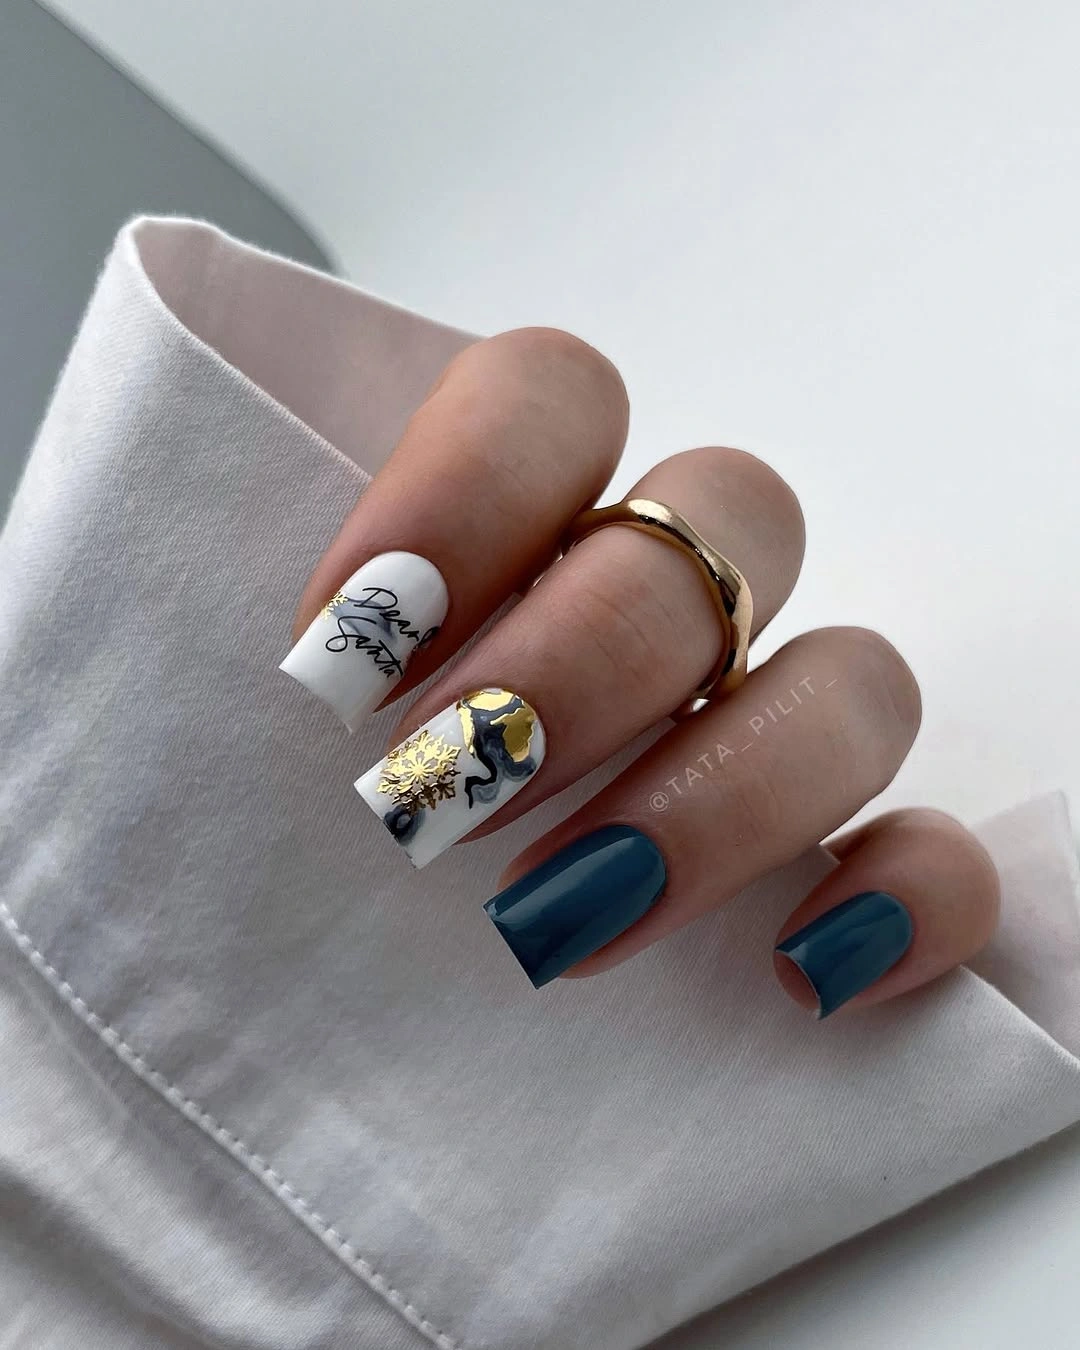
For the color story, I would look for a creamy white gel, a true midnight or ink-blue shade, and a thin metallic gold gel or transfer foil. OPI Russian Navy is the kind of deep blue I would consider for the solid nails, while a neutral white such as OPI Alpine Snow can provide the contrast. For the decorative pieces, I would keep the gold irregular rather than perfectly geometric. A little foil adhesive, fine nail-art brushes and a strong glossy top coat are enough to create the luxurious effect without turning the manicure into a craft project.
I would build this design in layers. First comes the base color and shape, then I would cure each nail before moving on to the art. On the accent nails, I would paint loose navy forms rather than trying to create identical patterns. After curing, I would add tiny pieces of gold foil and any fine linework, then seal everything carefully. If I were doing this at home, I would absolutely simplify the artwork on the non-dominant hand – there is no prize for making yourself miserable over a manicure.
I see this as the early fall option for someone who has already started reaching for her darker wardrobe. The navy feels sophisticated without going all the way to black, while the gold brings in that little evening glow. I could easily see this working for a dinner, a wedding guest look, or the first chilly weekend when a blazer suddenly feels exciting again.
Classic Red Nails With Delicate White Botanical Details
Red polish never really leaves my rotation, but this version gives the classic shade a seasonal personality. The nails have a rich, glossy red base with small white botanical motifs placed across selected fingers. The shapes are short-to-medium and softly squared, which keeps the manicure practical while allowing the red to look bold. I especially like the contrast between the solid red nails and the decorative ones – the pattern feels almost like tiny embroidered details against a dramatic fabric.
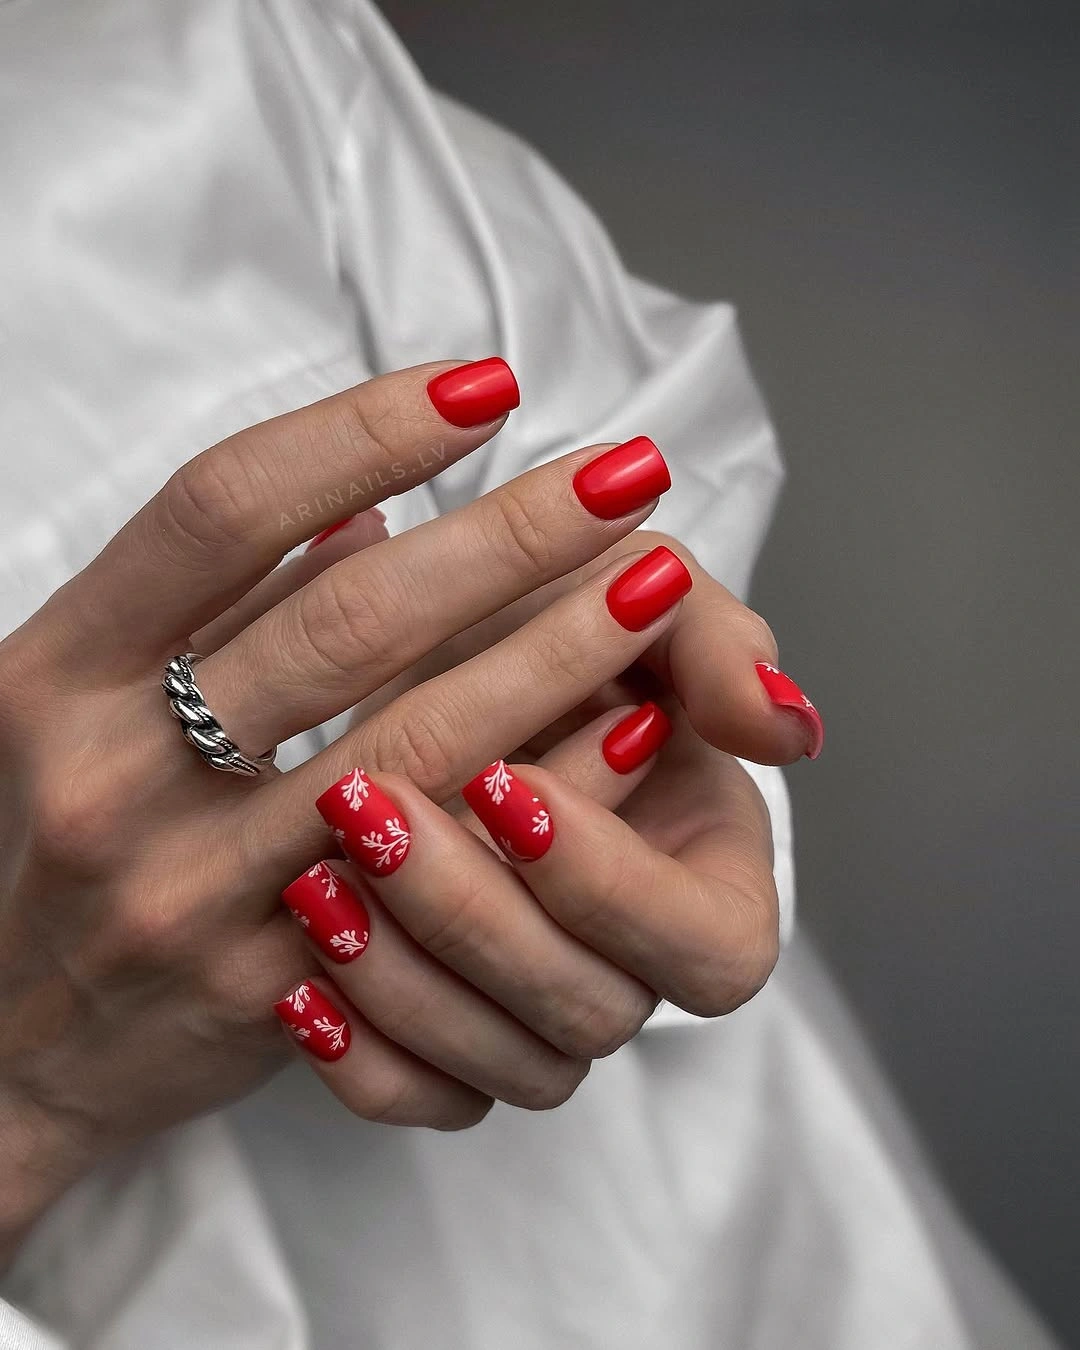
I would use a classic blue-based or neutral red gel for this look rather than a coral red. OPI Big Apple Red is an obvious starting point, although any saturated true red with a glossy finish can work. For the botanical details, I would choose an opaque white nail-art gel and a very fine detailing brush. A good base coat and top coat matter here because red can show every little uneven patch, especially under bright light.
The easiest way I know to recreate the flowers is to simplify them into tiny branches, leaves and dots instead of attempting realistic flowers. I would cure the red base first, then place the white details on only two or three nails per hand. Keeping the pattern concentrated makes the manicure look deliberate. I would finish with a glossy top coat and make sure the white artwork is completely covered so it does not catch on clothing.
I think this is the manicure I would choose when I want something familiar but not boring. Red already has enough personality to carry the entire look, so the tiny white accents only need to whisper. It also has that useful early-fall quality of working with both summer dresses and heavier autumn pieces. One day it is paired with denim and sandals; the next, it looks completely at home beside a black sweater.
Powder Blue Nails With Tiny Red Floral Accents
Here is where early fall gets a little unexpected. Instead of automatically reaching for burgundy, brown or olive, I would consider a soft powder blue base with small red botanical motifs. The finish is matte or softly velvety rather than intensely glossy, and the cooler blue makes the red details look surprisingly vivid. The longer square shape gives the design a neat canvas for the miniature leaves and flowers, while the overall palette still feels clean rather than overly sweet.
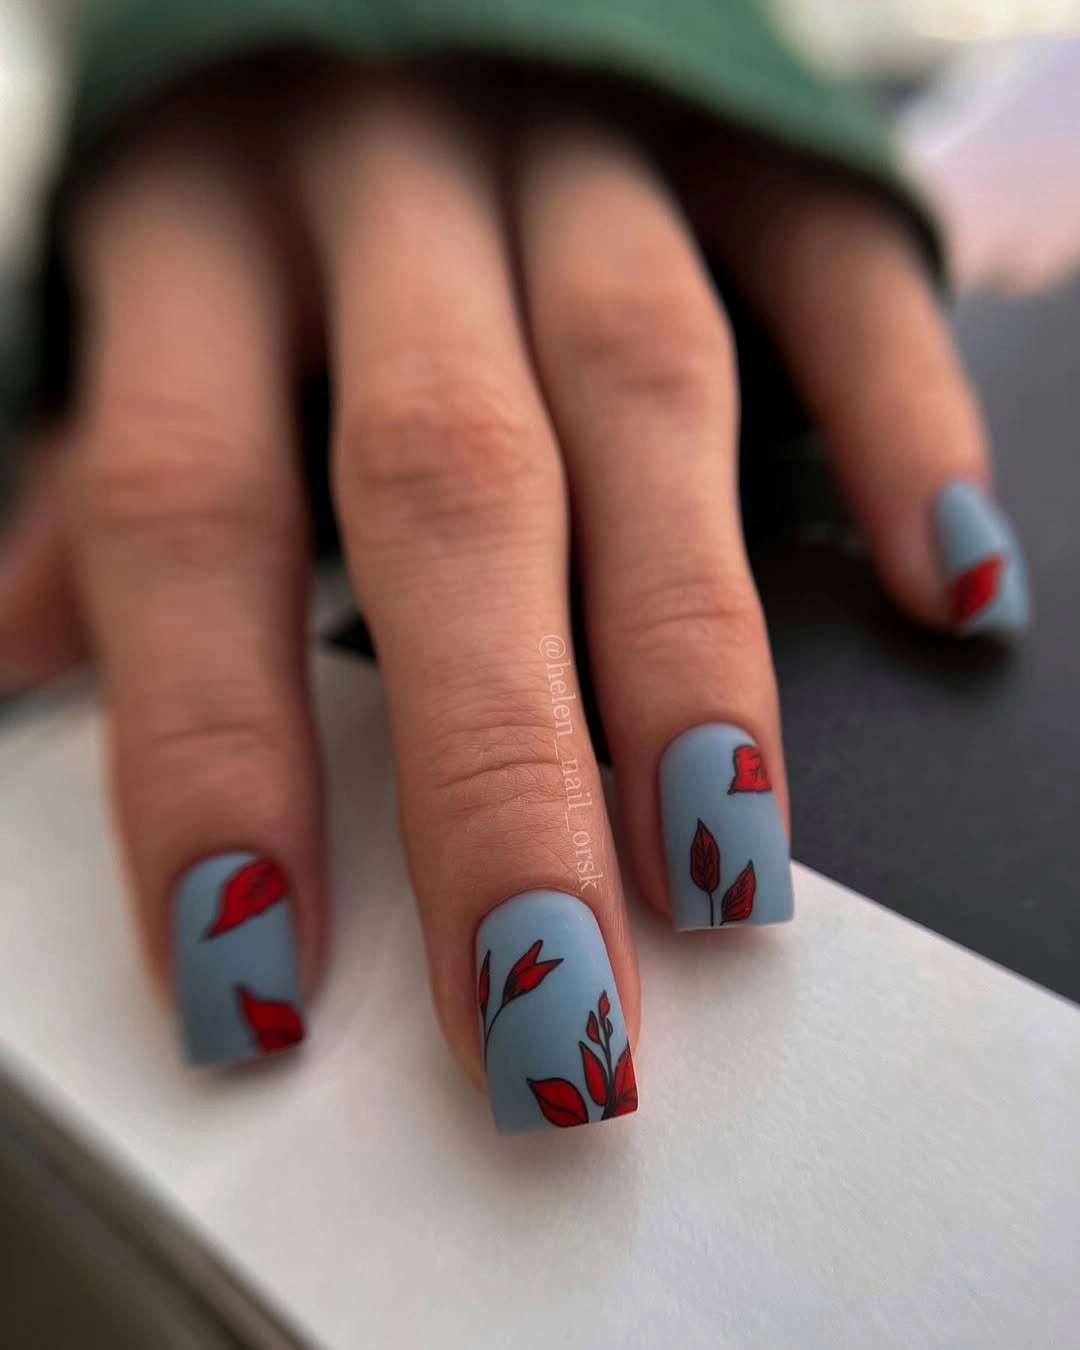
For this version, I would choose a pale blue gel that is slightly dusty rather than baby-pastel bright. OPI It’s a Boy! can work as a starting point if I want a lighter blue, although I would soften the effect with the finish. For the artwork, I would use a true red and a very thin black or deep-red detail if additional definition is needed. A matte top coat creates the soft finish, but I would keep a glossy option in mind if I wanted the manicure to look more playful.
I would apply two thin coats of blue, curing each one before adding the art. Then I would use a fine liner brush or dotting tool to create tiny red petals and leaves, deliberately leaving some negative space around them. The trick is not to overcrowd the nails. Once everything is cured, I would apply a matte top coat evenly across the entire set. If the matte finish makes the red look too muted, I would put a glossy top coat only over the botanical details for a subtle raised effect.
This color combination reminds me that early fall does not have to be visually heavy. Sometimes I want the crispness of a cool morning without dressing my nails in espresso brown. The powder blue keeps the manicure airy, while the red adds just enough warmth to connect it to the season ahead. It is an especially good choice if the usual fall palette feels a little too predictable.
Sunny Yellow Nails With Playful Leopard Details
Yellow can look intimidating on paper, but this manicure makes a strong case for giving it another chance. The nails are painted in a cheerful buttery yellow, with leopard-style black markings appearing on selected nails instead of covering the entire set. The rounded shape keeps the bright color approachable, while the animal-print details add just enough attitude. I like that the pattern is concentrated on a few nails – it turns what could have been a very loud manicure into something much easier to wear.
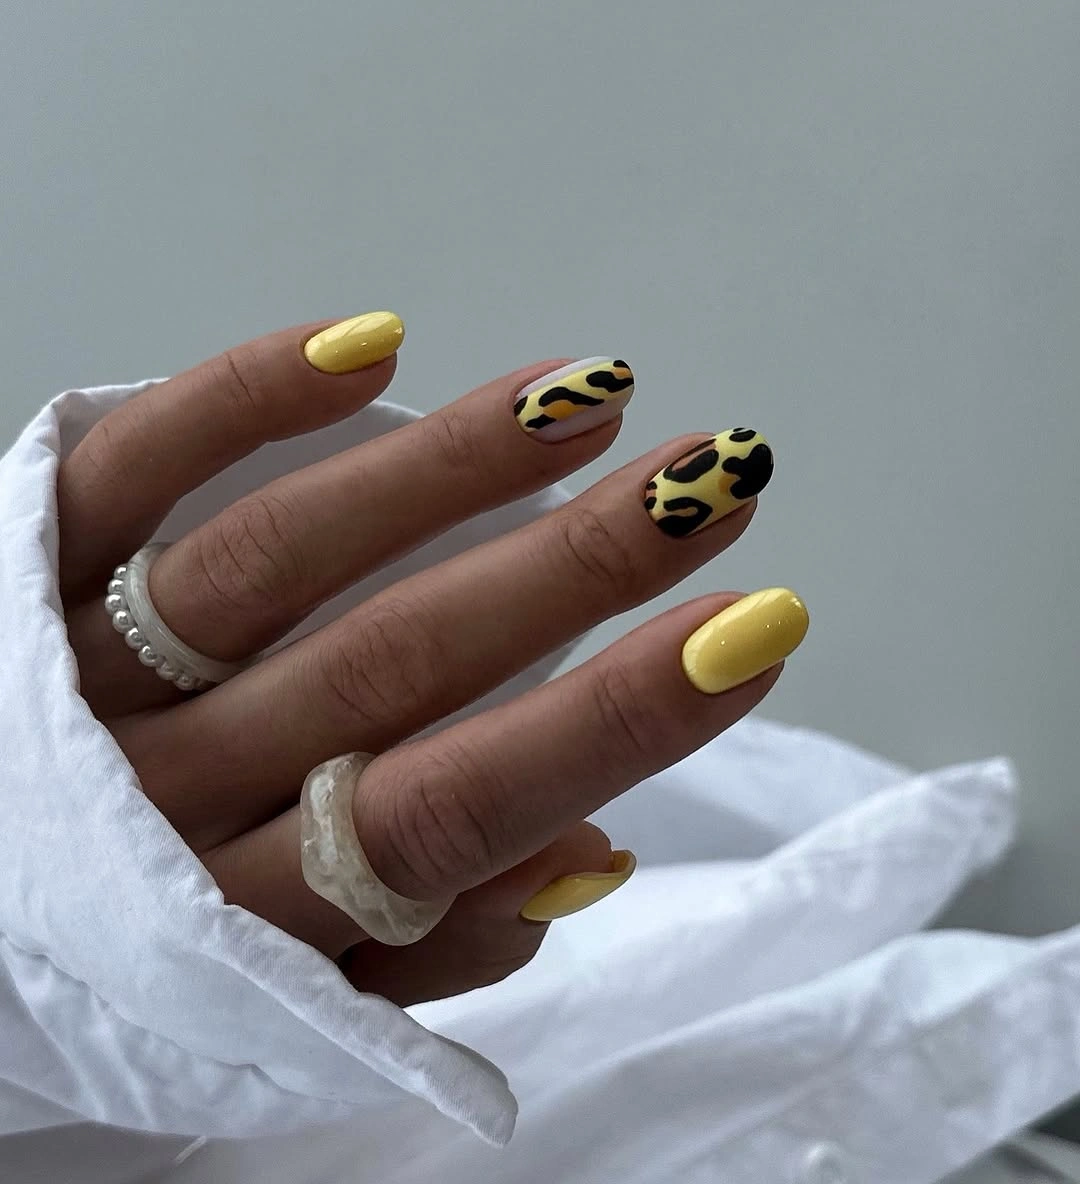
For the base, I would choose a warm yellow rather than a neon lemon. OPI Banana Bandanna is the kind of sunny direction I would consider, or I would use a softer mustard-yellow gel if I wanted the manicure to feel more autumnal. The leopard pattern needs only black and perhaps a small amount of brown. I would also keep the top coat glossy because the shine makes the yellow look richer and more expensive.
Creating the leopard pattern at home is much easier than it looks. I would paint the yellow base first, then use a small dotting tool to place irregular black shapes on two or three nails. I would avoid making perfect circles – real leopard spots are uneven, and the irregularity is what makes the design convincing. A few tiny brown or yellow gaps inside the black outlines can make the pattern feel lighter. After curing the artwork, I would seal everything with a glossy top coat.
This is the manicure I would save for those early September days when the weather still feels more like summer than fall. Yellow keeps the mood bright, while leopard print brings in a slightly richer, fashion-forward edge. I would pair it with white, denim, camel or chocolate brown and let the nails act as the unexpected detail. And honestly, that is often my favorite way to wear a trend – not head-to-toe, just enough to make someone look twice.
Soft Pink Marble Almond Nails
I keep coming back to this soft almond manicure because it feels delicate without looking overly sweet. The base is a sheer milky pink, while loose fuchsia and rose-pink strokes create an airy marble effect near the tips and across selected areas. The elongated almond shape makes the design look especially graceful, while the imperfect lines keep it from feeling too polished or formal.
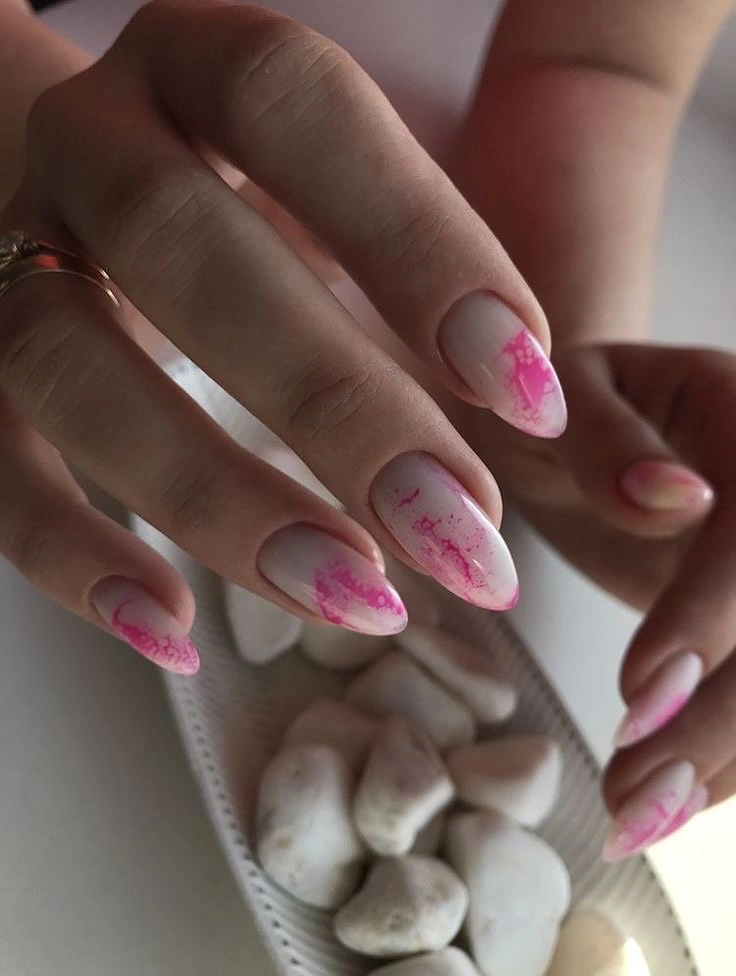
I would use a translucent pink builder gel or sheer polish, plus a bright pink gel for the abstract detailing. A very fine liner brush is enough for the wispy strokes, and a glossy top coat brings the whole manicure together. I would keep the pink slightly transparent so the design has that watercolor quality.
At home, I would apply the sheer base first and cure it, then lightly drag diluted pink pigment across the tips and sides. I would not try to make each nail identical – the beauty is in the irregular movement. A final glossy layer smooths everything and gives the pink a fresh, glassy finish.
For me, this is an easy bridge between summer and early fall. It still feels light and feminine, but the deeper pink gives it a little more richness than a classic summer pastel. I would happily wear it with cream knits, denim or a soft gray sweater.
Autumn Leaf Nail Art With Warm Yellow and Orange
This manicure brings the first real hint of fall through tiny leaf motifs in burnt orange, golden yellow and warm red. Most nails use a creamy white base, while the thumb and another accent nail carry solid orange and yellow shades. The short rounded-square shape keeps the detailed artwork practical, which I think makes this one especially wearable for everyday early fall.
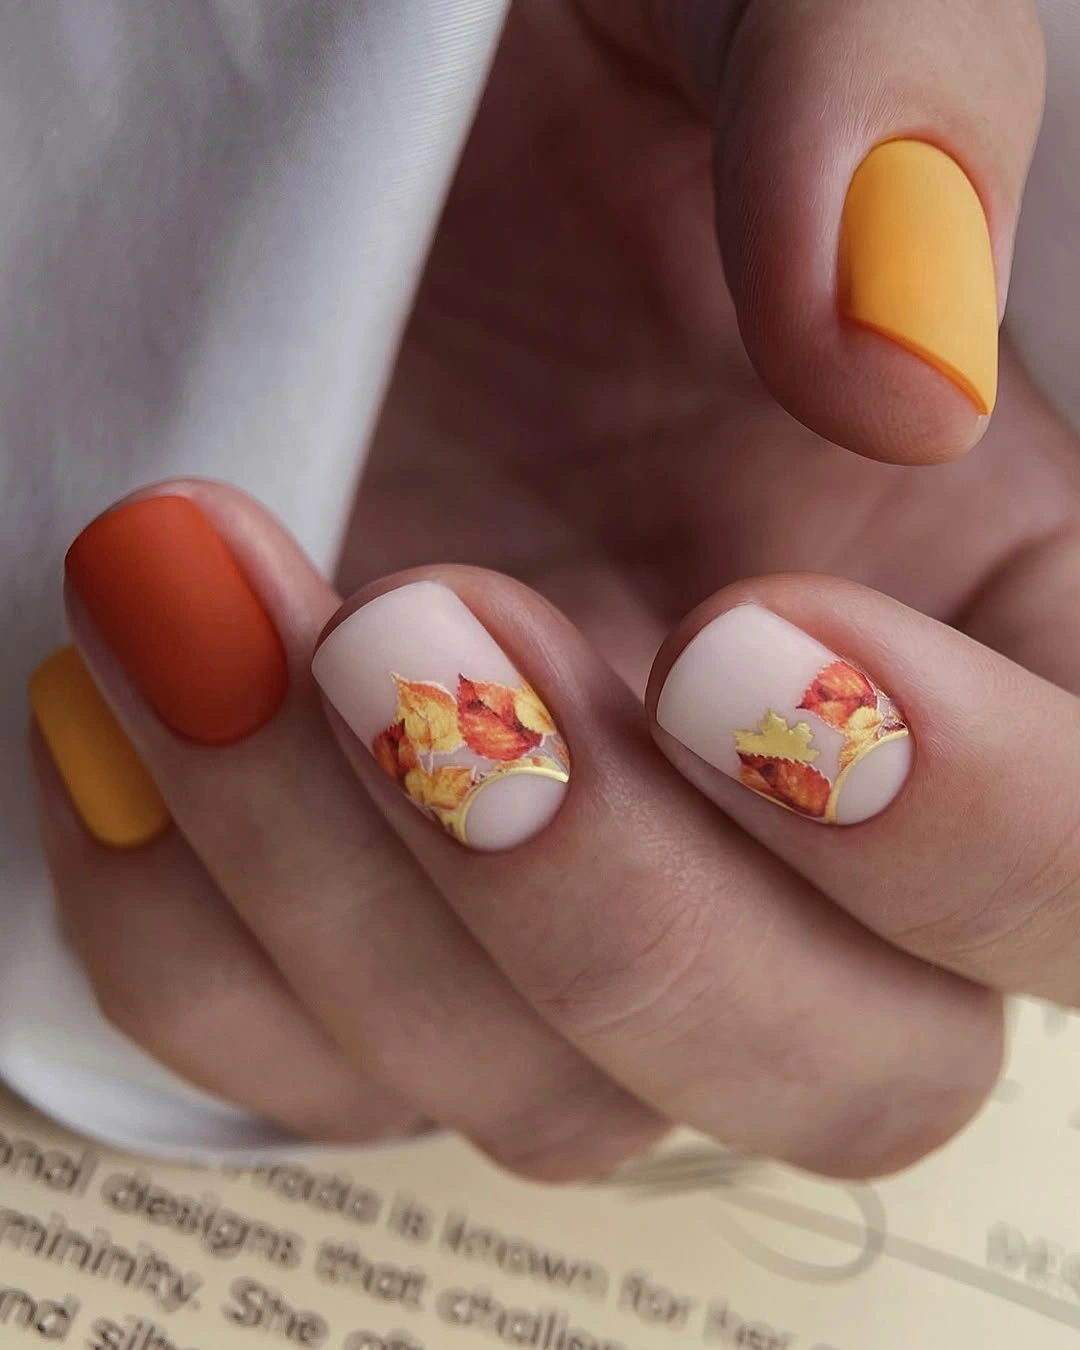
I would choose an opaque ivory gel, a warm pumpkin orange, mustard yellow and a muted brick red. For the leaves, tiny nail-art stickers or decals can make the process much easier, although a fine brush works if I want a completely hand-painted finish. A glossy top coat keeps the warm colors looking crisp.
I would paint the solid accent nails first and then create the leaf clusters on the lighter nails. I like placing the leaves near the lower or side edge rather than filling the entire nail. A thin curved line can separate the artwork from the bare section and make the design look more finished.
This is probably the most obvious fall manicure of the group, but in a good way. I love it for that short period when the mornings become cooler but the afternoons still feel sunny. It gives me autumn atmosphere without immediately jumping into dark brown and burgundy.
Burgundy and White Botanical Nails
Deep burgundy instantly changes the mood of a manicure, and here it is balanced beautifully with soft white nails covered in fine botanical line art. The nails have a long square shape, while the white leaves and stems create a delicate contrast against the rich red accent. I like the restraint – there is enough decoration to make the manicure interesting, but the design never becomes crowded.
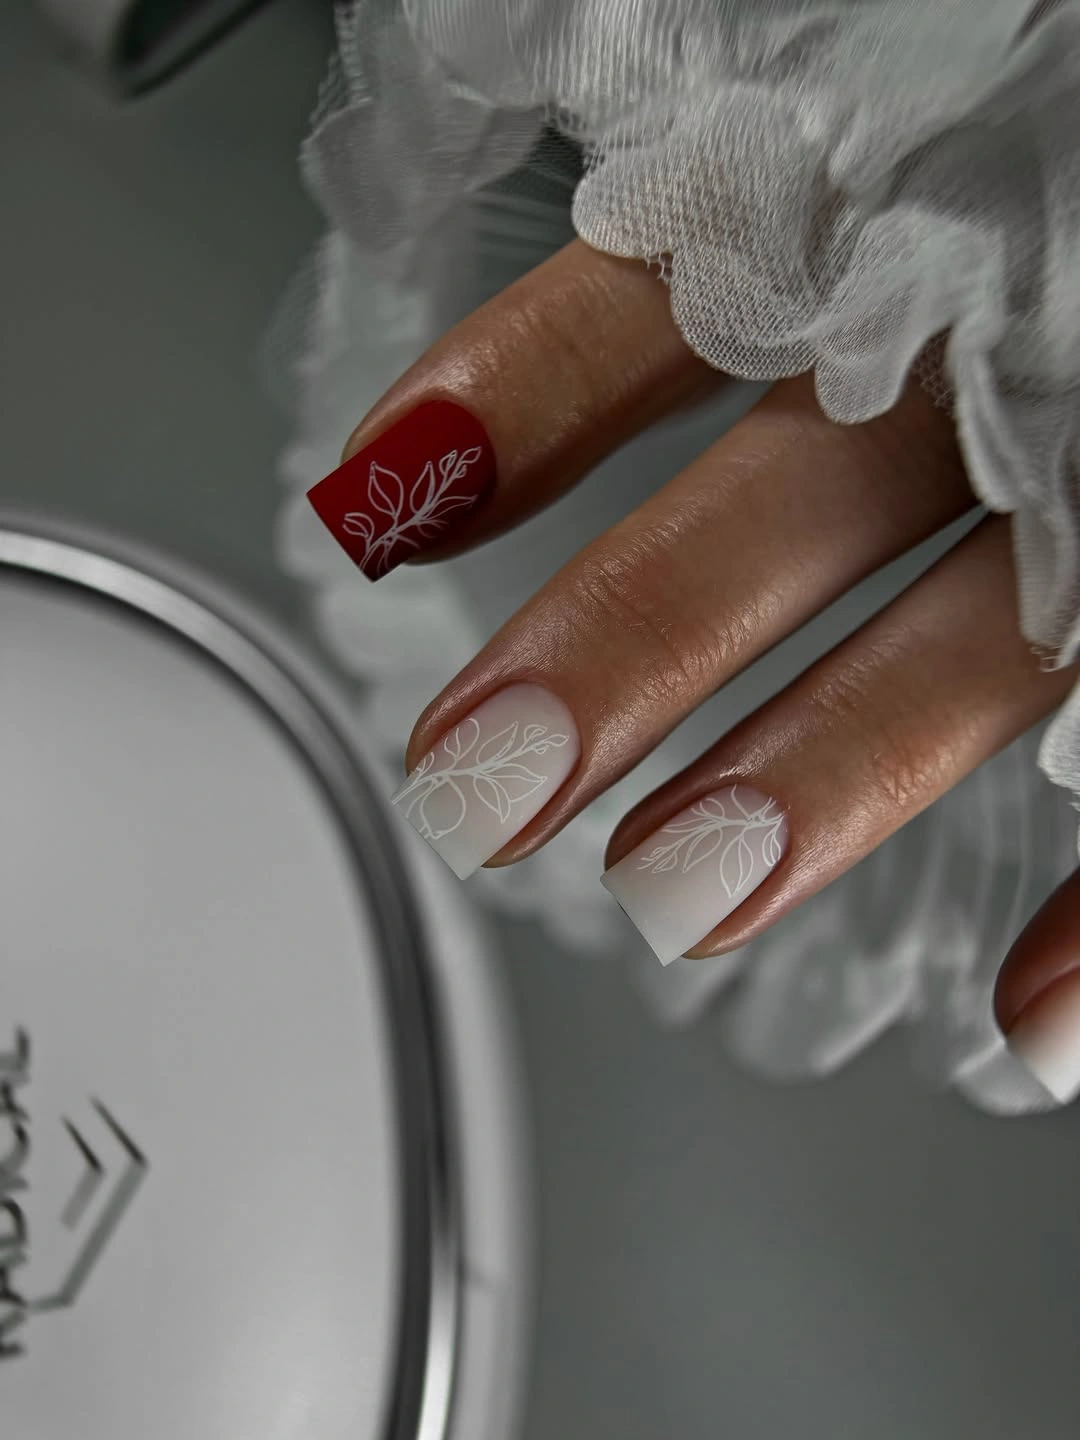
For this look, I would reach for a deep wine or burgundy gel, a soft milky white and an opaque white nail-art gel. A liner brush with a very fine tip is the important tool here because the botanical lines need to stay delicate. I would finish with either a glossy or satin top coat depending on how soft I want the final effect.
After applying the base colors, I would draw the stems first and add the leaves around them. I find that starting with the larger lines and then adding smaller details makes botanical art much easier to control. On the burgundy accent nail, the white design can be kept minimal so the rich color remains the star.
This is the manicure I would choose when early fall has officially arrived. Burgundy feels sophisticated and seasonal, while the white artwork keeps it fresh. It would look especially good with black tailoring, cream sweaters or a simple camel coat.
Graphic Black White and Red Square Nails
For something sharper, I would go straight to this graphic combination of milky white, matte black and bright red. The squared nails feature contrasting black and red tips, thin black lines and tiny text details, while several nails are painted entirely black. The result feels modern and slightly rebellious without relying on complicated shapes or excessive decoration.
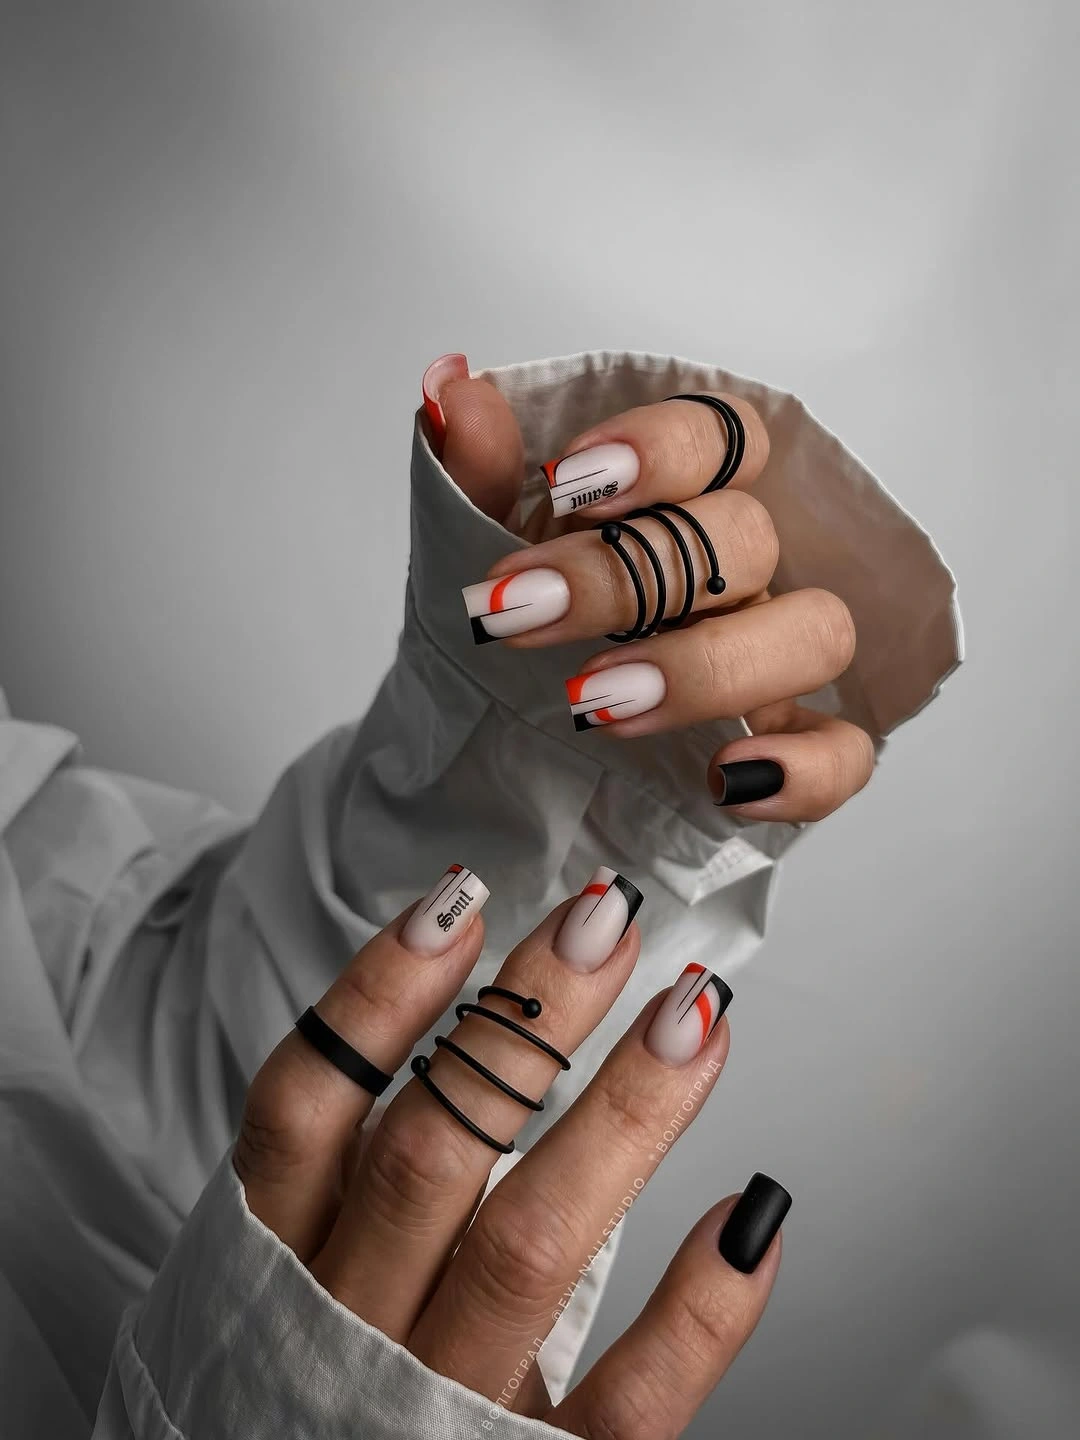
I would use a soft white base, jet-black gel and a vivid true red. A fine liner brush is essential for the narrow graphic lines, while a small square brush can help create clean color blocks. I would choose a matte black for the solid nails and a glossy top coat for the lighter nails if I wanted more contrast.
I would start with the milky base and map out the red and black sections before painting them. Thin striping tape can help keep the lines straight, but I prefer a fine brush when the design is small. The key is symmetry – even a very simple graphic manicure looks expensive when the edges are clean.
This one feels less traditionally autumnal, which is exactly why I like it. I could see myself wearing it with an oversized blazer, leather jacket or monochrome outfit when I want the nails to do a little more of the talking. Early fall does not always have to mean leaves.
Pink Floral Details With a Sheer Glossy Base
Soft pink linework gives this final manicure an almost vintage botanical feeling. The nails are long and squared, with a translucent pale base covered in overlapping pink floral and leaf outlines. The artwork stretches across the nail rather than sitting only at the tip, creating a delicate pattern that feels intricate without becoming visually heavy.
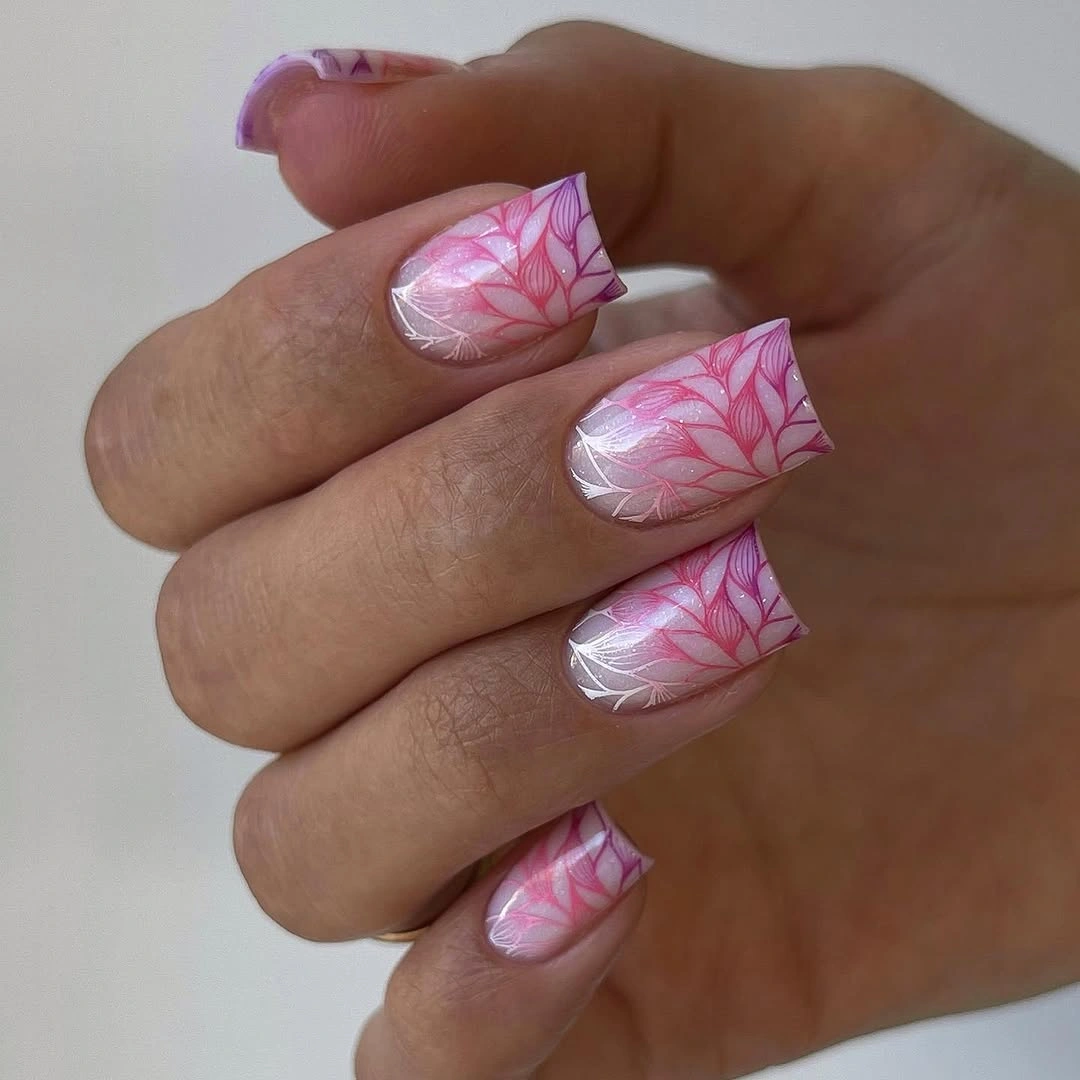
I would use a sheer pink or nude gel as the foundation and two shades of pink for the floral lines. One slightly darker pink creates definition, while a softer shade can add dimension. A fine liner brush and high-shine top coat are all I really need for this design.
I would apply the sheer base in thin layers, then build the flowers from curved petals and fine leaves. I would leave some of the natural-looking base visible between the motifs so the manicure does not become too dense. Once the artwork is cured, one smooth layer of top coat gives the flowers a glassy finish.
I see this as the softer side of early fall nails. It keeps the romantic feeling of late summer but looks more polished and intentional, especially with the longer square shape. If dark autumn shades are not really my thing, this is the kind of manicure I would save instead.
Leopard Accents With Gold Foil
I love how this manicure takes a soft pink nude base and gives it a much bolder personality. The nails have a long, squared shape with a gently softened edge, while the main color stays sheer and milky enough to keep the overall look elegant. The real statement comes from the tips and accent areas, where black and warm caramel leopard spots are framed with irregular gold foil. It is animal print, but not the loud kind – more like a tiny piece of vintage jewelry sitting on the nail. For early fall, that combination feels especially right because the warm brown tones quietly echo the colors that start appearing in our wardrobes.
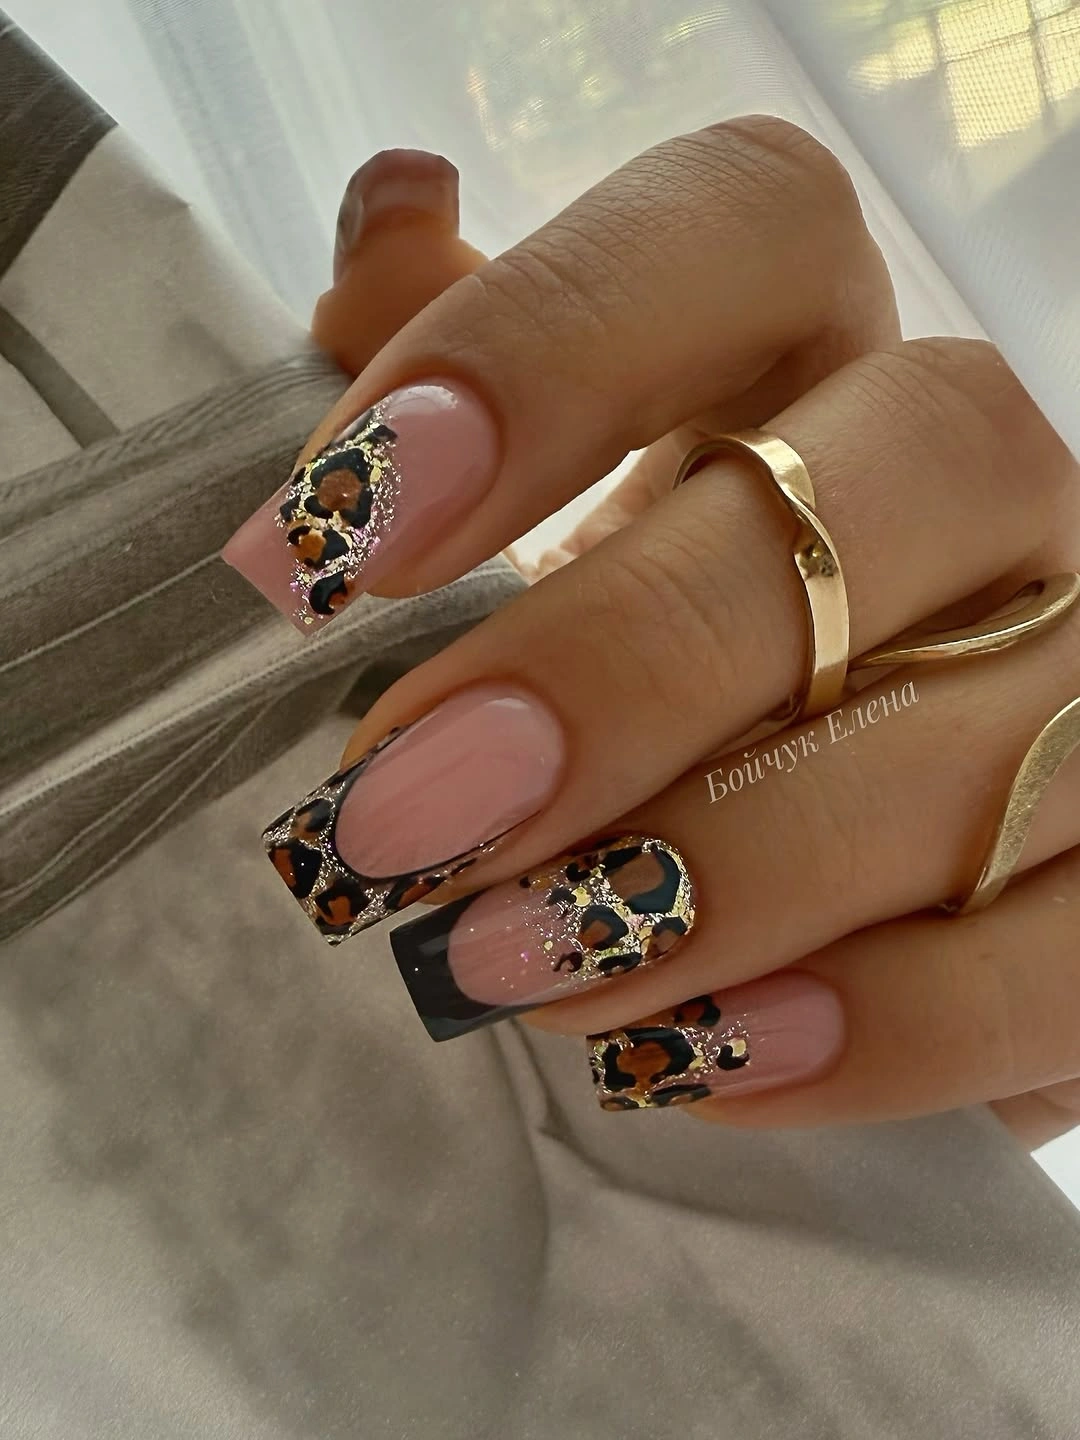
To recreate the look, I would start with a sheer pink or blush base such as OPI Bubble Bath or a similar translucent nude. For the artwork, I would use a rich espresso brown, soft tan, and black gel polish, plus small pieces of gold foil. A very fine nail-art brush helps with the irregular spots, although I actually prefer them slightly imperfect – the organic shape makes the design feel more expensive and less stamped-on. A glossy top coat brings everything together and gives the foil that pretty flash when the light catches it.
I would build this manicure in layers rather than trying to make the leopard design perfect in one go. After curing the pink base, I would add small caramel shapes, surround selected areas with black detailing, and place the gold foil while the appropriate layer is still tacky. The trick is restraint. I would not cover every nail completely with print because the negative space is what keeps this manicure wearable. If the nails are naturally long, the square shape gives the artwork plenty of room to breathe.
This is one of those designs I would save for the moment when a plain nude manicure feels just a little too quiet. I can already see it with a camel blazer, dark denim, or a simple black dress when the evenings start getting cooler. And if full leopard feels like too much, I would copy the idea onto just two accent nails. Same attitude, much less commitment.
Milky Blue French Tips With Tiny Details
This manicure takes the clean French tip in a much softer direction. The nails are long and square, with a translucent milky base that lets the natural nail show through while delicate blue details float underneath the glossy surface. Crisp white French tips sharpen the silhouette, creating a lovely contrast with the cloudy blue washes and tiny darker flecks. To me, this is the kind of early fall manicure that still remembers summer skies but starts feeling cooler and calmer. It is fresh without being sugary, which is exactly why I think it works so well for the transition between seasons.
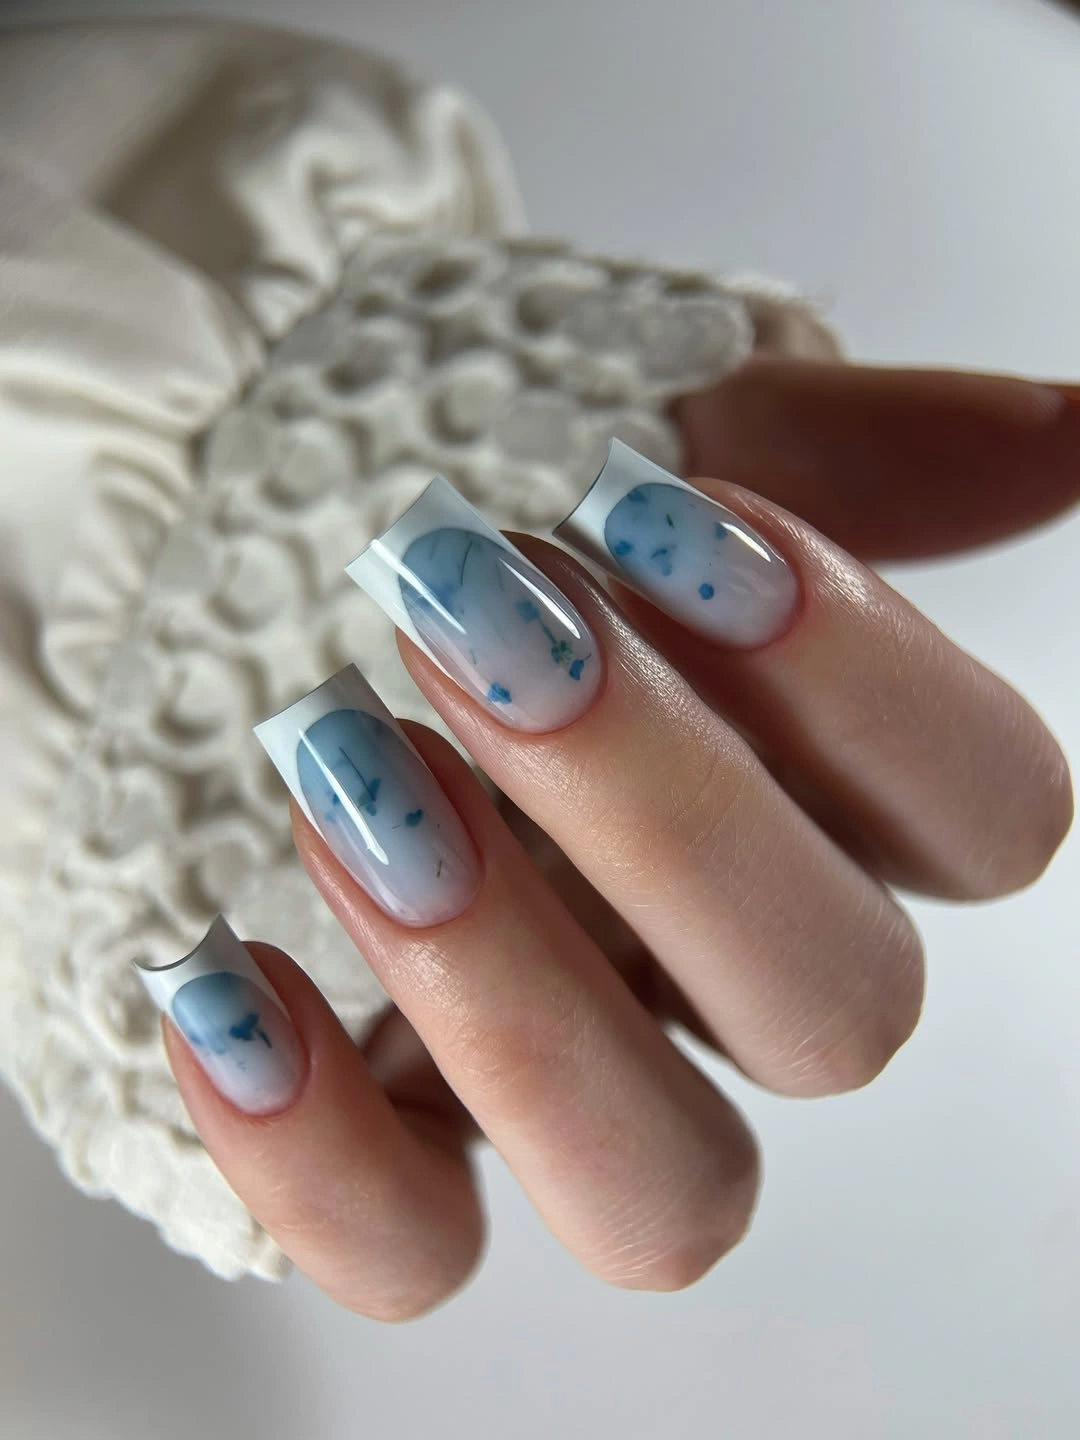
For this version, I would use a translucent milky white or pale pink builder base, a soft powder-blue gel, a deeper blue for the tiny accents, and an opaque white for the French tips. A thin liner brush is useful for the blue strokes, while a dotting tool can create those little scattered marks. I would keep the base glossy rather than matte because the glass-like finish makes the pale blue look almost watery.
At home, I would first create a smooth sheer base and cure it completely before adding the blue details. I would place the blue in very thin, uneven touches rather than making symmetrical flowers or dots. Once those details are cured, I would paint the French tips with a fine brush, checking the smile line from several angles before curing. One final layer of glossy top coat makes the whole design look more dimensional. It is a little fussy, yes, but the result is worth taking your time over.
I particularly like this idea for early fall because it does not force you into the usual seasonal palette. If brown and rust are not your thing, why should your manicure suddenly become autumnal just because the calendar says so? A pale blue sweater, white button-down, silver jewelry – done. It feels crisp, slightly unexpected, and very Pinterest-worthy without looking like I tried too hard.
Soft Pink Petal Nails
There is something wonderfully delicate about these long pink nails. The shape is elongated and softly tapered, giving the fingers a graceful appearance, while the translucent pink base keeps everything light and feminine. Over that base, white petals and washes of rosy pink create an airy floral design that almost looks painted with a watercolor brush. The flowers are not arranged in a rigid pattern, and that is part of the charm. Some petals are more visible, others fade into the base, giving the manicure a soft, hand-painted quality.
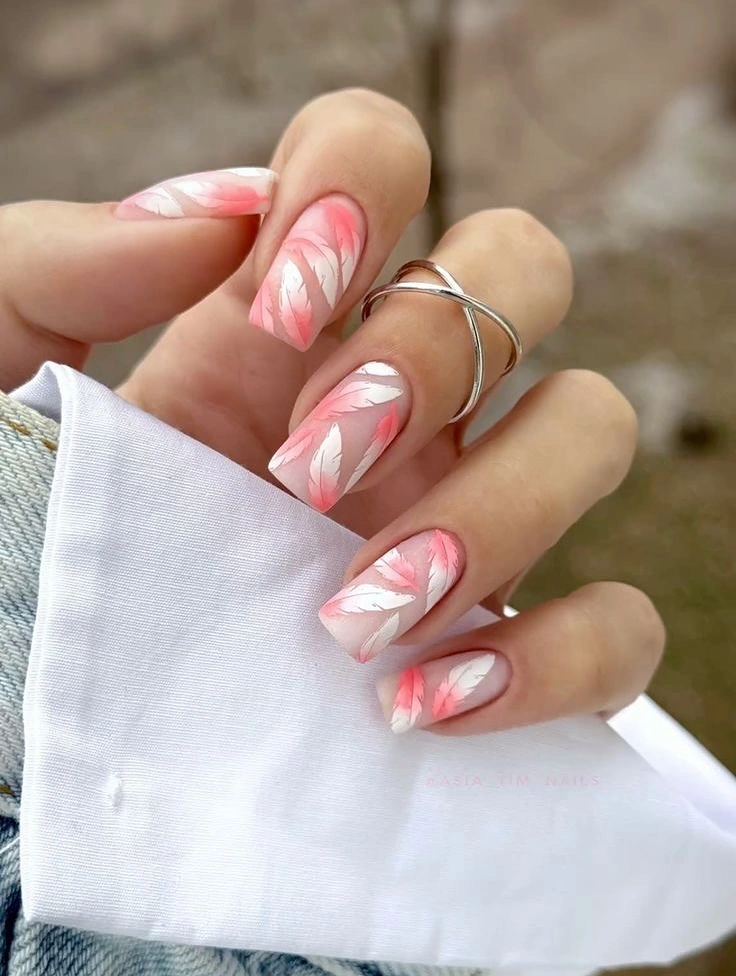
I would reach for a sheer blush gel, an opaque soft white, and two or three pink shades ranging from baby pink to a slightly stronger rose. A detail brush is essential here because the petals need to stay delicate rather than becoming chunky. I would also keep a glossy top coat nearby. With a design this light, a smooth finish matters almost as much as the artwork itself because it makes the colors look layered instead of flat.
My approach would be to work with very thin strokes and build the flowers gradually. First comes the translucent pink base, followed by loose white petals. I would then add small touches of brighter pink near the center or along the edges of selected petals, allowing some of the base color to remain visible. There is no need to make every flower identical. In fact, I think slightly different shapes make this manicure look more natural and less like a repeated decal.
I would choose this design for the part of early fall when the weather has cooled down but I am not emotionally ready for dark nails yet. It has that last-bouquet-of-summer feeling, especially with a cream cardigan or a soft pink sweater. And if long nails are not practical for everyday life, the same floral idea would look beautiful on a shorter almond or rounded-square shape. The flowers do the talking, so the length can be flexible.
Pressed Flower Details On A Bare Pink Base
For me, this manicure captures the quiet side of early fall beautifully. The nails are short with a neat rounded-square shape, and the base is a sheer pink nude that keeps the natural nail visible. Tiny pressed-flower-style details are scattered across the surface in muted cream, blush, yellow, green, and earthy tones. Rather than creating a complete floral scene, the design feels like little botanical fragments collected from a garden. It is subtle, personal, and much easier to wear every day than a full-coverage floral manicure.
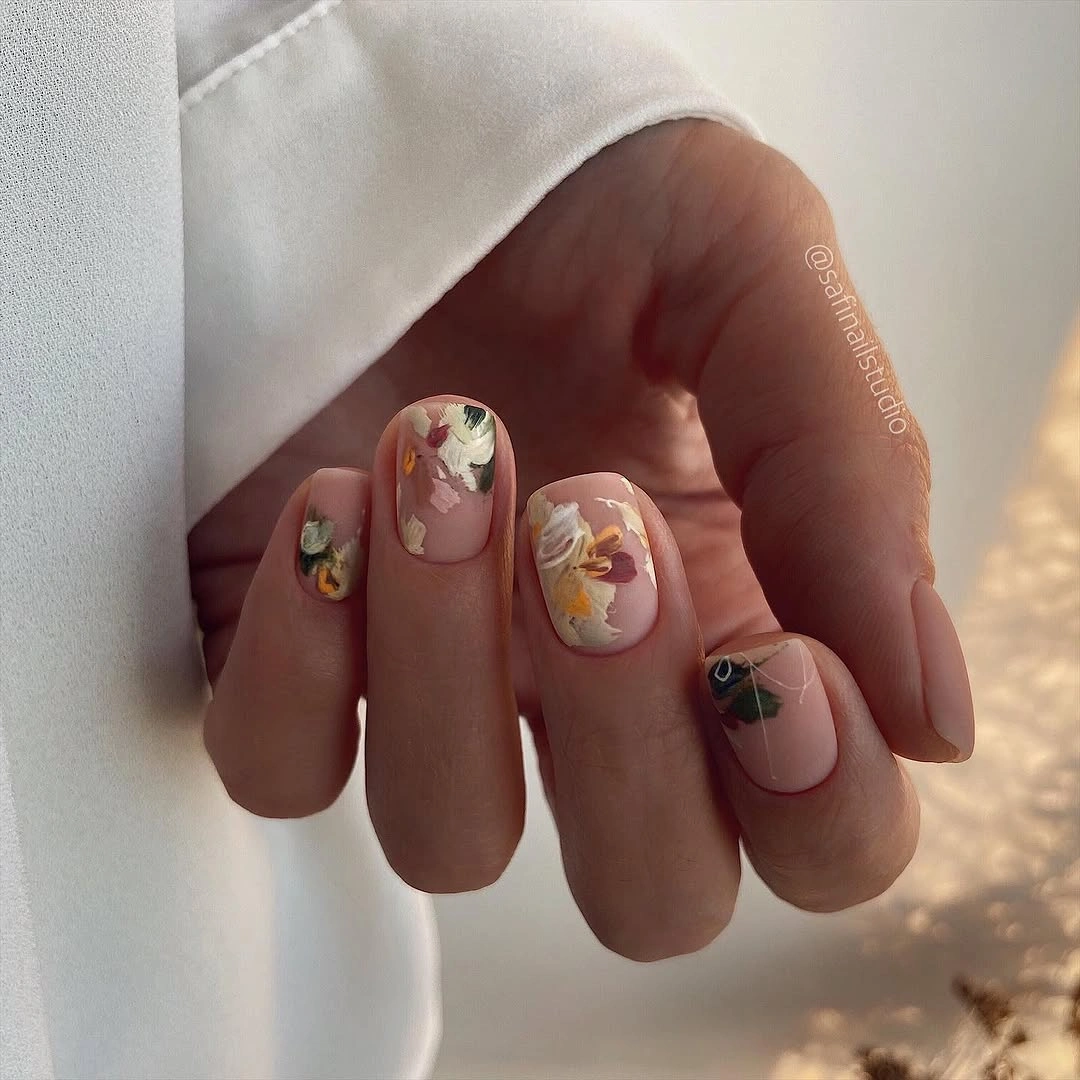
I would use a sheer nude-pink gel as the foundation, then choose tiny floral decals, dried-flower pieces, or hand-painted botanical details in cream, dusty pink, muted yellow, sage, and a touch of burgundy. A fine brush is useful if I am painting the details myself, but tiny dried flowers or nail-art transfers can make the process much easier at home. The important thing is to keep the background translucent. That barely-there base is what gives the manicure its airy quality.
I would begin with the pink base and make sure the surface is perfectly smooth before adding the floral elements. If I use dried flowers, I would position them carefully and secure them with a suitable gel layer before finishing with top coat. For painted details, I would work with small irregular shapes rather than trying to draw botanically perfect flowers. I actually prefer a little imperfection here – it makes the manicure feel collected rather than manufactured.
This is probably the easiest look in the group for me to imagine wearing for weeks. It works at a coffee shop, at the office, with denim, or dressed up for dinner, and the short length makes it wonderfully practical. There is also something nostalgic about tiny flowers on a sheer base. They remind me of pressed petals tucked inside an old book – only much more polished.
Glossy Blush Short Nails
Sometimes the most beautiful early fall manicure is the one that barely announces itself. These short rounded nails are coated in a translucent blush pink that gives the natural nails a healthy, softly flushed appearance. The finish is extremely glossy, almost jelly-like, and there is no additional artwork competing with the shape or color. That simplicity is exactly what makes the manicure feel modern. Instead of using decoration to create interest, it relies on immaculate shaping, a smooth surface, and that pretty pink glow.
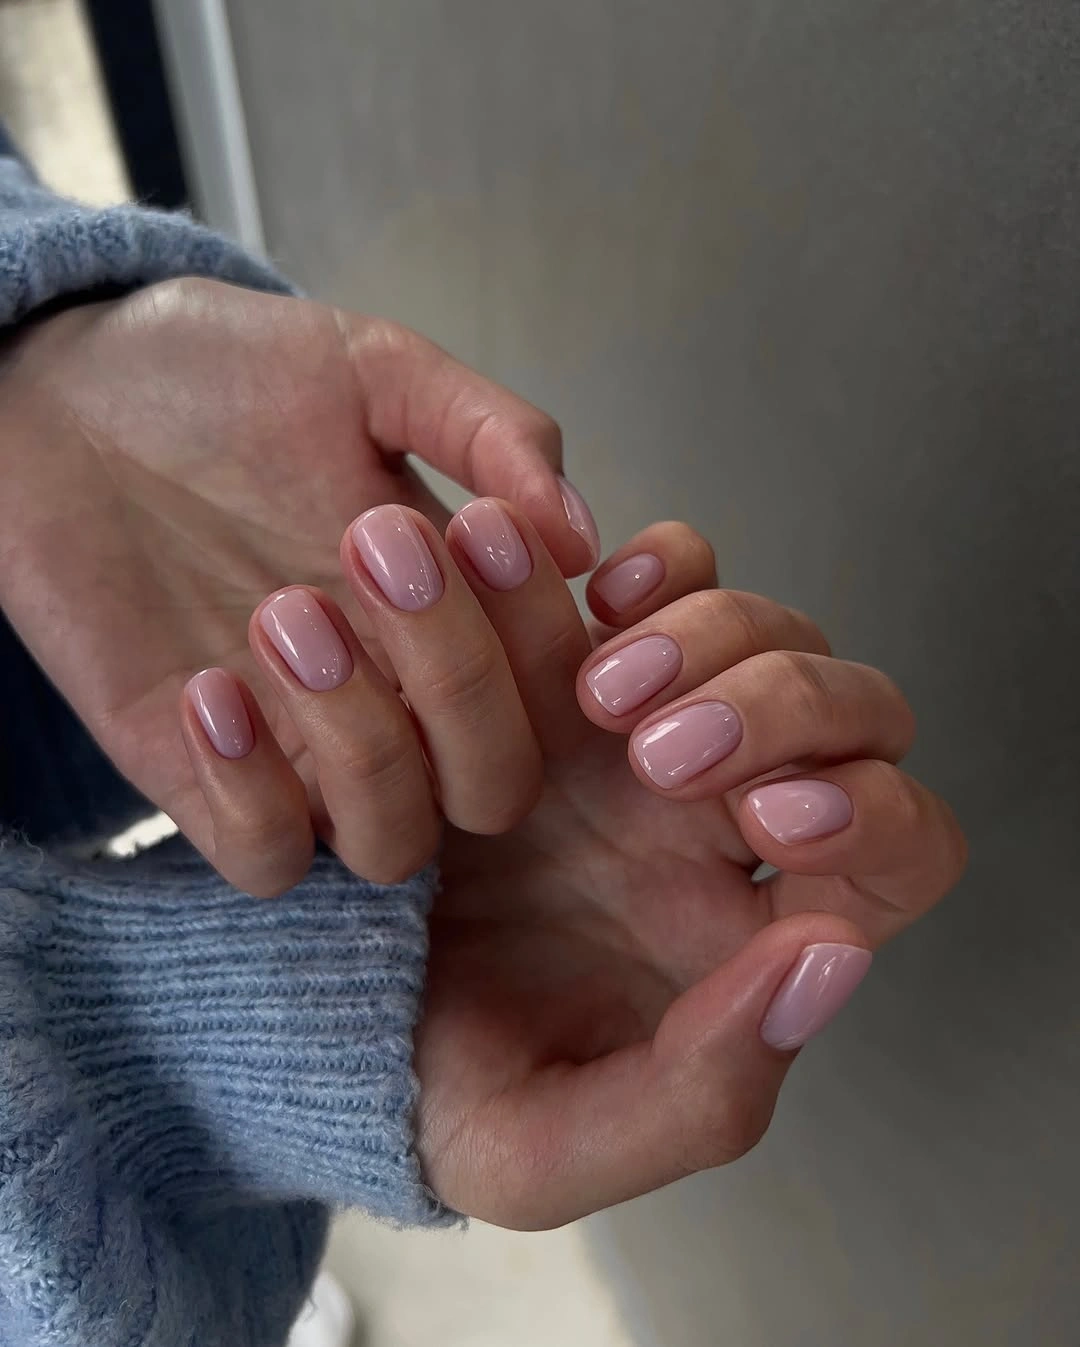
For this manicure, I would keep the product list deliberately short: a nourishing base coat, sheer blush or milky pink gel, and a high-shine top coat. OPI Bubble Bath, CND Romantique, or a similar translucent pink can create this kind of effect, depending on the natural tone of the nails. I would avoid choosing a shade that is too opaque because the charm comes from seeing a little of the natural nail underneath. Think your nails, but slightly more polished.
At home, I would spend most of my time on preparation rather than color. I would gently shape the nails into a consistent rounded-square or soft oval, tidy the cuticles without overworking them, and apply a thin base layer. Two very thin coats of translucent pink usually look more sophisticated than one heavy coat. After sealing everything with glossy top coat, I would give the edges a final check so the manicure looks clean from every angle.
This is the manicure I would pick when I want my hands to look expensive without making them the main event. It goes with absolutely everything, which is especially useful at the beginning of fall when wardrobes are doing their own little transition from linen and sandals to knits and jackets. A glossy pink manicure also grows out gracefully, so I can get it done and forget about it for a while. Honestly, sometimes that is the ultimate luxury.
Rich Burgundy Square Nails
I always come back to burgundy when early fall arrives. These long square nails use a deep wine-red shade with a glossy, almost lacquered finish that makes the color look beautifully dimensional. The clean shape keeps the dramatic shade polished rather than heavy, while the rich berry tone feels perfect with denim, knitwear, and the first deeper colors of the season.
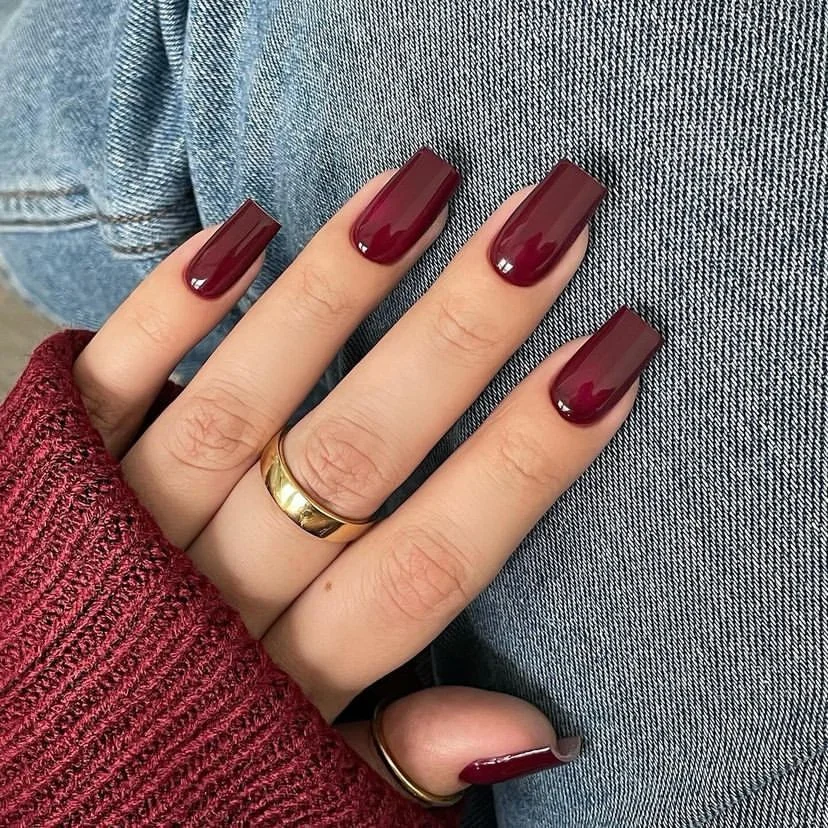
For the closest result, I would choose a deep burgundy gel such as OPI Malaga Wine or a similar blackened cherry shade, along with a strengthening base and high-shine top coat. I like two thin layers here because they create that rich, glassy finish without making the color look too thick.
I would shape the nails into a precise square with slightly softened corners, prep the cuticles, and apply the burgundy in thin coats. After curing each layer, I would seal the free edge and finish with glossy top coat. The simpler the application, the more important the shaping becomes.
This is probably my easiest recommendation when I want a manicure that instantly makes an outfit feel more autumnal. No artwork, no extra details – just that gorgeous wine shade doing all the work.
Liquid Silver Metallic Nails
Silver gets a much cooler attitude here. These long square nails are covered in a reflective metallic finish that shifts between polished chrome and textured liquid metal. The surface has subtle irregularity, giving the silver more depth than a perfectly smooth chrome manicure, while the dramatic length makes the futuristic finish impossible to miss. It feels sleek, slightly rebellious, and surprisingly fitting for the cooler side of early fall.
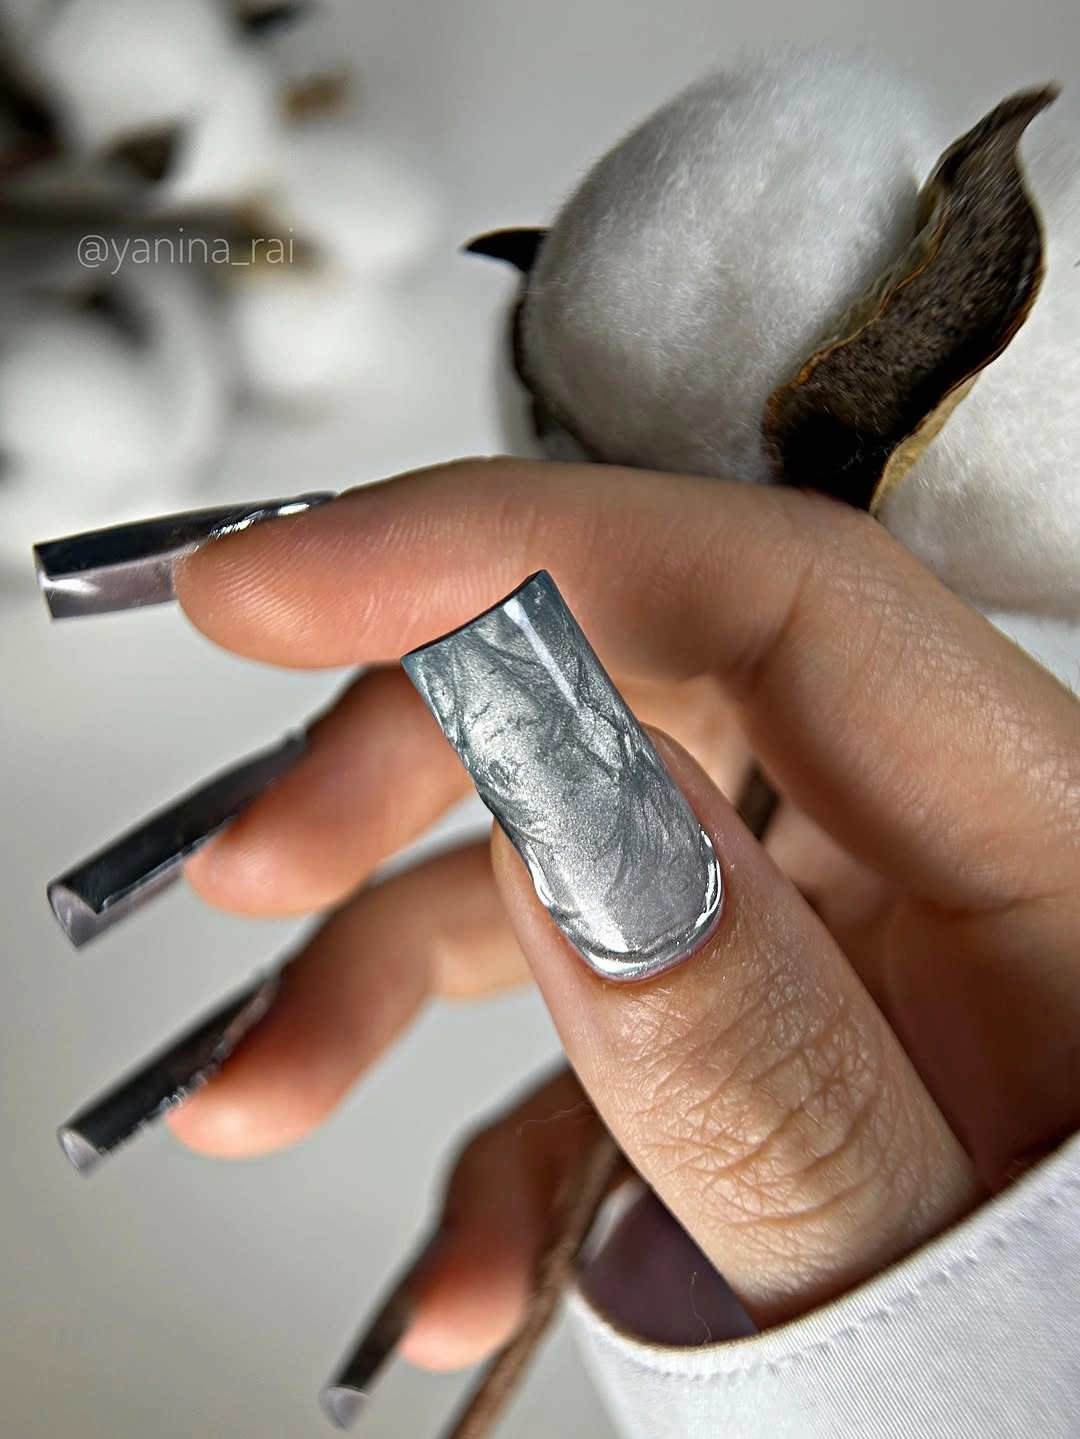
I would use a black or dark neutral gel base, a silver chrome powder, and a no-wipe top coat. For a more textured effect, I would add a thin metallic gel layer before the chrome rather than relying on one perfectly reflective coat. The final glossy top coat helps preserve the mirror-like shine.
After preparing and shaping the nails, I would apply the dark base and cure it fully. Then I would work the chrome powder into the cured no-wipe surface until the silver becomes reflective, concentrating a little extra product in places where I want the finish to look more dimensional. A final top coat locks everything in.
I would save this manicure for the days when a simple neutral feels a little too predictable. Silver looks especially striking with charcoal, black, denim, and soft gray, so it slips naturally into an early-fall wardrobe while still giving the hands a little futuristic sparkle.