Temperatures drop, sweaters come out, and suddenly my nail mood changes with them. Fall 2026 is making a strong case for polka dots, but not the overly retro kind that feels like a costume. I’m seeing dots become smaller, cleaner, moodier, and much easier to wear. So how do I make polka dots feel chic for fall rather than overly cute? And which combinations actually work with brown, burgundy, pink, white, or even a little yellow?
For me, the trick is balance. A sheer base can make a playful dot pattern feel elegant, while deep burgundy or black gives it that autumn edge. Keep the dots tiny and suddenly the manicure looks almost like jewelry. Go bigger, add contrast, and it becomes the statement. These are the kinds of chic polka dot fall nails I would save to Pinterest now and actually wear when the first crisp mornings arrive.
Soft Pink and Burgundy Polka Dot Nails for a Cozy Fall Mood
I love this combination because it gets the fall feeling right without relying on the usual orange and brown palette. The manicure pairs a soft blush pink with a deep burgundy accent, creating a sweet contrast that still feels sophisticated. On the pink nails, tiny burgundy dots trace the outer edge in a delicate border, while the burgundy accent nail reverses the idea with pale dots around its perimeter. The short rounded-square shape keeps everything practical and polished. Even better, the pattern has enough negative space to let the colors breathe.
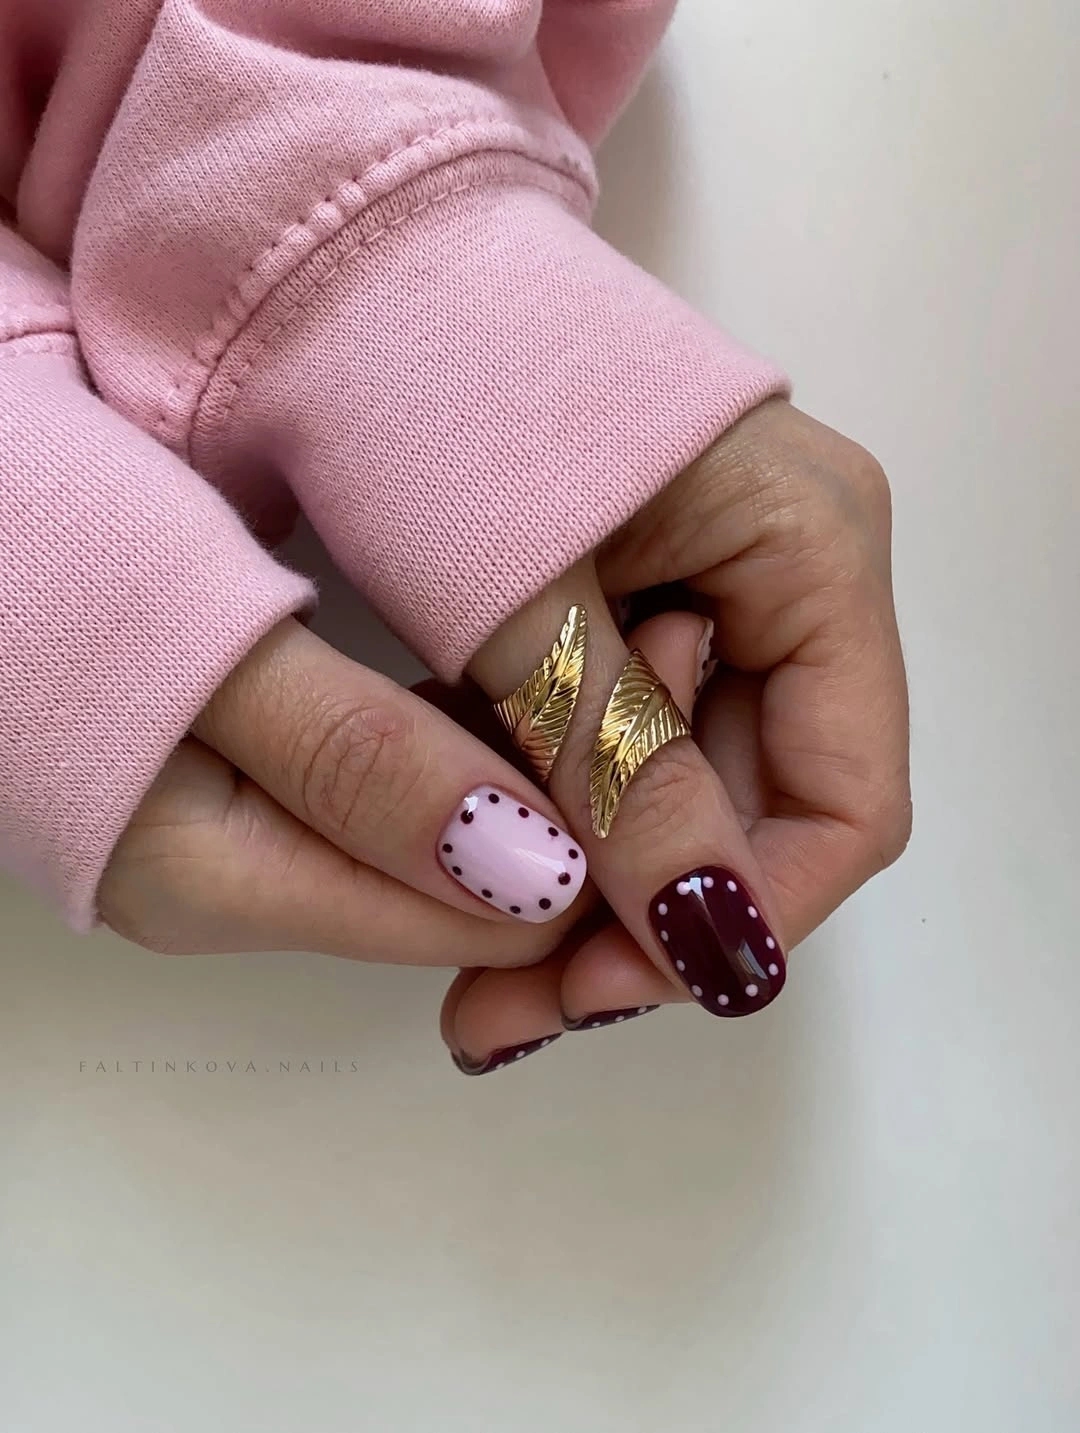
To recreate the color story, I would start with OPI Bubble Bath or a similar translucent pink nude, then bring in a rich burgundy such as OPI Malaga Wine for the dots and accent nail. I would also keep a glossy top coat nearby because this particular design looks best when the surface has that smooth, almost glazed finish. A fine dotting tool is useful, although the rounded end of a small nail-art tool can work surprisingly well when I want tiny, even circles.
I would shape the nails first and apply a thin layer of sheer pink, letting it dry completely before adding the dots. For the border effect, I would place the dots one at a time around the perimeter instead of trying to make a continuous pattern. That little bit of patience matters. I would then paint one or two nails burgundy and repeat the pattern in reverse with pink dots. A final layer of glossy top coat pulls the whole design together.
Sheer White Almond Nails With Delicate Polka Dots
Sometimes fall nails do not need a dark palette at all. These elongated almond nails use a milky, translucent base with crisp white dots, creating a soft, almost frosted effect. Some nails are covered in evenly spaced white polka dots, while others introduce a sparkling white finish for a subtle change in texture. The almond shape makes the design feel more elongated and elegant, while the sheer base keeps the manicure light enough for everyday wear. It has a little bridal softness to it, but the dots give it enough personality for an autumn wardrobe.
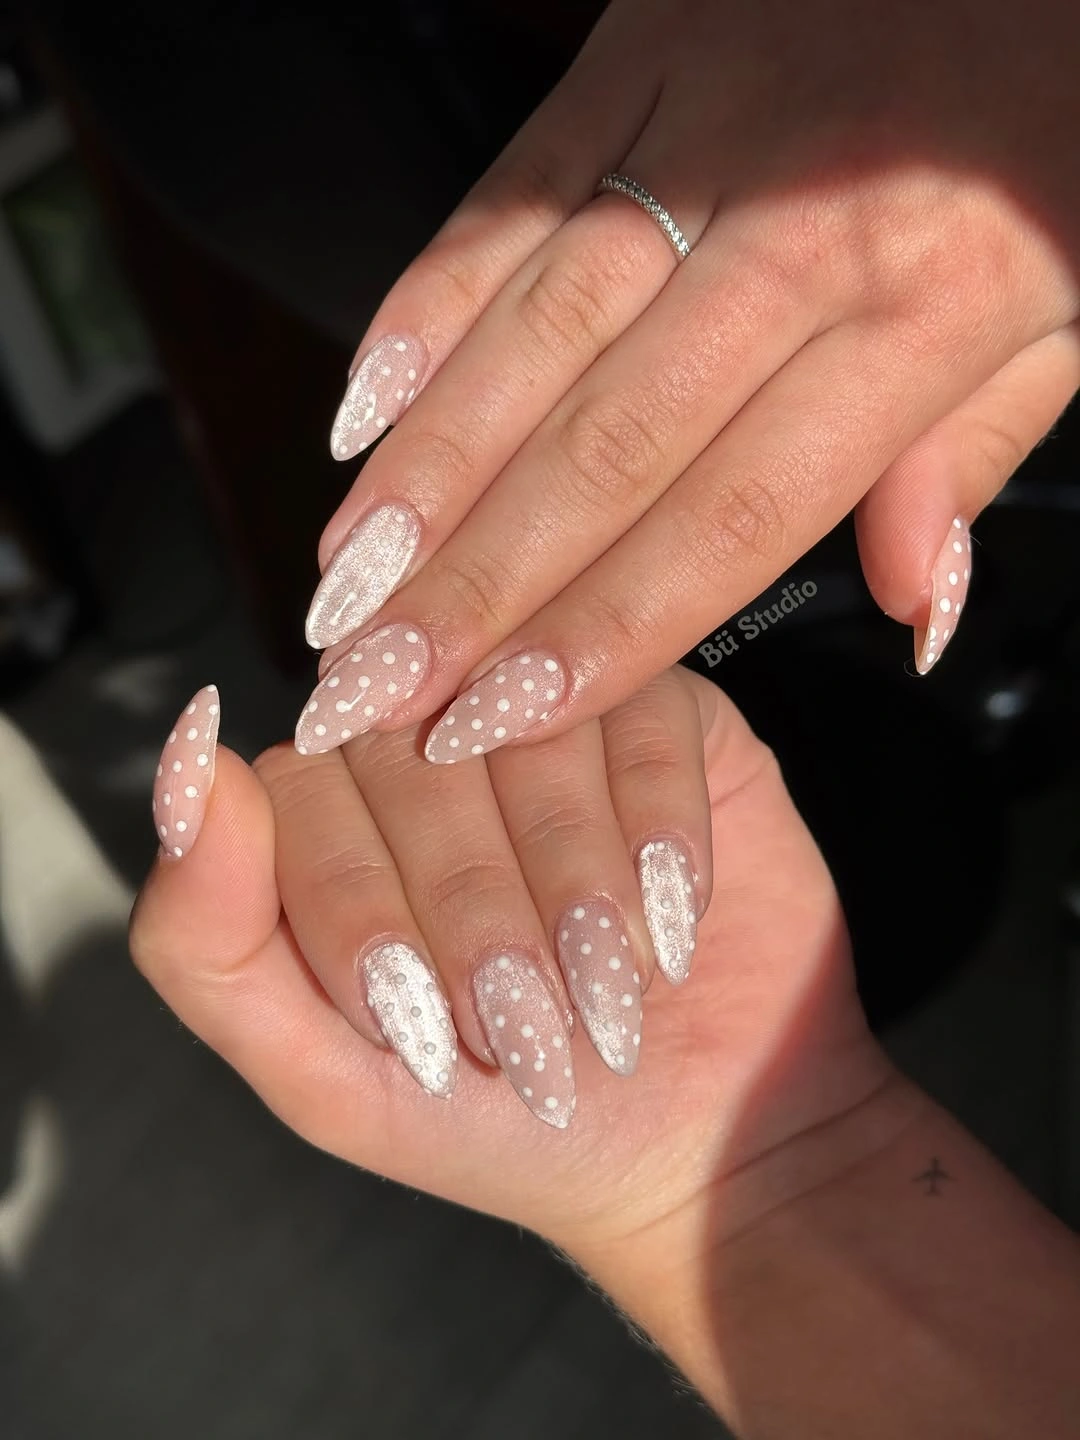
For this look, I would reach for a sheer nude or milky pink base, an opaque white polish, and a fine dotting tool. OPI Funny Bunny is an easy reference point for the soft white family, while a pearly or fine-glitter white can create the textured accent nails. I would not make the glitter too chunky here. The beauty of this manicure is that the shimmer looks almost embedded into the finish rather than sitting heavily on top.
At home, I would keep the base very thin and slightly translucent so the natural nail remains visible. Once it has set, I would use the smallest dotting tool to create neat white circles, spacing them loosely rather than forcing every row to be perfectly symmetrical. For the sparkling nails, I would use a sheer glitter layer over the same pale foundation. The final glossy coat is essential because it makes the dots look more dimensional and gives the almond shape that clean salon finish.
Pink, Butter Yellow and Black Polka Dots With a Playful Twist
Here is where polka dots get their personality back. Soft pink and buttery yellow create the base, while black dots bring in a sharp graphic contrast. The manicure mixes full-coverage yellow and pink nails with French-style placement, leaving parts of the natural pink base visible. A few tiny crystals add sparkle without taking over the design, and the almond shape gives the playful palette a more polished finish. I like the irregular distribution because it keeps the manicure from looking like a pattern copied perfectly across every nail.
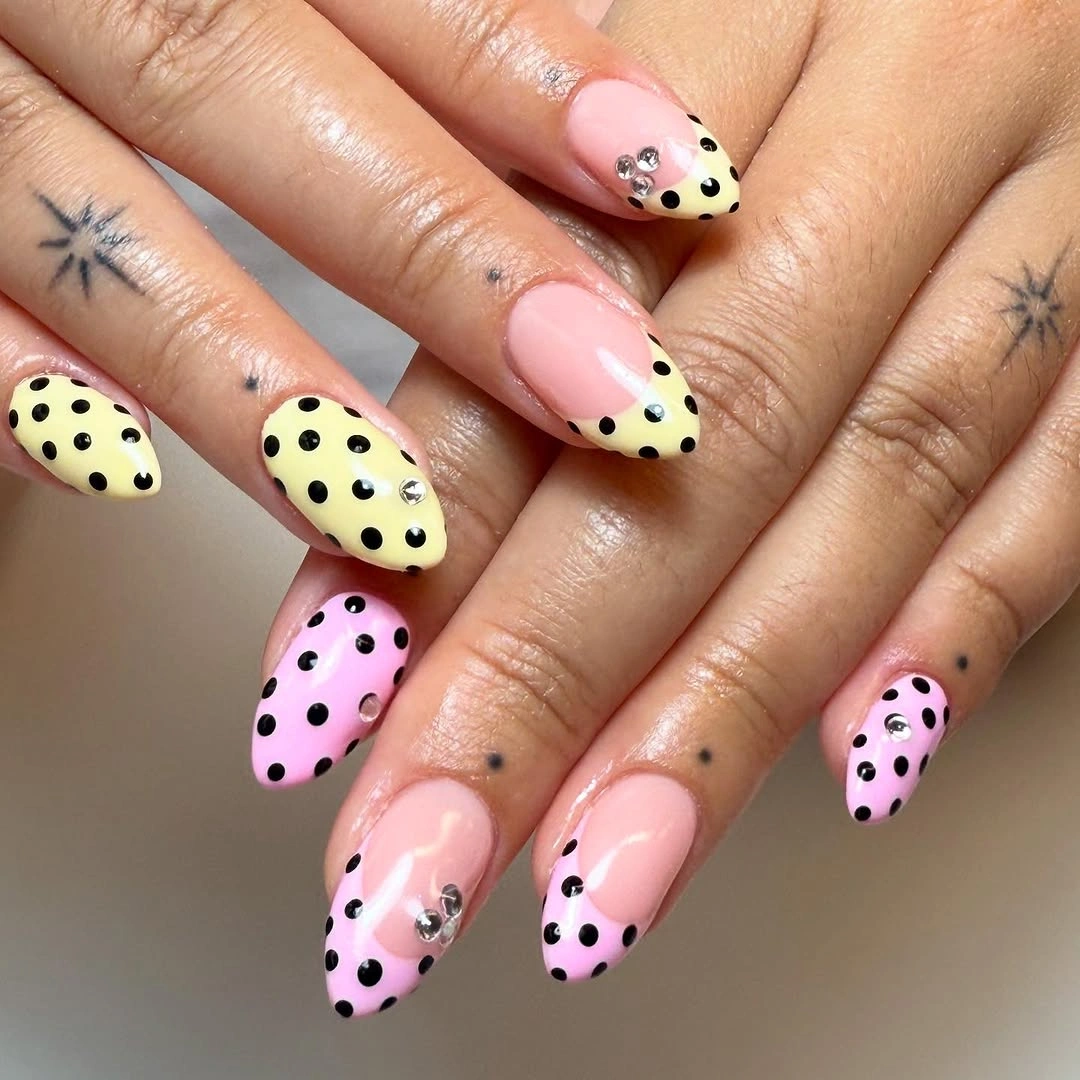
I would use a soft blush pink as the foundation, a creamy butter yellow for the colored sections, and a true black for the dots. Essie Ballet Slippers can work as a sheer pink starting point, while any opaque butter-yellow cream polish gives the same sunny effect. For the black, I would choose a highly pigmented formula so the dots stay crisp instead of becoming gray or watery. A tiny rhinestone or two is optional, but honestly, the manicure already has plenty going on.
The easiest way to make this design wearable is to build it in layers. I would begin with the pink base, then add the yellow French sections using a fine brush or French-tip guide. Once everything is dry, I would place the black dots with a dotting tool, varying their position slightly from nail to nail. Finally, I would add a couple of small crystals while the top coat is still tacky enough to hold them. The result should feel spontaneous, not mathematically perfect.
Minimal White French Tips With Tiny Black Dots
This manicure takes the classic French tip and gives it a tiny graphic update. The nails are short and softly rounded, with a translucent milky-pink base and clean white tips. Small black dots sit along the French line, almost like delicate punctuation. The contrast is strong, but the overall design stays remarkably refined because the dots are small and the white tip remains the main feature. For anyone who likes minimalist nail art, this is such an easy way to step outside plain French without going all in on maximalism.
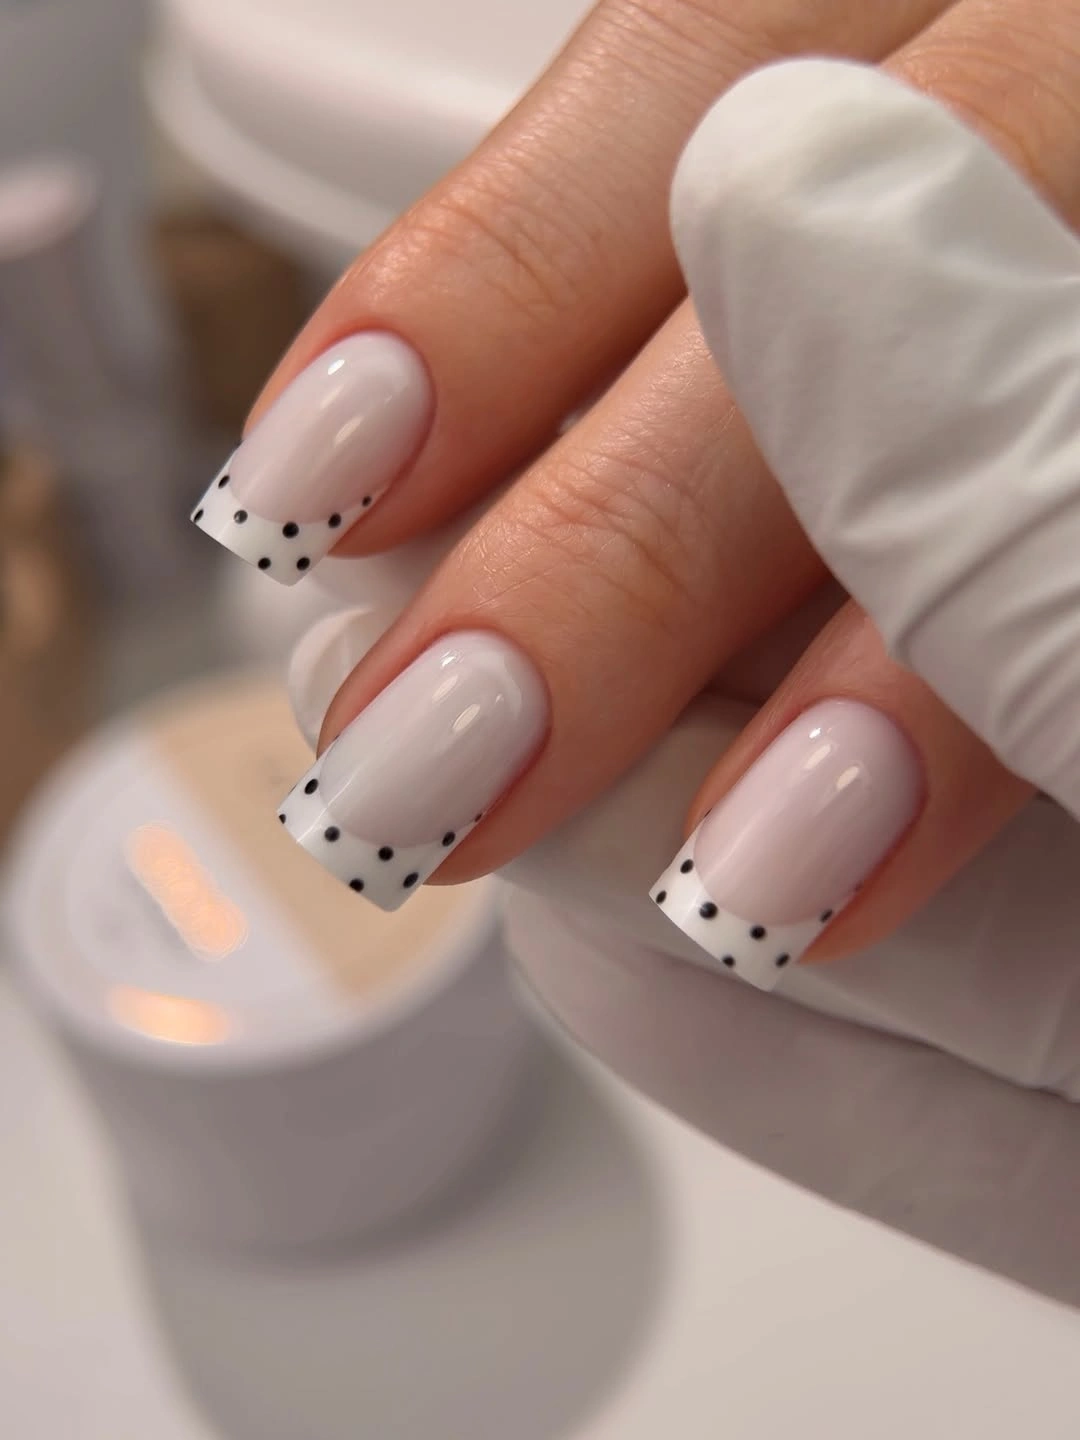
My materials would be simple: a sheer pink or nude base, an opaque white polish, a black nail-art polish, a thin French-tip brush, and a glossy top coat. OPI Bubble Bath is again a useful soft-pink reference, while a classic bright white creates the cleanest French contrast. I would keep the black formula extremely pigmented because these dots need to stay tiny and defined.
I would first create the French tips and let them dry thoroughly before touching the black polish. Then I would use a small dotting tool to place evenly sized dots directly along the border of each tip. The key is restraint. I would rather have fewer crisp dots than crowd the entire edge. After the design has set, I would seal it with top coat, carefully floating the brush over the nail so I do not drag the black pigment into the white.
Soft Pink Micro-Dot Nails for an Everyday Fall Manicure
There is something wonderfully uncomplicated about a sheer pink manicure covered with tiny white dots. The short square shape makes this version practical, while the pale base gives it a clean, healthy-looking appearance. Instead of dramatic contrast, the design relies on small white circles scattered across each nail. The effect is delicate and almost playful, but because the colors stay close to the natural nail palette, it never becomes childish. This is polka dot nail art for someone who wants a detail rather than a declaration.
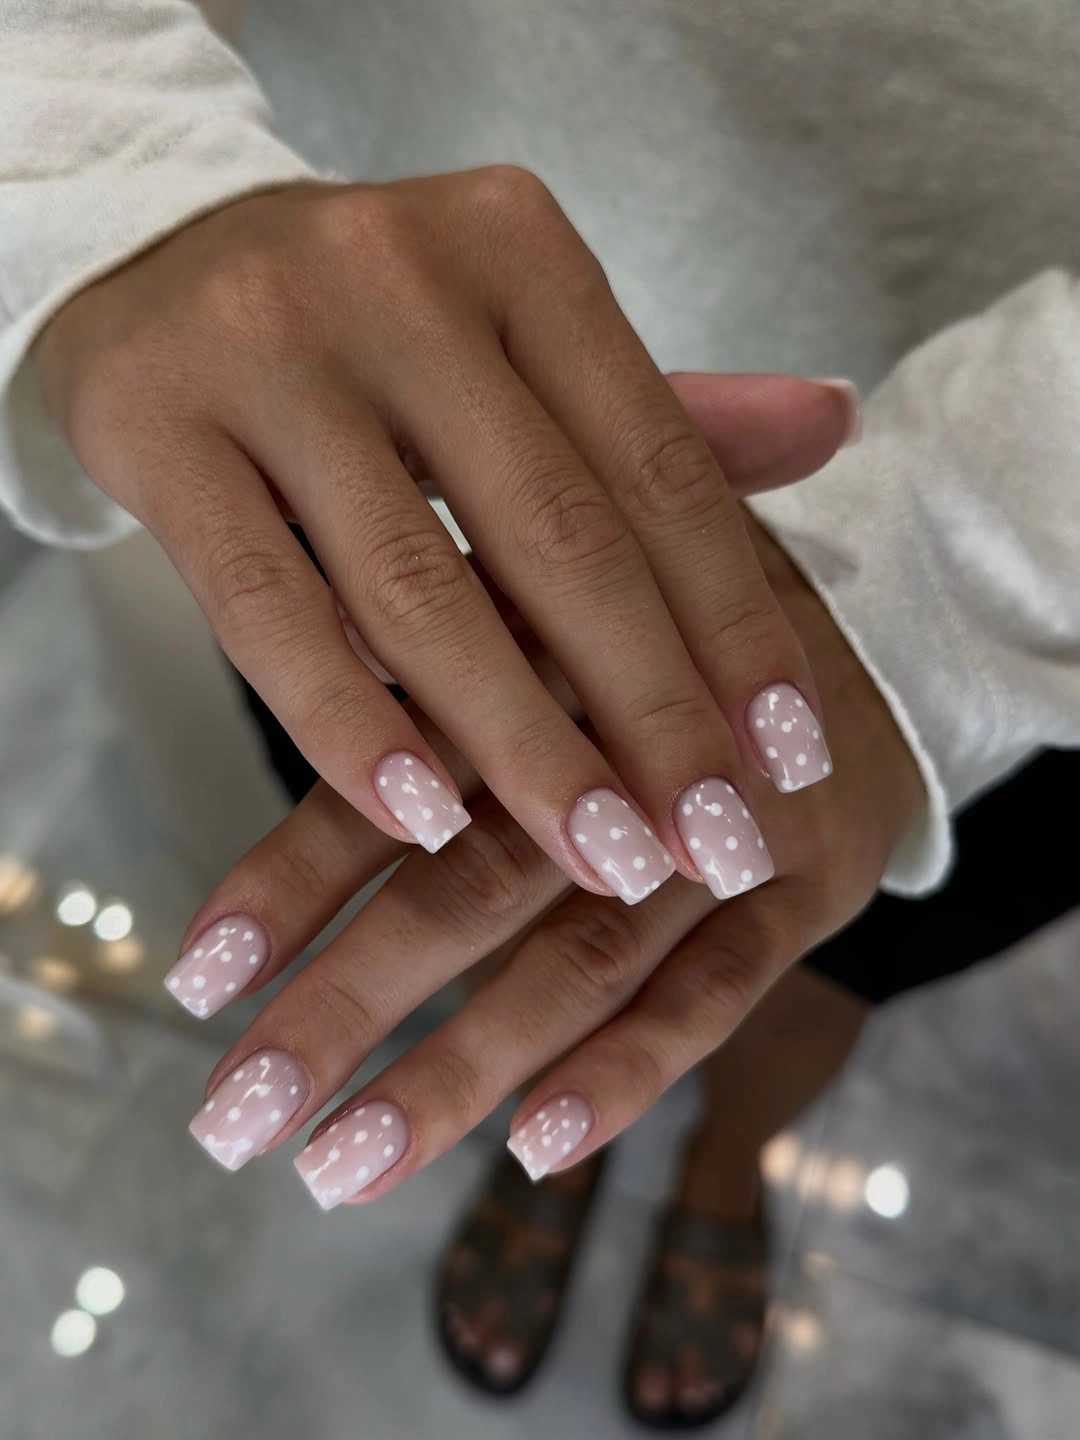
For the base, I would choose a translucent pink nude such as OPI Bubble Bath, Essie Ballet Slippers, or another sheer shade that lets some of the natural nail show through. A creamy white polish is enough for the dots, and I would use a small dotting tool to keep their size consistent. There is no need for glitter or complicated accessories here. A high-shine top coat does most of the finishing work.
Sheer White Polka Dots With a Gold Accent
I would call this manicure quietly glamorous. Short square nails are covered with a milky white base and neat black dots, creating a clean pattern that feels especially polished for fall. The oversized gold floral ring adds warmth, but the nail design itself stays wonderfully restrained.
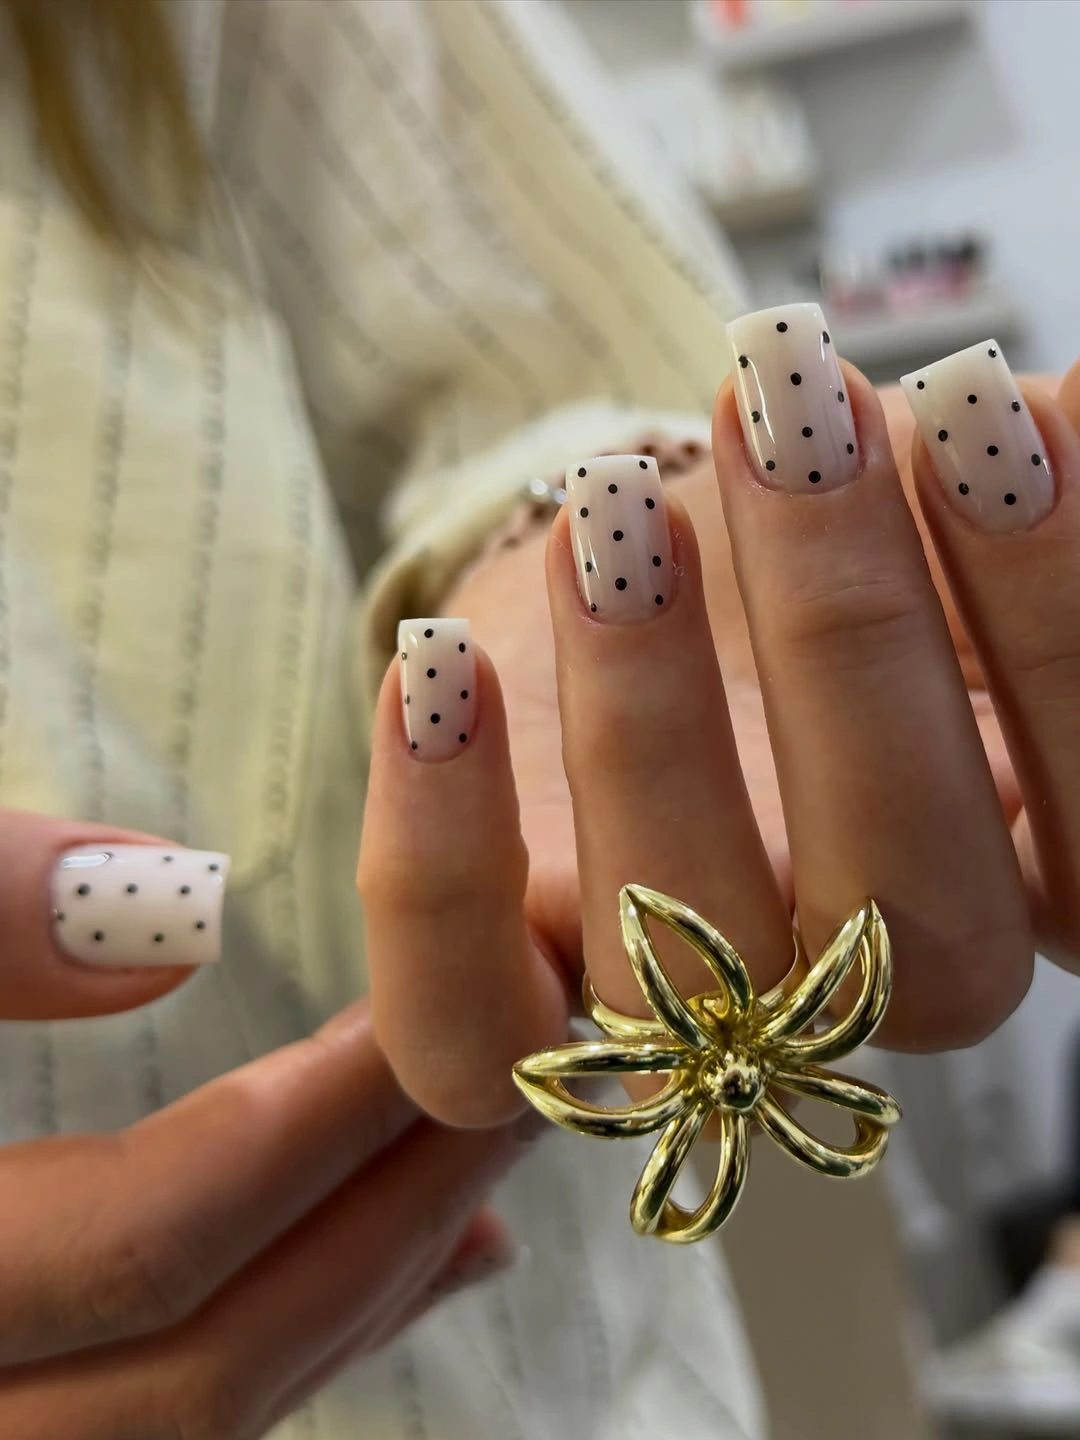
I would use a sheer white or milky nude polish, a highly pigmented black nail-art polish, and a small dotting tool. For a softer result, OPI Funny Bunny works beautifully as the base, while a glossy top coat keeps the finish fresh.
I would apply the milky base in thin coats, then add small black dots in loose, even rows. I would not worry about making every dot perfectly aligned because a little variation keeps the manicure looking handmade rather than mechanical.
For me, this is an excellent everyday fall choice. It looks crisp with cream sweaters and denim, but the black dots give it enough contrast to work with darker autumn outfits too.
Pastel Green and Butter Yellow Polka Dot French Tips
This manicure takes polka dots somewhere much softer and more unexpected. Long square nails combine a sheer pink base with pastel green and butter-yellow French tips, while tiny contrasting dots decorate the colored sections. The result feels playful but surprisingly sophisticated.
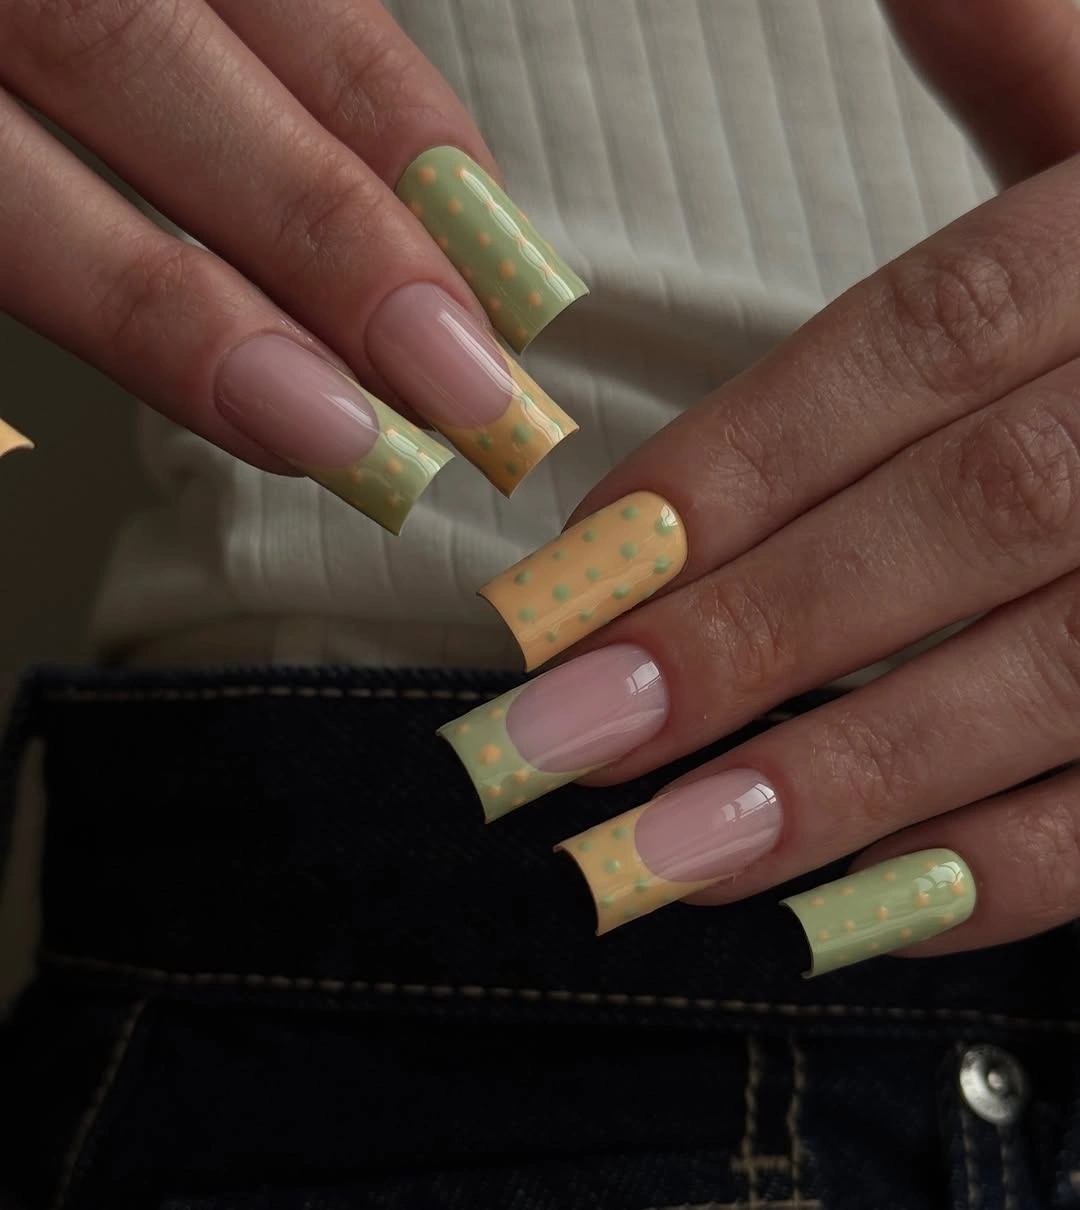
I would reach for a translucent pink base, muted sage-green and creamy yellow polishes, plus two contrasting shades for the dots. A fine French brush makes the curved tips much easier to control, especially on longer square nails.
I would create the pink foundation first, then carefully paint alternating green and yellow tips. Once those sections are dry, I would add tiny dots in the opposite color. A glossy top coat brings out the soft, candy-like finish.
I like this version for the beginning of fall, when I still want a little color before moving into deeper seasonal shades. It would look adorable with a beige cardigan, dark denim, or a simple black outfit.
Metallic Black and Gold Polka Dot Nails
Now this is where polka dots become evening-ready. The almond nails have a translucent nude base covered with reflective black, silver, and gold dots. Because the dots have a metallic finish, the manicure catches the light with every movement without needing heavy embellishment.
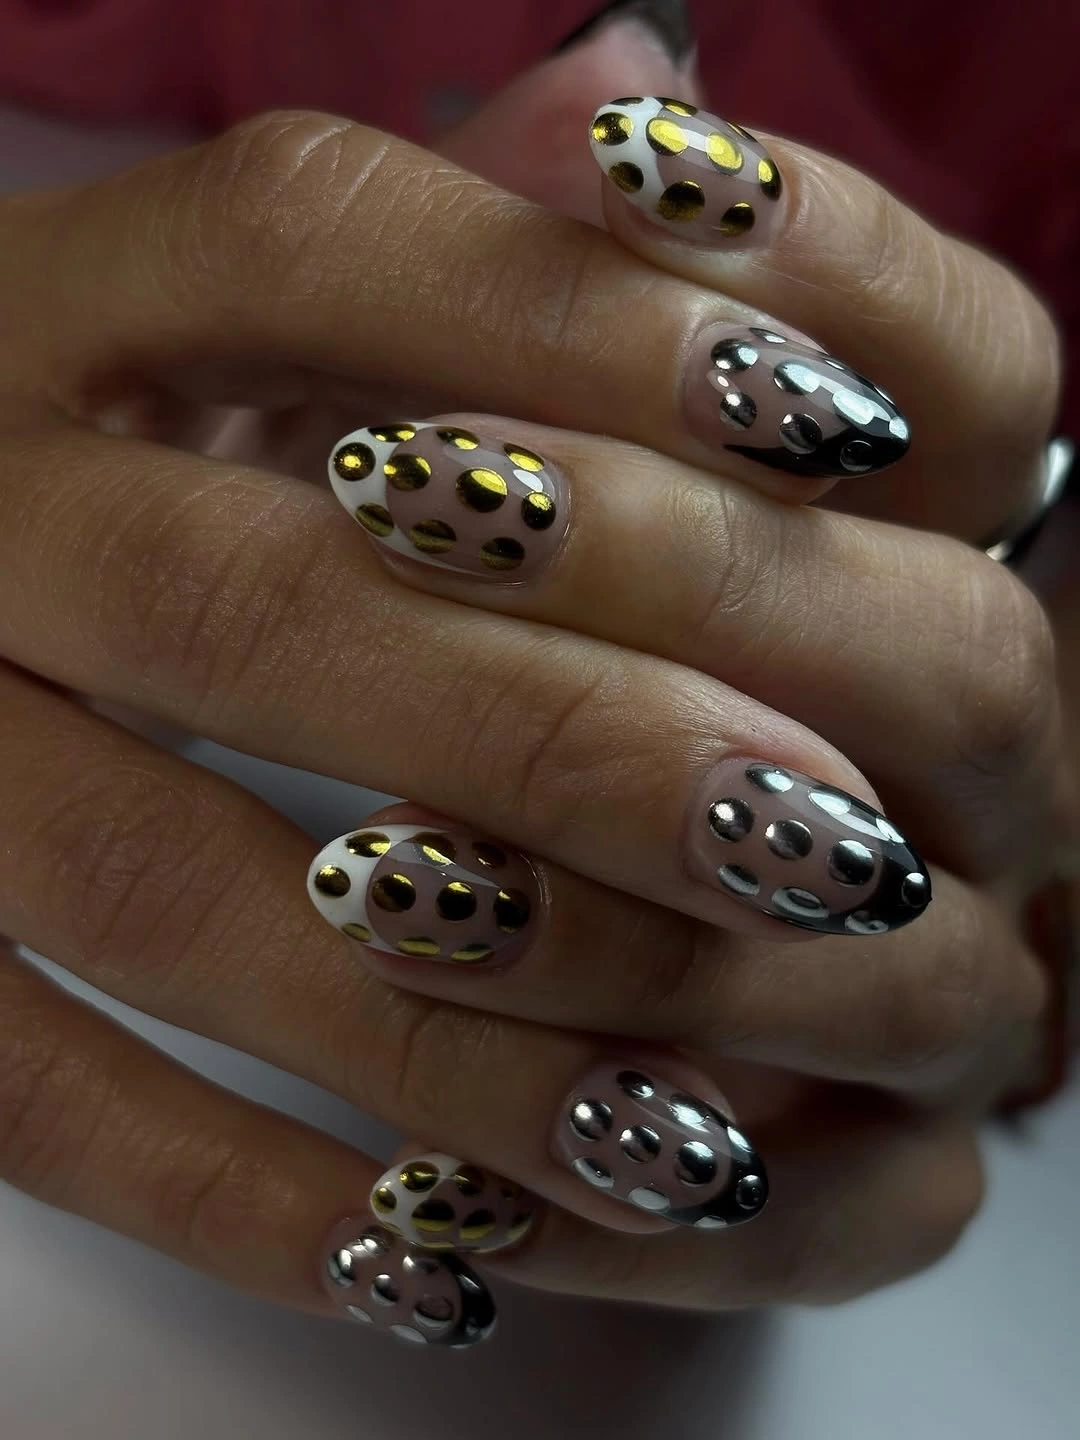
I would use a sheer nude base, black polish, gold metallic polish, silver metallic polish, and a small dotting tool. A chrome or metallic gel polish can make the dots especially reflective, although regular metallic lacquer works nicely for a simpler at-home version.
I would keep the base translucent and place the dots in different sizes, mixing the metallic shades instead of creating identical rows. The glossy top coat is important here because it makes the metallic details look smoother and more dimensional.
I would save this manicure for dinners, parties, or those first chilly evenings when everything suddenly feels a little more glamorous. Black, gold, and silver against nude nails have that effortless fall-night energy I never really get tired of.
Bright Multicolor Polka Dot Almond Nails
Who says fall nails have to be dark? These pointed almond nails turn polka dots into a full color story, pairing vivid purple, yellow, orange, pink, blue, and green with contrasting dots. Each nail gets its own combination, making the manicure cheerful, graphic, and unapologetically fun.
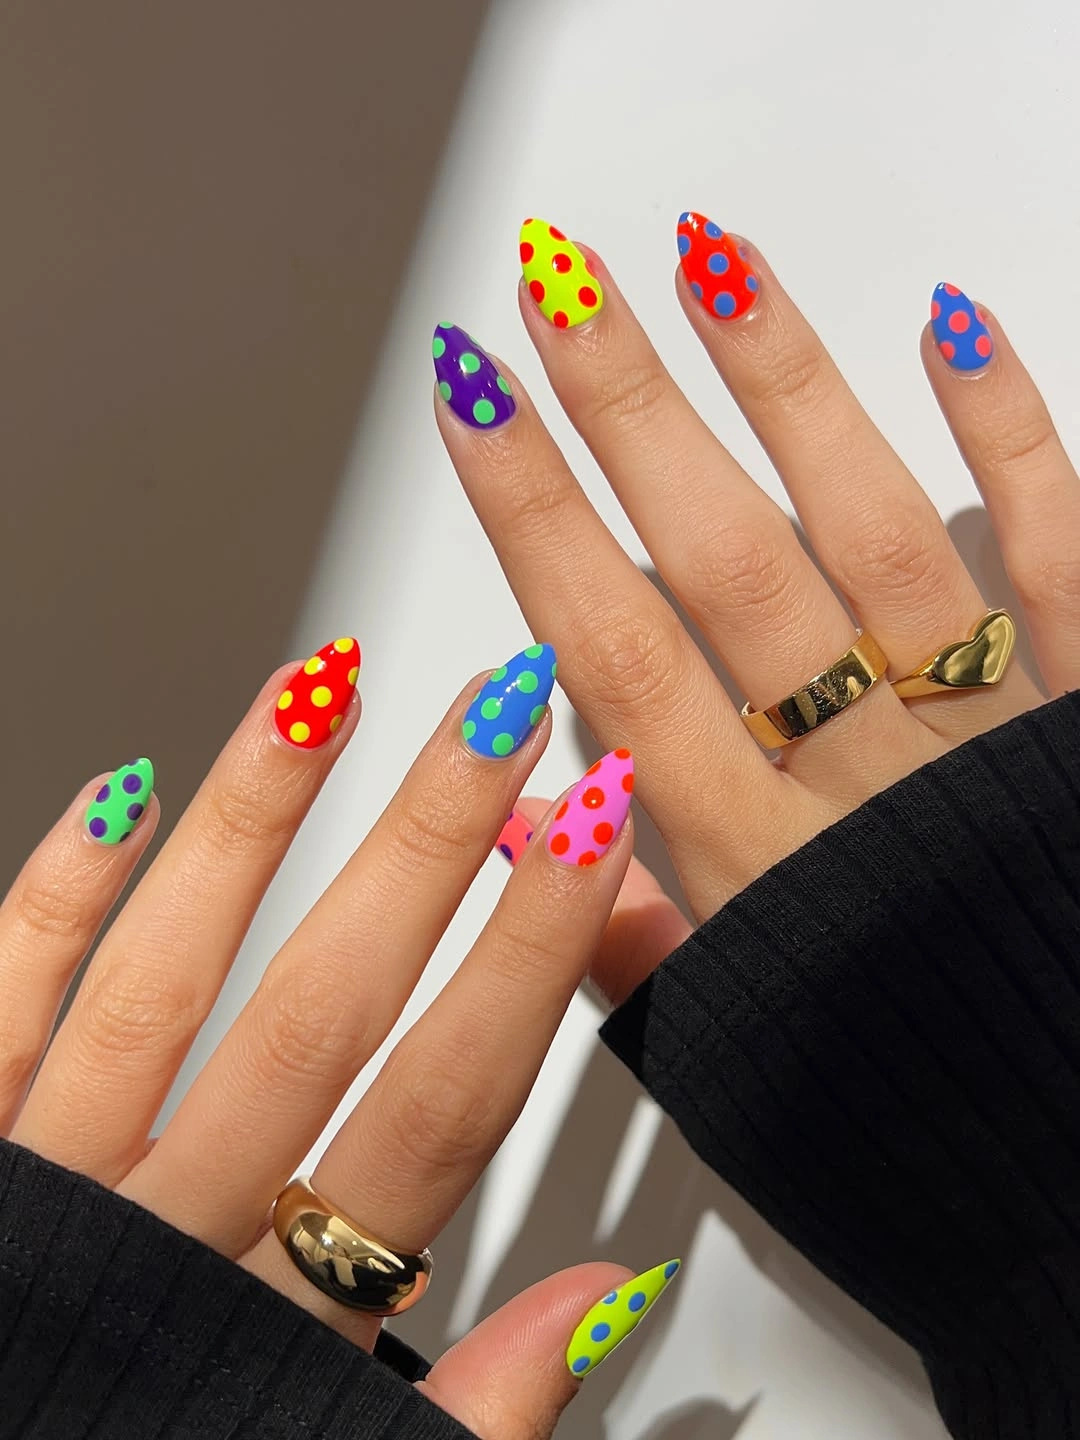
For this design, I would collect several highly pigmented cream polishes in bright colors and use a dotting tool for the contrasting circles. The base colors need to be opaque enough that the dots remain crisp and visible, especially when two strong shades meet.
I would paint each almond nail a different color, allowing the polish to dry before adding the dots. Then I would choose a contrasting shade for each nail rather than repeating one color throughout. A glossy finish keeps the whole palette looking intentionally coordinated.
This is my choice when the usual brown and burgundy fall palette feels a little too predictable. I would pair these nails with a simple black sweater and let the manicure do all the talking.
Silver Shimmer Nails With Minimal Black Dots
For a more refined take, I love these short almond nails with a fine silver shimmer base and tiny black dots. The metallic finish gives the manicure a cool, sophisticated glow, while the dots create just enough graphic contrast. It feels festive without crossing into full holiday territory.
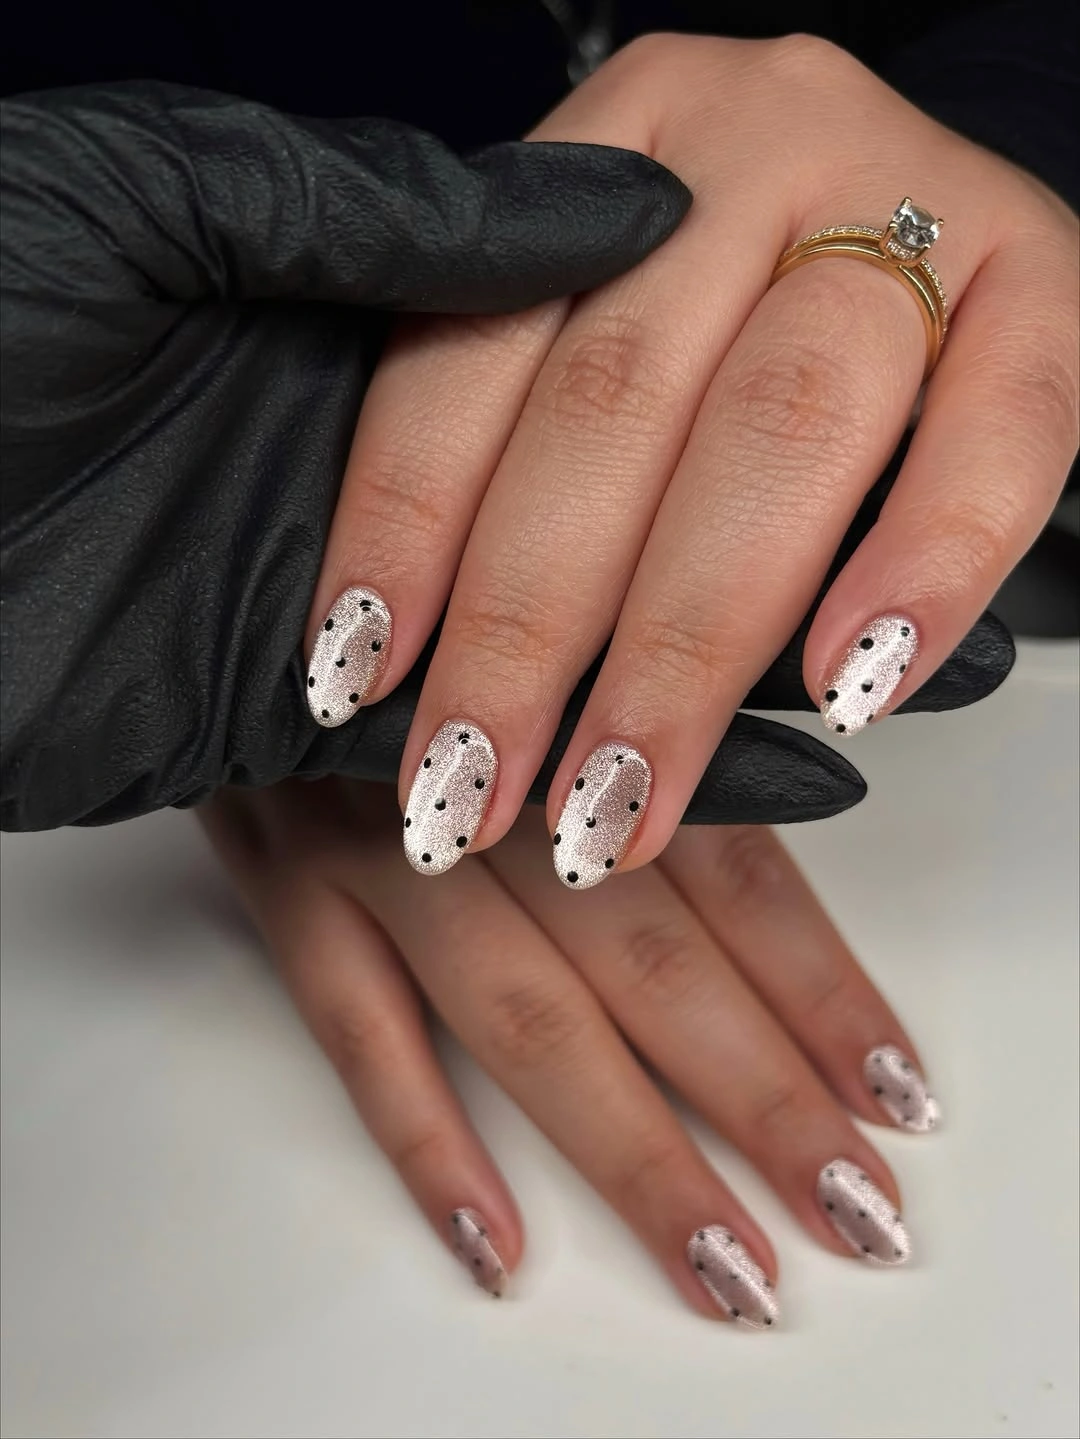
I would use a fine silver shimmer polish, a black nail-art polish, and a glossy top coat. A sheer silver chrome or pearl polish can also work if I want the metallic effect to be stronger. The important part is choosing a fine shimmer rather than chunky glitter.
I would shape the nails into a soft almond, apply the silver base, and then place small black dots mostly around the outer areas of each nail. Keeping the center relatively open makes the design look lighter and lets the shimmer remain the star.
For late fall, this one feels just right. It has enough sparkle for a dinner reservation or holiday gathering, but the black dots keep it modern and wearable. Sometimes the most chic manicure is the one that whispers instead of shouts.
Olive Green Nails With Silver Polka Dot Details
I would take this olive green manicure straight into fall. The long almond shape is coated in a muted yellow-green shade, while small raised silver dots run in neat lines across each nail. The cool metallic accents give the earthy color a sharper, more fashion-forward finish.
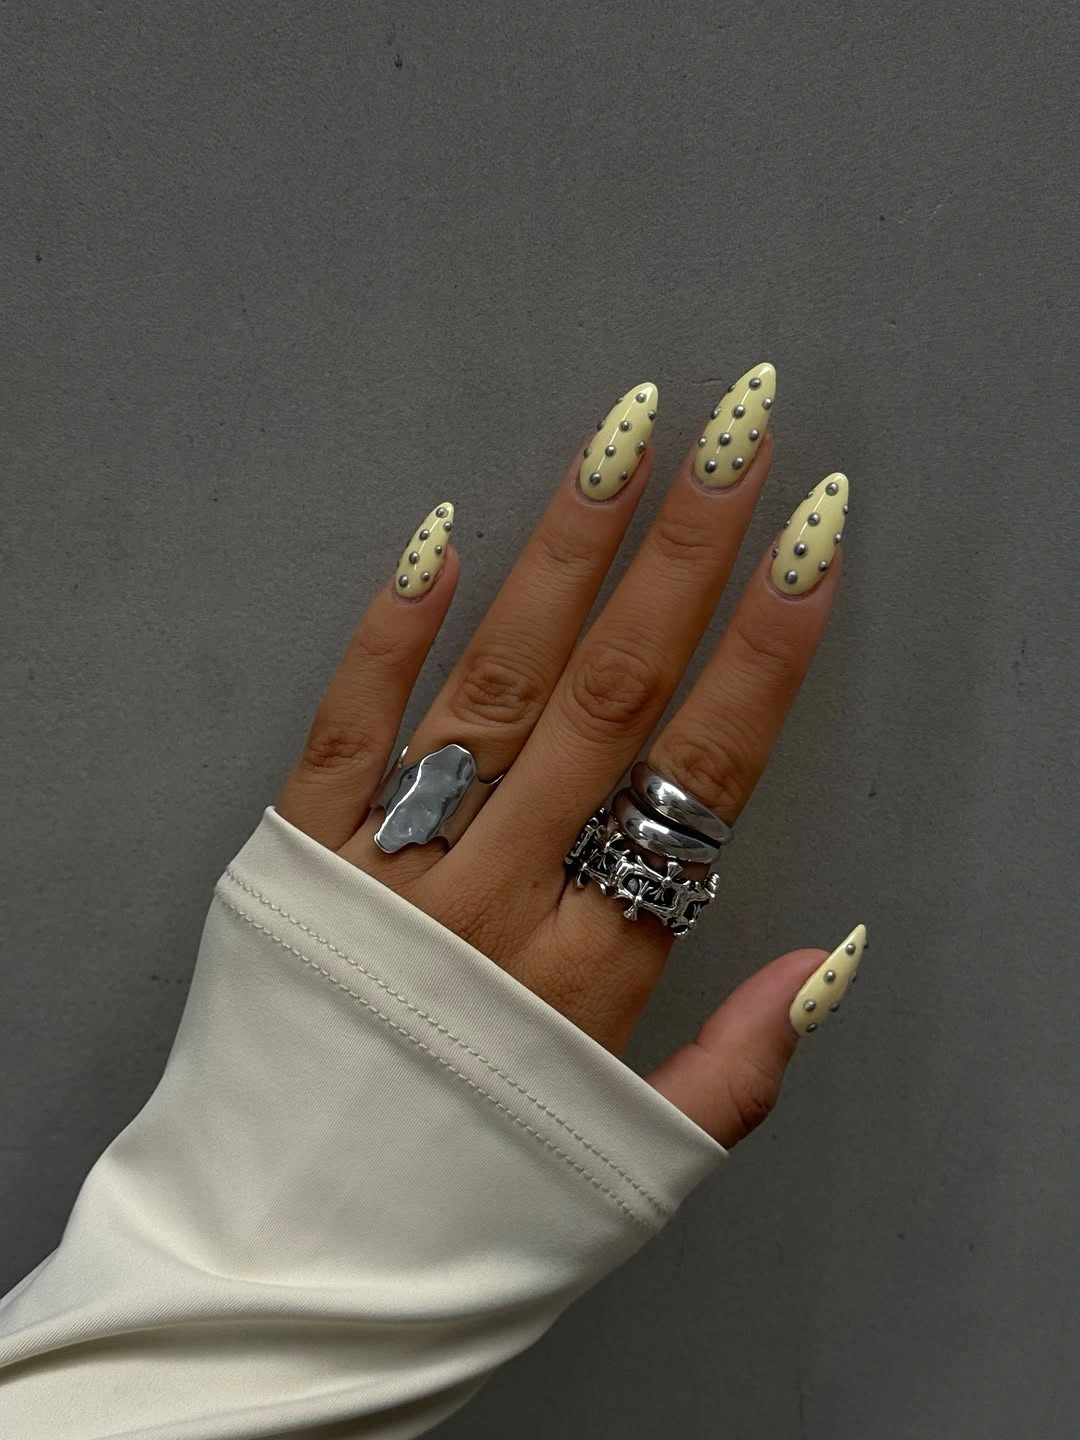
I would use a muted olive or pistachio polish, silver metallic polish or small nail studs, and a glossy top coat. A dotting tool is enough if I want painted dots, while tiny metallic embellishments create the raised effect.
I would apply the green base evenly, then place the silver dots in narrow rows following the length of the almond nails. I would keep the spacing consistent and seal everything carefully so the raised details stay secure.
This feels like one of the easiest ways to make green work for fall without going overly dark. I would pair it with cream knits, silver jewelry, and soft tailoring for a very polished seasonal look.
Smoky Black Sheer Nails With Tonal Dots
There is something wonderfully moody about a sheer black manicure. These almond nails have a translucent charcoal-black base with glossy black dots scattered across the surface. Because the colors are so close, the pattern appears almost inky and understated rather than loud.
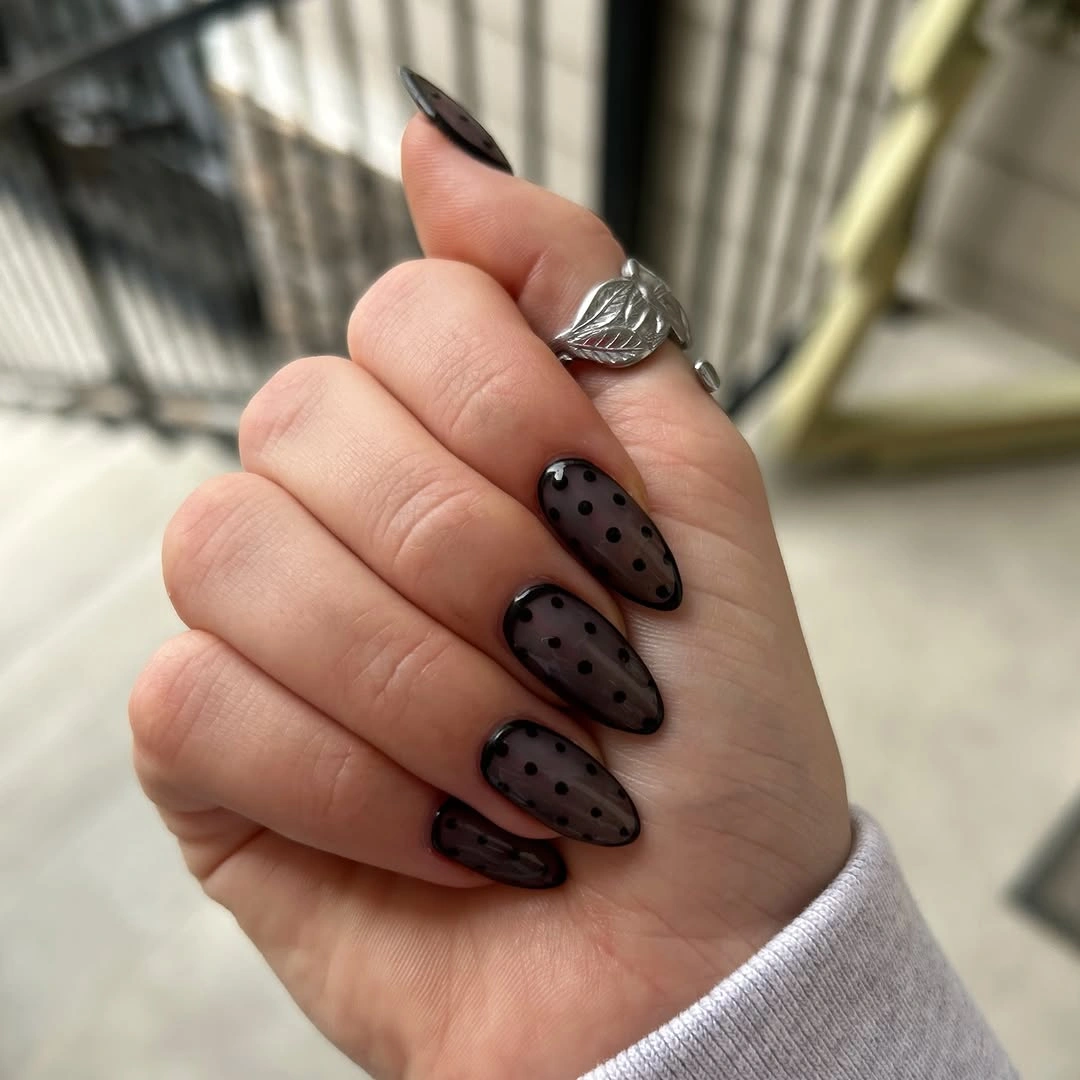
I would choose a sheer black or smoky charcoal polish, an opaque black for the dots, and a high-shine top coat. The important part is maintaining some transparency in the base so the dots remain visible without creating a flat black manicure.
I would build the sheer color gradually with thin coats, then add small black dots in varied sizes. Once dry, I would finish with a glossy top coat to emphasize the difference between the translucent background and the darker dots.
For me, this is pure fall evening energy. It would look especially good with leather, silver rings, and an oversized gray sweater when I want something understated but definitely not boring.
Yellow French Tips With Black Dots and Gold Rings
This manicure gives the classic French tip a playful autumn update. The nails have a sheer nude base with vivid yellow tips, oversized black dots, and delicate gold bands crossing some of the nails. The rounded almond shape keeps the combination elegant even with all those graphic details.
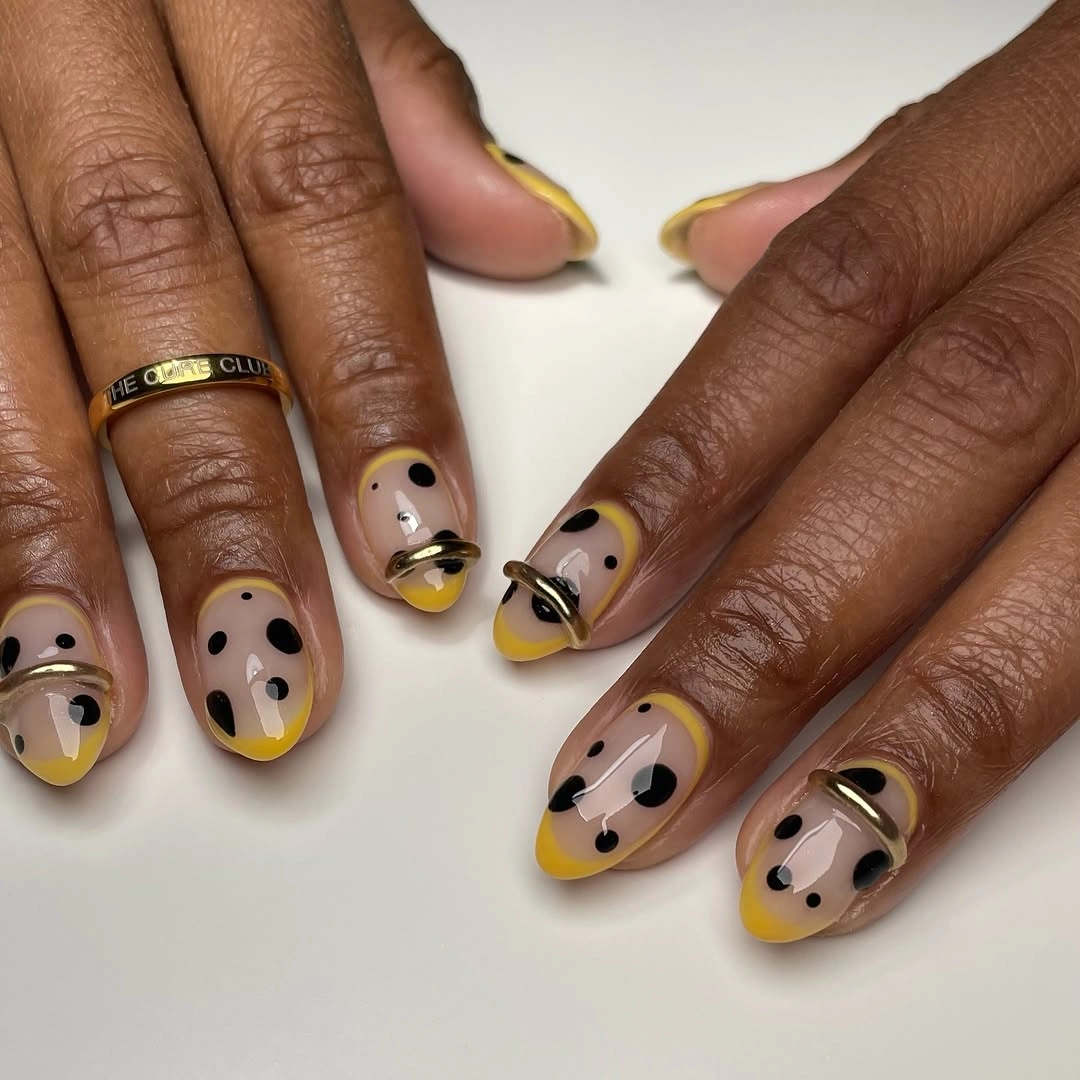
I would use a sheer nude base, bright mustard-yellow polish, black nail-art polish, and thin gold striping tape or metallic gel. A dotting tool makes the larger black circles much easier to control.
I would create the yellow tips first, then add black dots in different sizes across the nude area and tips. The gold bands should be added last so their lines stay crisp. A glossy top coat finishes the design without hiding its layered details.
Yellow can sometimes feel more spring-like, but this deeper, graphic combination makes it surprisingly good for fall. I would wear it with camel, chocolate brown, or black and let the manicure bring the unexpected color.
Powder Blue and Butter Yellow Polka Dot Tips
Soft blue and butter yellow create a surprisingly pretty contrast here. The long nails alternate between pale pink centers and colorful French-style sections covered in tiny dots. The rounded square shape keeps the manicure neat, while the pastel palette gives the polka dots a fresh, almost retro feeling.
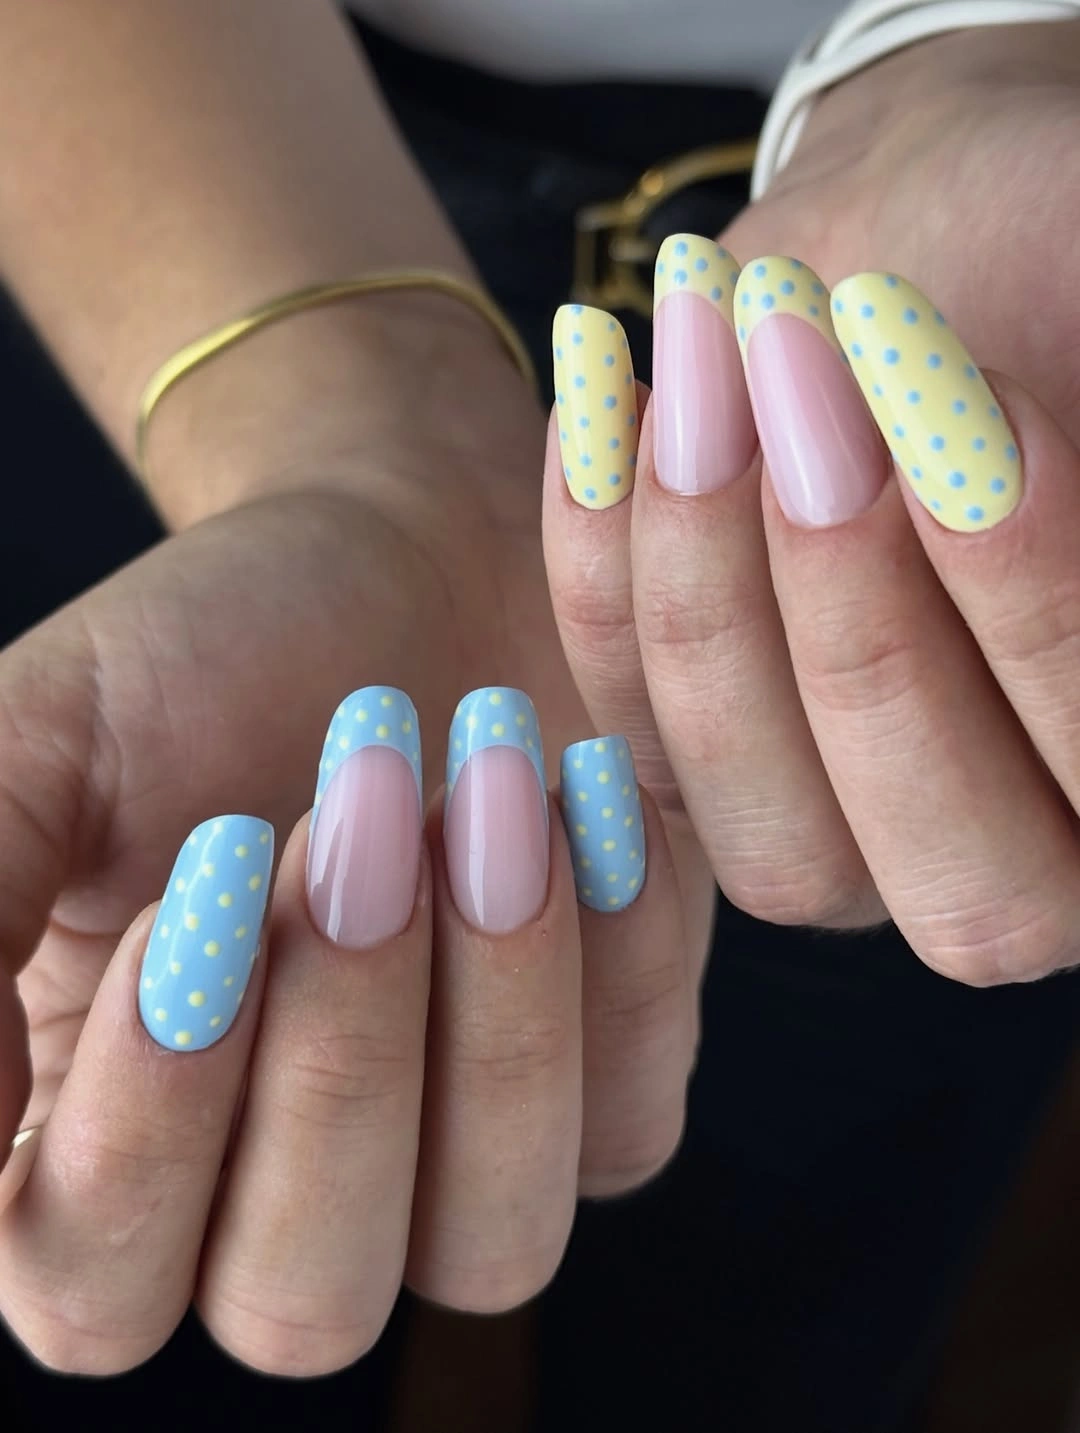
I would use a sheer pink nude, pastel blue, soft yellow, and two contrasting pastel shades for the dots. A fine nail-art brush helps create the curved French sections, while a small dotting tool keeps the circles uniform.
I would paint the sheer pink center first and carefully outline the colored tips. After they dry, I would add the tiny dots in the opposite pastel shade. A glossy finish makes these pale colors look much cleaner and more dimensional.
This is a fun choice for early fall when I am still holding onto lighter colors. It would be particularly cute with denim, cream, or a navy sweater, proving that fall polka dots do not always have to be brown or burgundy.
Playful Pastel Polka Dots With Striped Accents
This final combination turns polka dots into a full-on mix-and-match manicure. Pink, blue, and yellow appear across rounded almond nails, with some nails covered completely in dots and others featuring sheer centers, colorful borders, or fine multicolor stripes. The different patterns still feel cohesive because the same soft palette repeats throughout.
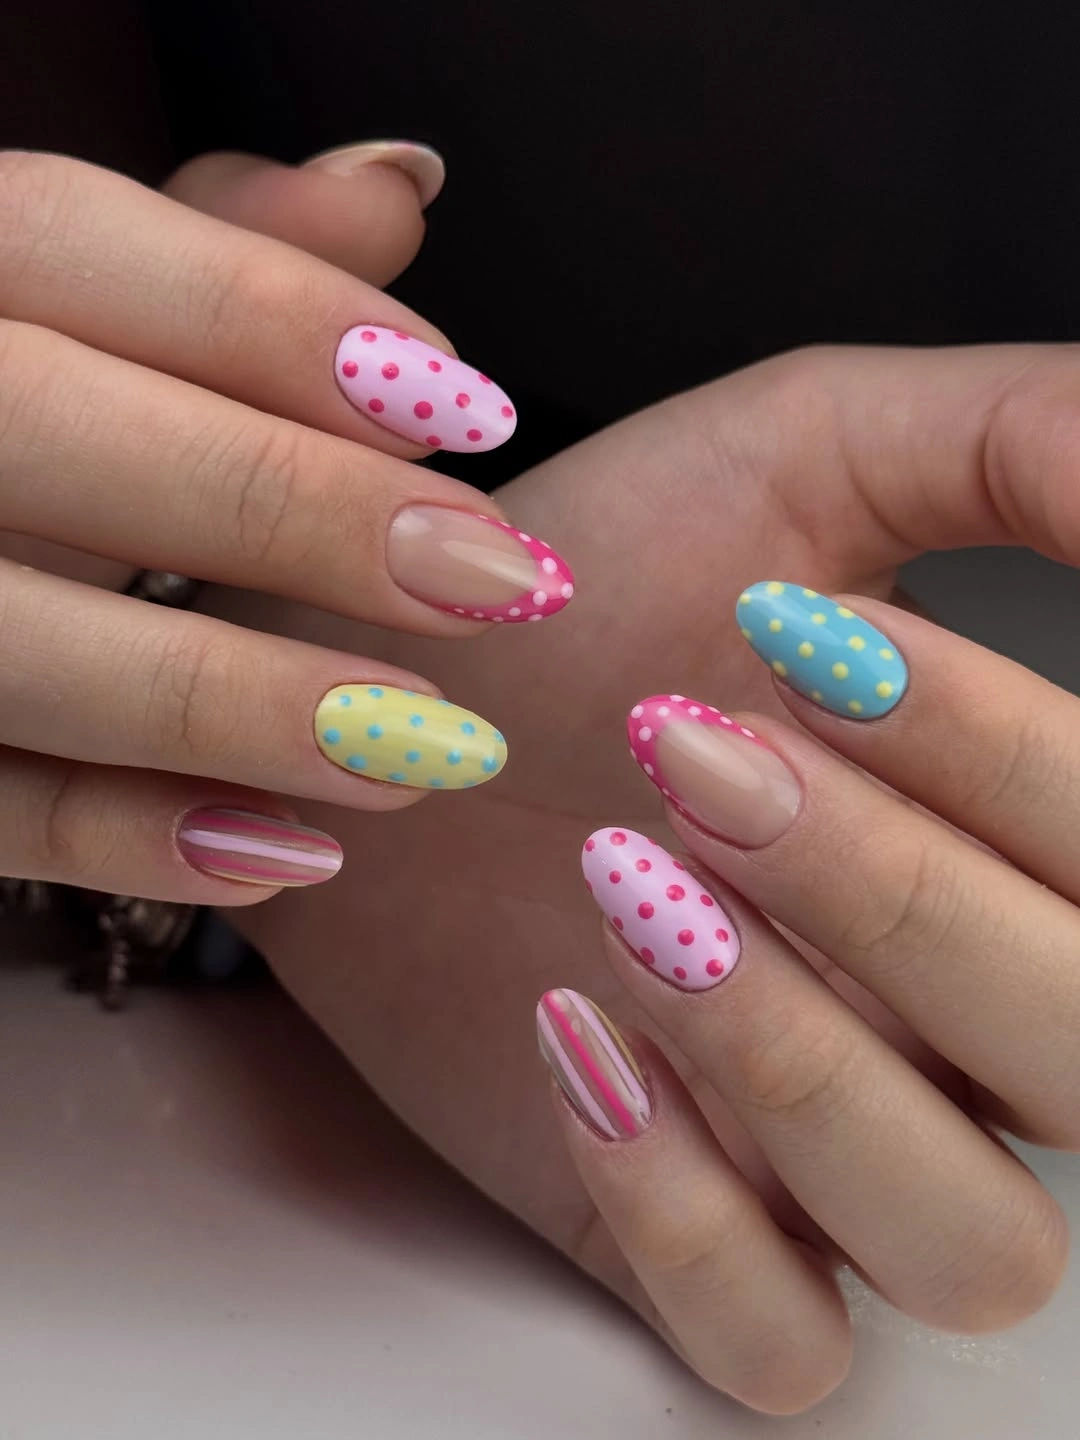
I would gather pastel pink, baby blue, butter yellow, and a few coordinating shades for the dots and stripes. A fine liner brush is useful for the narrow striped nails, while a dotting tool handles the larger polka dot designs.
I would treat each nail as its own small design rather than trying to duplicate the entire pattern. Some can have full-color dots, others a French border, and one or two can carry stripes. The final glossy coat brings all those different details into one manicure.
I love this idea when I want my fall nails to feel personal rather than perfectly coordinated. The palette is cheerful, but the almond shape and controlled patterns keep it polished. It is a little playful, a little unexpected, and exactly the kind of manicure that makes me want to try something new.
Milky White Almond Nails With Tiny Black Dots
I would keep this manicure on my fall mood board for its sheer simplicity. Long almond nails are finished with a translucent milky white base and tiny black dots scattered evenly across the surface. The combination feels delicate and clean, while the darker dots give the pale manicure just enough graphic definition.
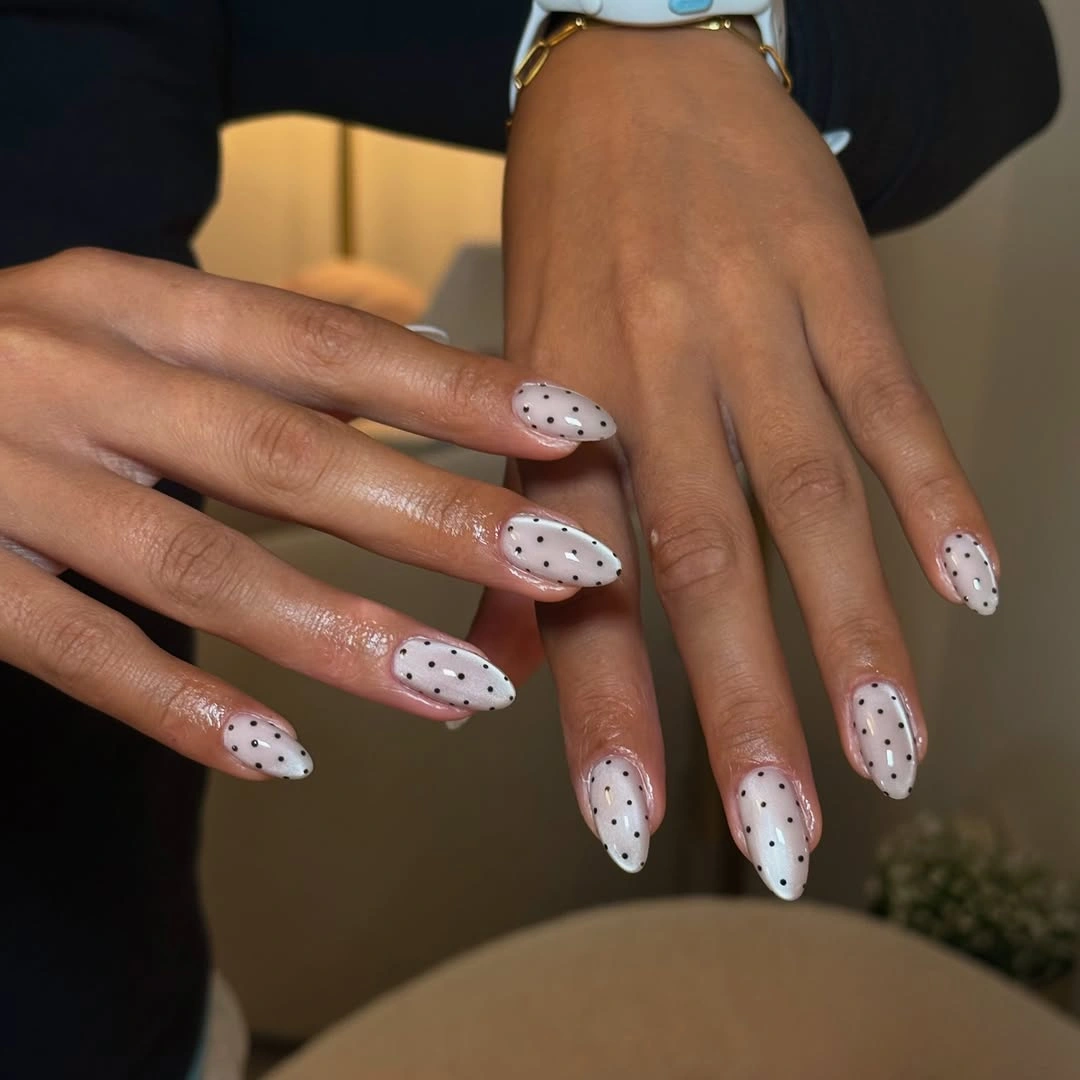
I would use a sheer white polish, a black nail-art polish, and a small dotting tool. OPI Funny Bunny is a good starting point for the translucent base, especially if I want the natural nail to remain softly visible.
I would apply the white base in thin layers, then place tiny black dots in loose rows once the surface is dry. A glossy top coat brings out the contrast and makes the almond shape look especially sleek.
For me, this is the quiet-luxury version of polka dots. It works beautifully with black coats, cream sweaters, and silver jewelry, and it is polished enough to wear almost anywhere.
Blush Pink Nails With Raised Pearl Dots
These short rounded nails take polka dots in a completely different direction. A soft blush-pink base is covered with raised pale dots that look almost like tiny pearls or droplets. The monochromatic color palette keeps the manicure elegant, while the three-dimensional texture gives it a surprisingly interesting finish.
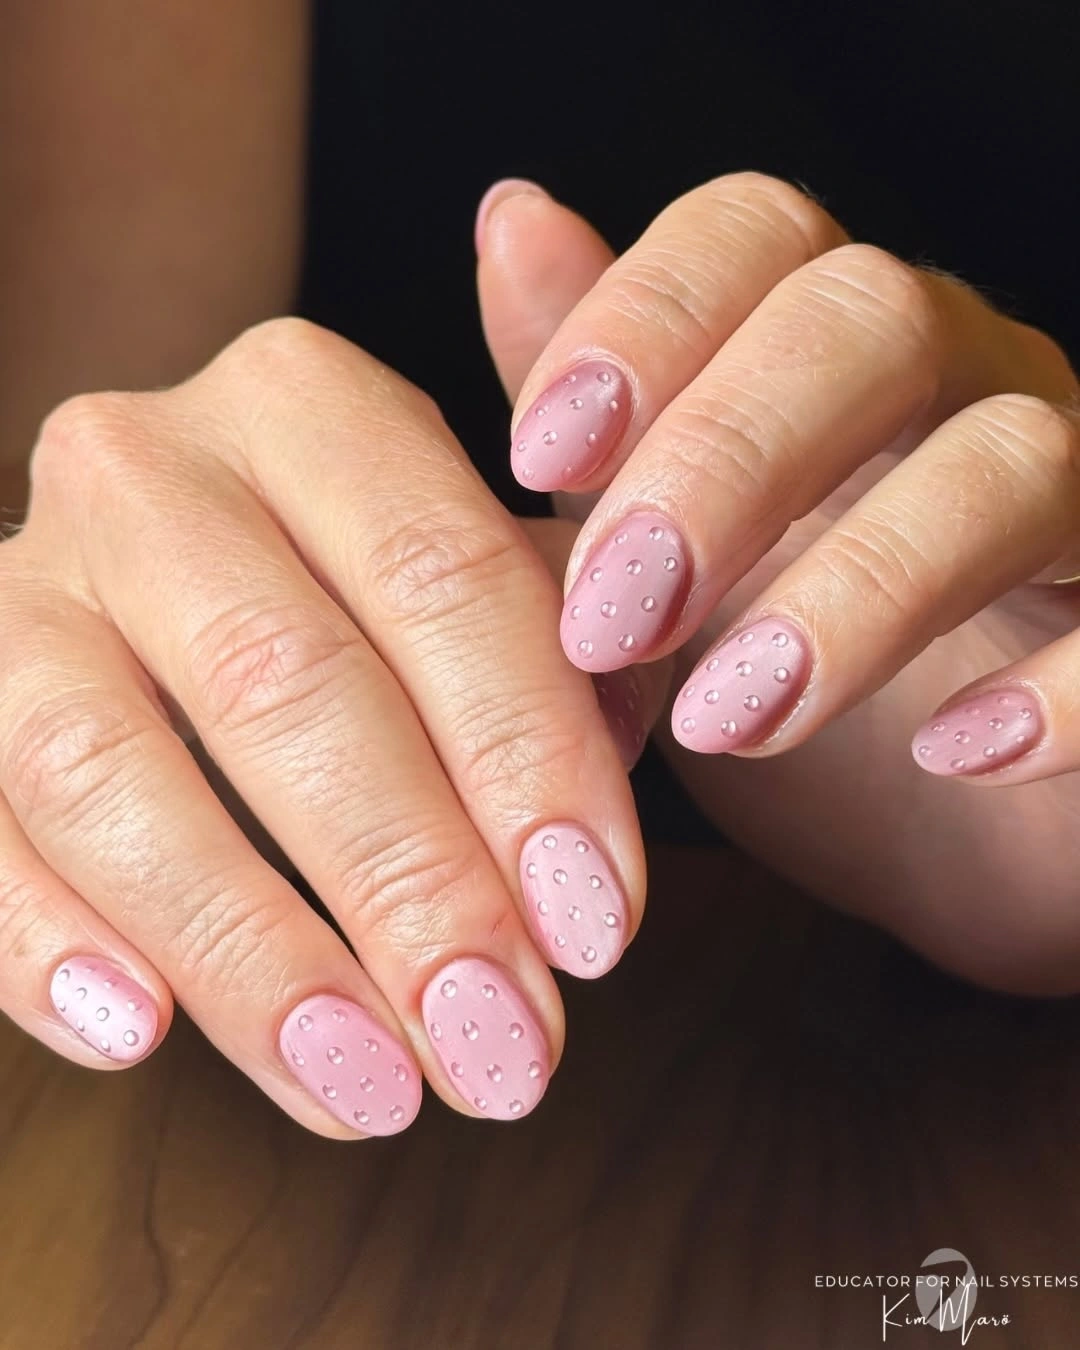
I would use a creamy blush-pink gel polish, a builder gel or 3D gel for the raised dots, and a glossy top coat. The dots should be slightly lighter than the base so the texture catches the light without creating a harsh contrast.
I would start with a smooth pink foundation, cure it properly, and then create small rounded dots with a dotting tool. Building each dot gradually gives me more control over its height. I would cure again before adding the final glossy layer around the design.
This is such a pretty option for fall when I want something feminine but not overly sweet. The texture makes a simple pink manicure feel special, and I can easily imagine wearing it with a soft cashmere sweater on a cool October afternoon.