Elegant nude fall nails 2026 are proof that neutral does not have to mean predictable. I keep coming back to nude manicures when the weather turns cooler because they work with everything from oversized denim and soft knits to a sharp blazer and gold jewelry. But how do you make a nude manicure feel fresh for fall rather than simply safe? For me, the answer is in the details – a thin line of green, a touch of gold, tiny flowers, unexpected color, or barely-there black art can completely change the mood.
This season, I would look for designs that keep the base polished and understated while letting one small idea do the talking. Short nails can look just as interesting as longer shapes, and almond nails still give delicate details plenty of room to breathe. Here are the elegant nude fall nails 2026 ideas I would save before my next manicure appointment.
Soft Nude Nails With Lime Green Waves
I love how this manicure takes a warm nude base and gives it a surprisingly modern twist with thin, irregular waves. The nails are kept short with a softly squared shape, which makes the design feel practical rather than overly precious. The sheer beige-nude foundation allows the natural nail to remain part of the look, while lime green, white, and a hint of golden yellow create narrow flowing lines across the surface. I especially like that the waves are not perfectly symmetrical – that tiny bit of movement makes the manicure feel handmade and current. Green is also an easy way to bring a little fall color into a neutral look without committing to a deep forest or olive manicure.
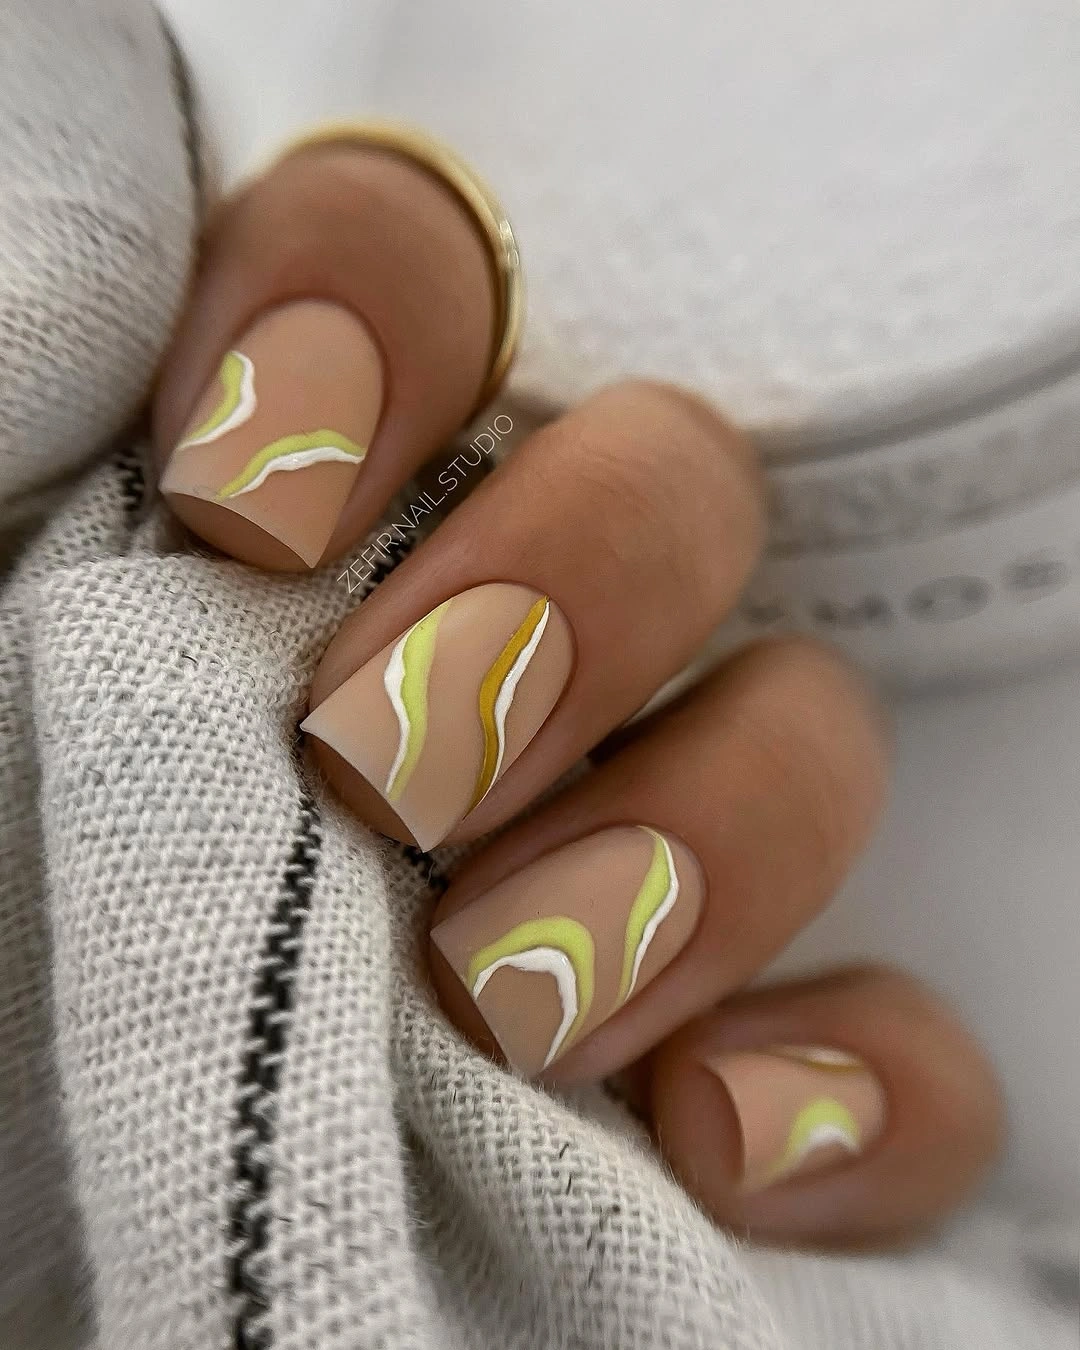
For the base, I would start with a sheer nude or pink-beige gel polish that closely matches the natural tone of the nail. OPI Bubble Bath, Funny Bunny, or a similar milky nude can give the right translucent effect, although I would choose the shade according to my own skin tone rather than trying to copy the color exactly. For the artwork, I would use a bright lime gel, crisp white, and a muted mustard or golden yellow. A very fine nail-art brush is essential here because the lines need to stay narrow. I would also keep a glossy top coat nearby – this design looks best when the surface is smooth and glassy.
At home, I would shape the nails first and make sure every edge is even before applying the base. After curing the nude color, I would draw the waves one at a time rather than trying to make a continuous pattern across every nail. I find that slightly varying the height and direction keeps this kind of manicure from looking too uniform. If the green feels too bright for fall, I would swap it for olive, moss, or a softer pistachio. One little color change can take the whole idea from high-summer playful to early-autumn polished.
Marble Nude Almond Nails With Delicate Gold
For me, this is where nude nails start to feel genuinely luxurious. The longer almond shape creates an elegant silhouette, while the soft taupe and ivory marble effect gives each nail a slightly different finish. Instead of strong contrast, the design relies on cloudy beige-gray movement that almost resembles natural stone. Small touches of metallic gold appear near the edges and corners, adding warmth without turning the manicure into full-on glitter. The result is sophisticated, quiet, and very easy to imagine with fall textures such as cashmere, suede, wool, and polished leather.
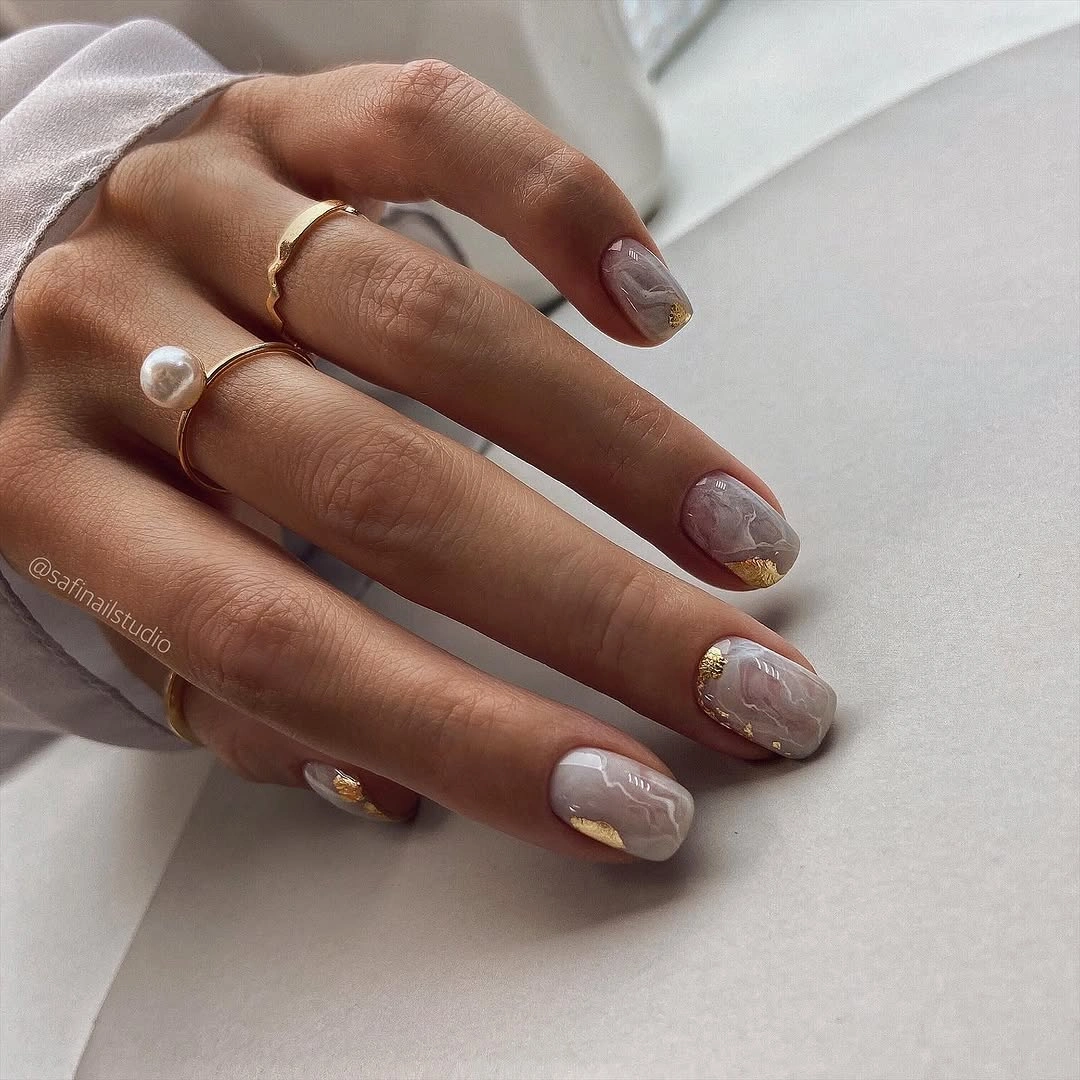
I would build this manicure with a translucent beige or nude base, a soft gray-taupe gel, and an ivory shade for the marble effect. The gold can be created with metallic gel polish, gold foil, or a fine chrome-style pigment depending on how subtle I want the finish. A small detail brush and a thin liner brush would be enough for the artwork. I would avoid an overly yellow gold because the taupe base already has plenty of warmth. A champagne or antique-gold finish feels much more sophisticated for fall.
The marble effect looks complicated, but I find that it becomes much easier when I stop trying to make every line perfect. I would apply the nude base, add very diluted taupe strokes, and soften them slightly before curing. Then I would add a few ivory veins and cure again. The gold comes last, placed sparingly around selected areas rather than across every nail. A glossy top coat pulls everything together and gives the marble that polished stone effect. If I were doing this at home, I would practice the marble strokes on a nail-art palette first – five minutes of practice can save a lot of frustration.
Delicate Floral Art on a Soft Nude Base
I have always had a soft spot for tiny floral nail art, especially when the flowers are kept small enough to let the nude base remain the star. Here, the manicure combines a pale pink-beige foundation with miniature botanical details in white, dark green, and touches of warm orange. The nails are short and rounded, which makes the delicate artwork feel relaxed and wearable rather than overly decorative. I like the slightly scattered placement, too – some nails carry a small flower, others have only a few leaves or petals. It gives the set a collected, almost sketchbook-like quality.
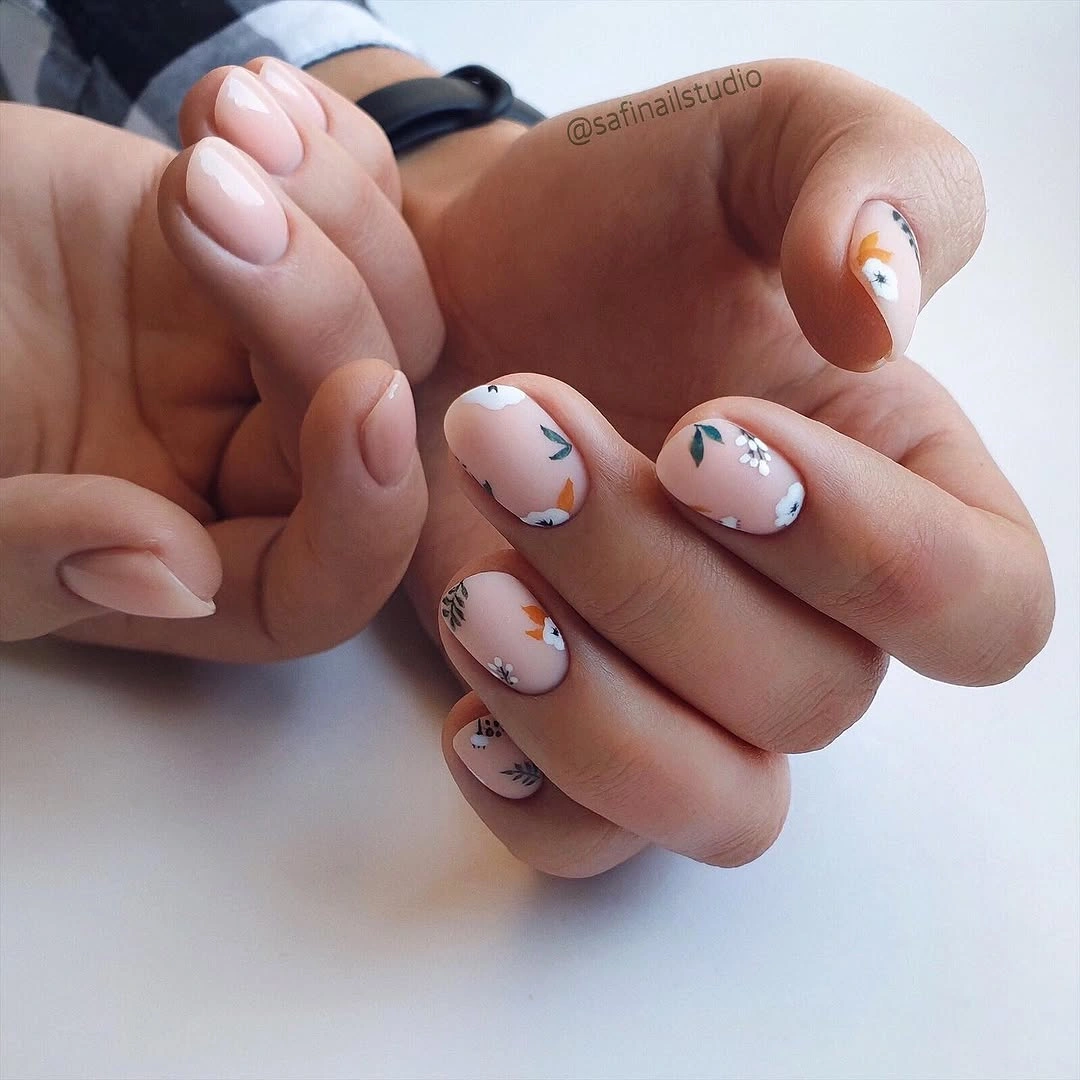
For this look, I would choose a sheer blush nude or soft milky pink as the foundation. The floral palette can stay surprisingly simple: opaque white for petals, muted green for leaves, and a small amount of burnt orange or terracotta for warmth. I would use a dotting tool for flower centers and a very fine brush for the leaves and tiny stems. A glossy top coat is enough to finish the manicure, although a satin finish could make the design feel more autumnal if I wanted something less shiny.
I would begin with a clean, even nude base and let it cure completely before adding any flowers. Small dots are the easiest starting point for simple petals – I would place several around one center, then add tiny leaves beside them. I would resist the urge to fill every empty space. That negative space is what makes the manicure look delicate. For a fall version, I might replace the brighter orange with rust, cinnamon, or muted terracotta and use a deeper olive green for the leaves. Suddenly, the same floral idea has a completely different season.
Rainbow Micro-Stripes on Nude Short Nails
This manicure takes the simplest possible idea – a nude base with thin lines – and makes it feel playful through color. The short rounded nails are covered with a translucent neutral shade, while narrow stripes in pink, orange, yellow, green, blue, and deeper tones are grouped toward one side of each nail. I particularly like the placement because the stripes do not dominate the entire nail. The nude space remains visible, creating a clean balance between color and restraint. For anyone who thinks colorful nails are too much, this is the gentler way in.
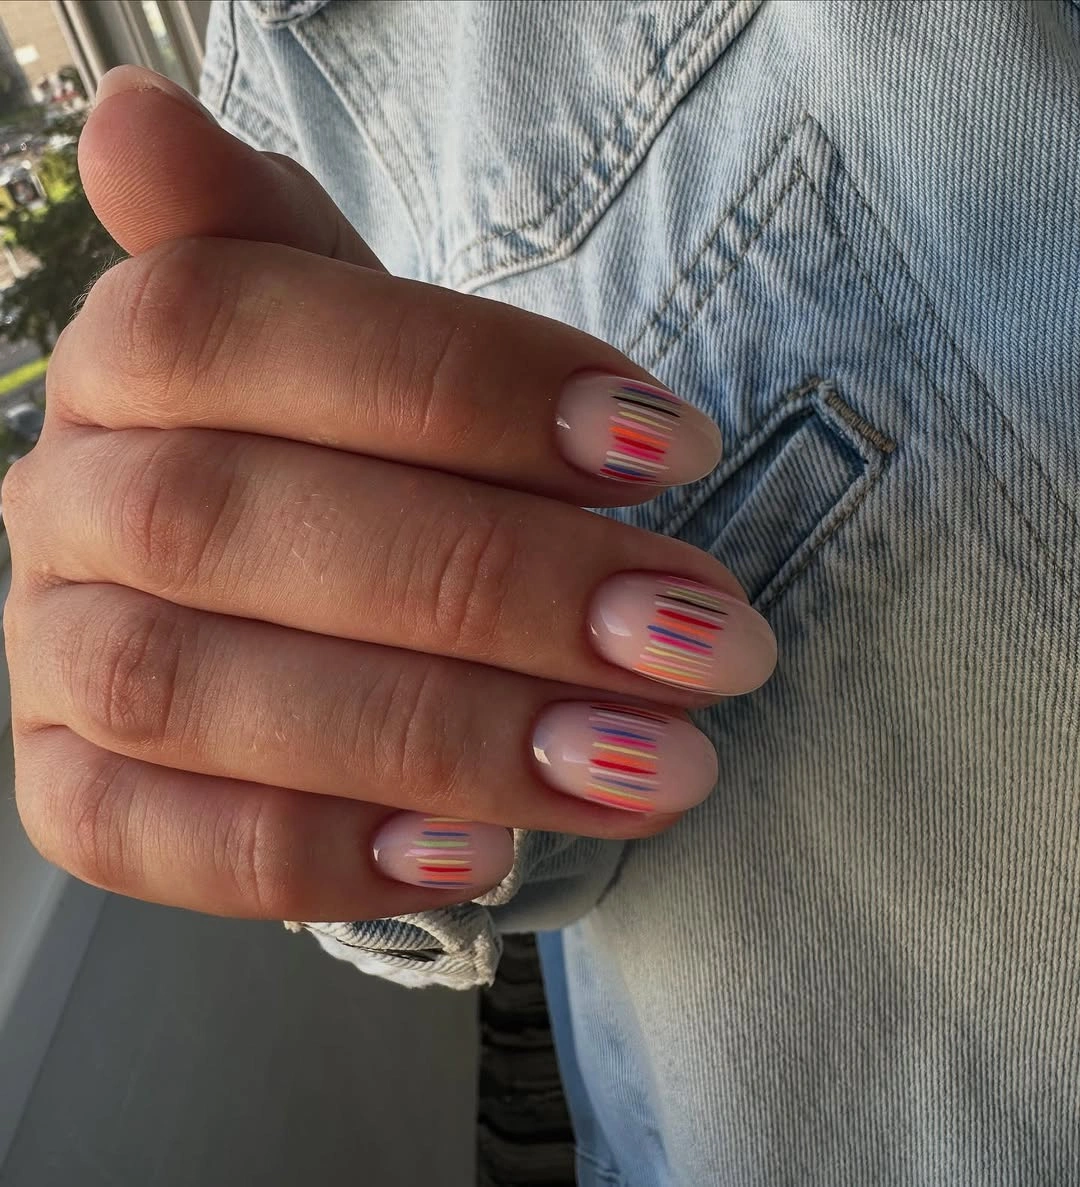
I would use a sheer nude base and several highly pigmented gel colors for the stripes. The exact palette can be adjusted for fall, which is what makes this design so useful. Instead of bright summer shades, I could choose burgundy, mustard, olive green, dusty rose, chocolate brown, and muted blue. A fine liner brush is the most important tool because the stripes need to stay narrow and consistent. I would also use a glossy top coat to keep the nude background looking fresh and prevent the tiny lines from feeling visually heavy.
The trick at home is to keep the stripes thin and give myself enough space between them. I would cure the nude base first, then draw each color separately, curing when necessary so one shade does not drag into another. I would not worry about making every nail identical. In fact, slightly different stripe groupings make the finished set more interesting. If my hands are not steady enough for extremely thin lines, I would make fewer stripes and give each one a little more breathing room. Simple does not mean easy, but it does mean forgiving.
Minimal Black Botanical Art on Nude Short Nails
There is something especially chic about black nail art when the rest of the manicure stays soft and understated. This design uses a muted nude-pink base on short nails and places tiny black botanical shapes, stars, dots, and curved details across the surface. Nothing is overly dense, and that is exactly why it works. The dark artwork creates contrast against the delicate nude background without making the manicure look severe. I also like the mixture of tiny symbols and organic shapes – it feels more like personal doodling than traditional nail art.
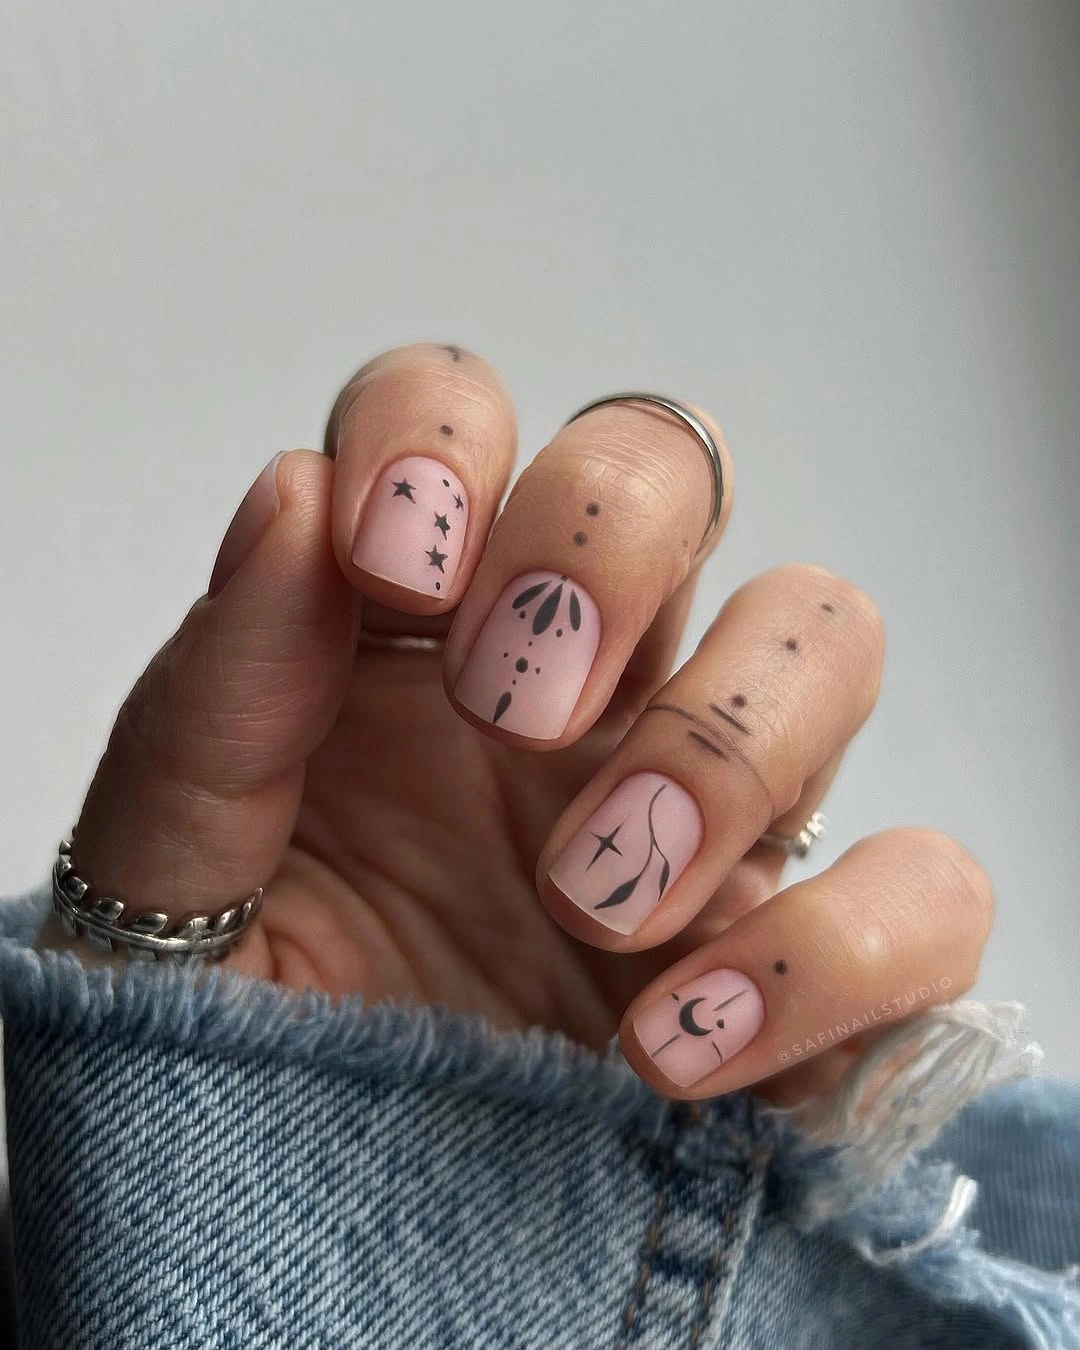
I would keep the materials uncomplicated here. A translucent pink-beige nude polish forms the base, while a highly pigmented black gel creates the details. I would use a fine liner brush for the curved botanical shapes and a dotting tool for the tiny circles. If I wanted a softer fall interpretation, I could replace true black with espresso brown or deep burgundy. That small adjustment would keep the contrast while giving the manicure a warmer seasonal feeling. A glossy finish makes the design crisp, but a matte top coat could make the same artwork look wonderfully modern.
When I create minimal nail art, I always think less is more. I would apply two thin layers of nude polish, cure them properly, and then add the black details with as little product on the brush as possible. For the stars and dots, I would vary the size slightly rather than making them identical. The botanical shapes can be drawn as simple tapered strokes, so there is no need to create complicated illustrations. Once everything is cured, I would seal the design carefully with top coat, making sure the free edge is covered as well.
Milky Nude Nails With Gold Flower Accents
I would choose this manicure when I want elegant nude fall nails with a soft romantic edge. The short rounded nails have a translucent pink-beige base, while delicate white petals form loose flowers across several nails. Tiny pieces of gold foil sit in the centers, giving the manicure a warm glow without making it feel flashy. The combination of milky nude, white, and gold feels especially lovely for early fall.
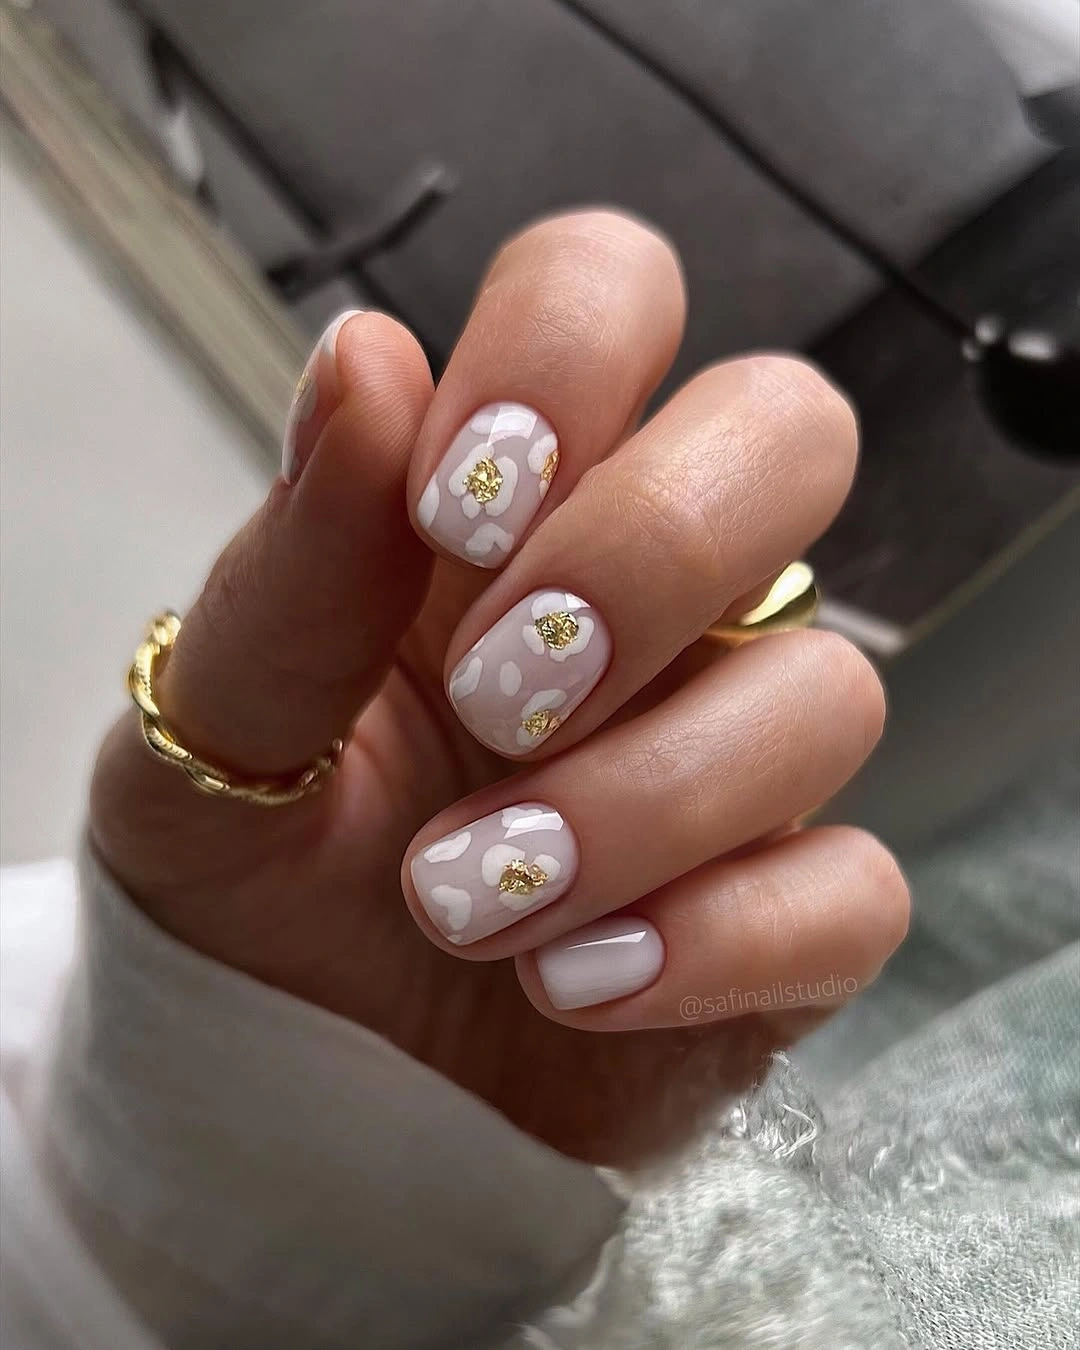
I would use a sheer nude gel, opaque white polish, gold foil, a dotting tool, and a fine nail-art brush. I would keep the flowers slightly irregular rather than perfectly identical. That little imperfection makes the design feel softer and more personal.
For me, the easiest way to recreate it is to apply the nude base, build the petals with small rounded strokes, and add gold foil while the design is still slightly tacky. I would finish with a glossy top coat. With a cream sweater and simple gold jewelry, this manicure practically styles itself.
Minimal Black Details on Short Nude Nails
This is proof that black nail art does not have to feel dramatic. I love the contrast between the soft nude-pink base and the tiny black botanical shapes, dots, and fine vertical strokes. The short rounded shape keeps everything refined, while the different motifs give each nail its own little personality. It feels understated but definitely not boring.
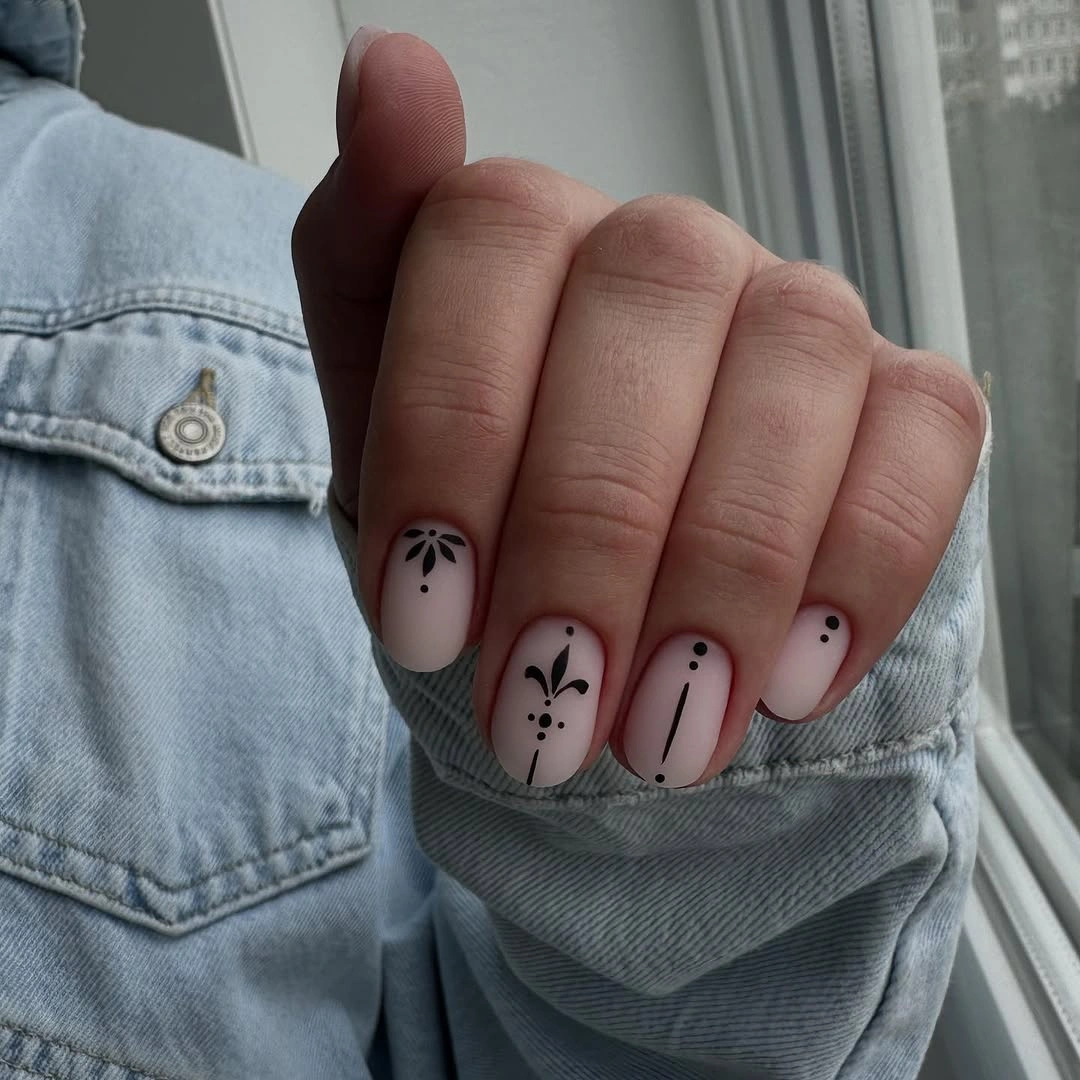
I would reach for a milky nude gel polish, highly pigmented black gel, a very fine liner brush, and a dotting tool. For a softer autumn version, espresso brown could replace black without losing the graphic effect.
I would keep the artwork sparse and cure small details as I go. That is the secret here – there is no need to cover the entire nail. I especially like this idea for short nails because the clean negative space makes the manicure look polished and modern.
White Floral Details for a Soft Fall Manicure
I find this version of nude nails especially pretty because the floral artwork is concentrated near the tips instead of covering the whole nail. The glossy milky-white base has a delicate translucent quality, while tiny white flowers and muted green leaves create a botanical border. The short rounded shape makes the manicure practical, but the detailed flowers still give it that special-occasion feeling.
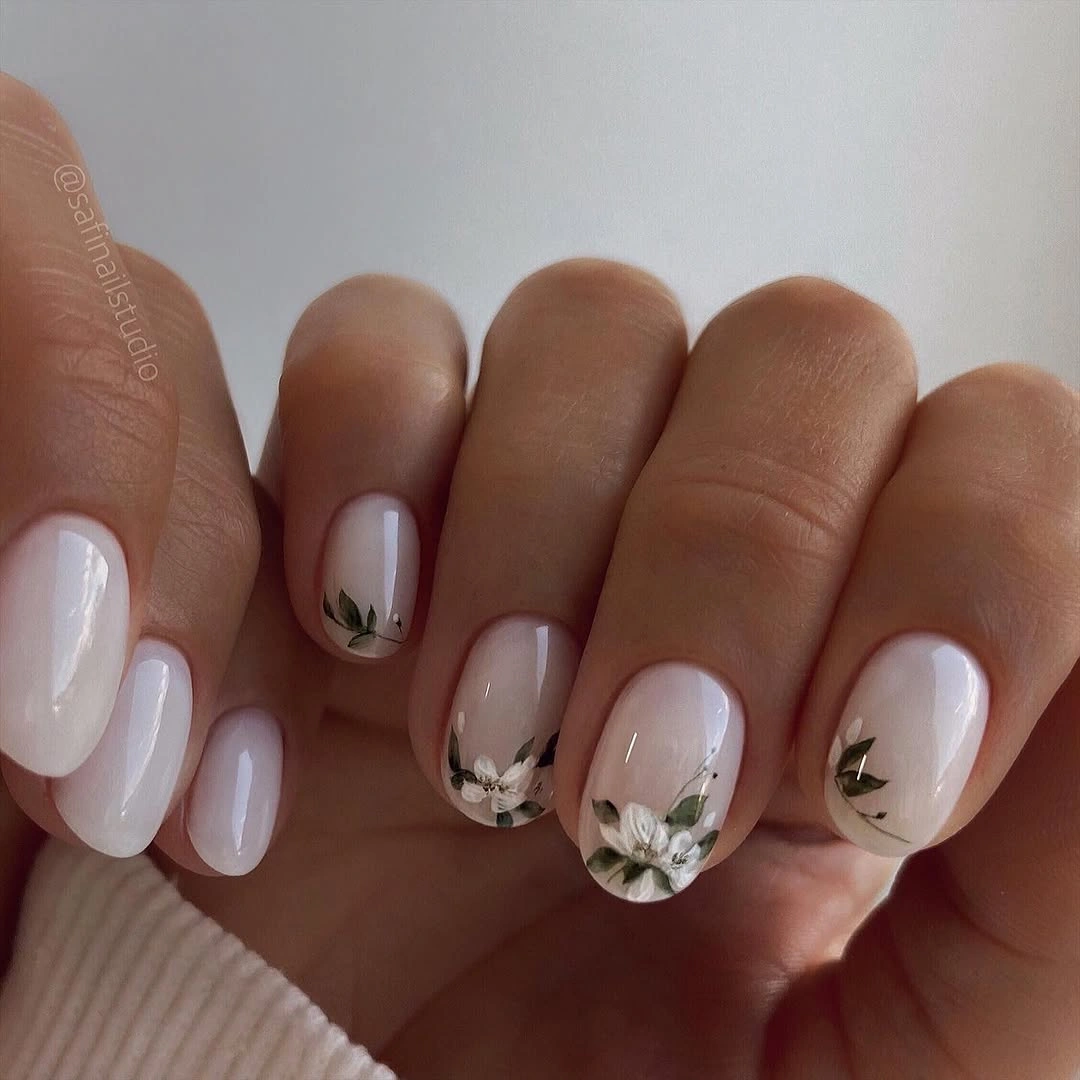
I would use a sheer white or very pale nude gel, a soft white for the flowers, muted olive green for the leaves, and a fine detail brush. A dotting tool makes the tiny petals much easier to control. I would keep the finish glossy so the flowers look almost pressed into glass.
I would start with the clean nude base and place the flowers along selected tips rather than repeating the exact pattern on every nail. For fall, I would choose olive or sage instead of bright green. It gives the manicure a quieter, more seasonal mood that works beautifully with knitwear.
Abstract Nude Nails With Gold and Brown Details
Here I would lean into the more artistic side of elegant nude fall nails. The almond-shaped nails are covered in glossy nude and taupe tones, with a few abstract brown shapes, delicate botanical lines, soft pink accents, and flashes of gold foil. Because most of the nails remain simple, the decorated ones become little focal points. It feels sophisticated without looking overly coordinated.
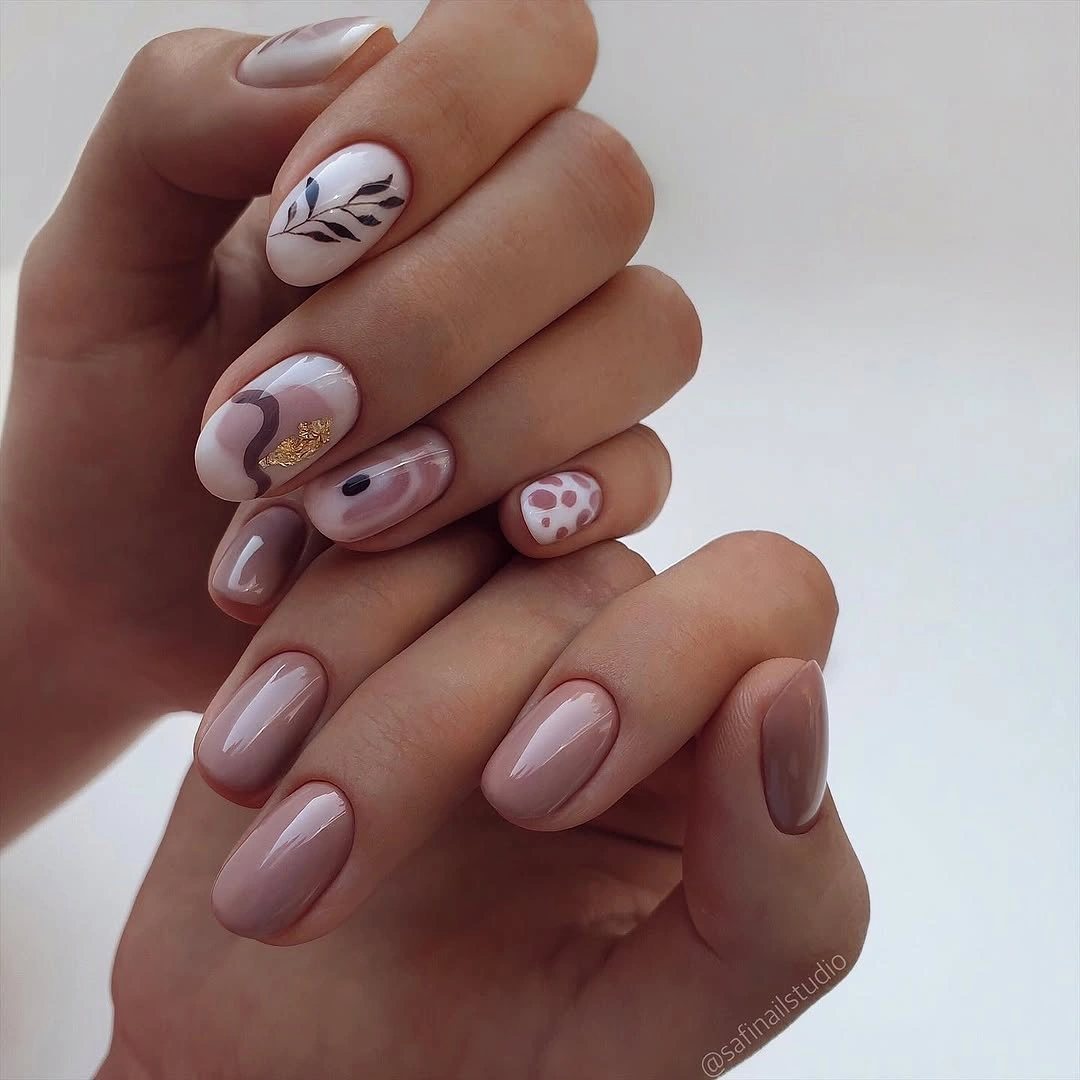
I would use several close nude shades, including blush beige and translucent taupe, plus chocolate-brown gel, muted pink, black or deep brown for the fine botanical detail, and gold foil. I would use a liner brush for the leaves and a small detail brush for the abstract shapes.
I would apply the neutral shades first and then decorate only two or three nails. I think that restraint is what makes this set work. The result has a little bit of everything – neutral, art, gold, and soft brown – but still feels completely wearable for a fall wardrobe.
Pastel Pink Nude Nails With Gold Abstract Art
This manicure takes nude nails in a softer, almost dreamy direction. Most of the almond-shaped nails are finished in a glossy pastel pink, while selected nails feature a milky white base with pale blue and pink abstract shapes outlined by irregular pieces of gold foil. The colors are delicate, but the metallic accents keep the design from disappearing into the background.
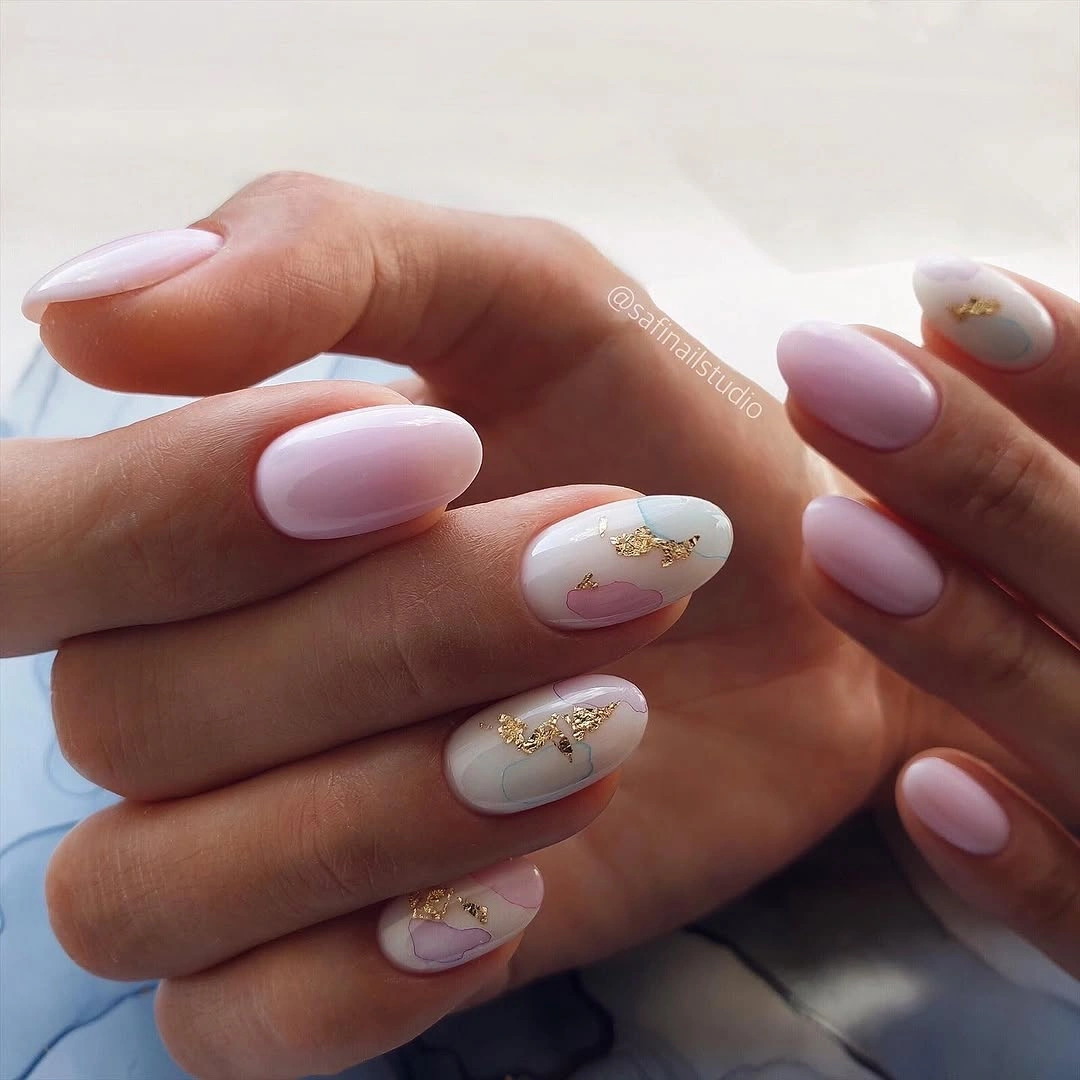
I would use a soft pink nude, milky white, pale blue, muted rose, and thin gold foil. A glossy top coat is important because it gives the pastel colors that smooth, almost glazed appearance. I would keep the gold pieces uneven and organic rather than cutting them into precise shapes.
For me, this is an easy way to bring pastel nails into fall without making them feel summery. I would pair the manicure with gray, cream, dusty rose, or chocolate clothing and let the tiny gold details catch the light. Sometimes a neutral manicure only needs one unexpected color to feel completely new.
Ivory Marble Nails With Fine Gold Foil
I love the quiet luxury of this manicure. Short rounded nails carry a soft ivory base with layered beige and taupe curves that create a delicate marble effect. Tiny pieces of gold foil appear between the flowing lines, giving the neutral palette just enough warmth for fall. The result feels polished, elegant, and especially pretty with gold jewelry.
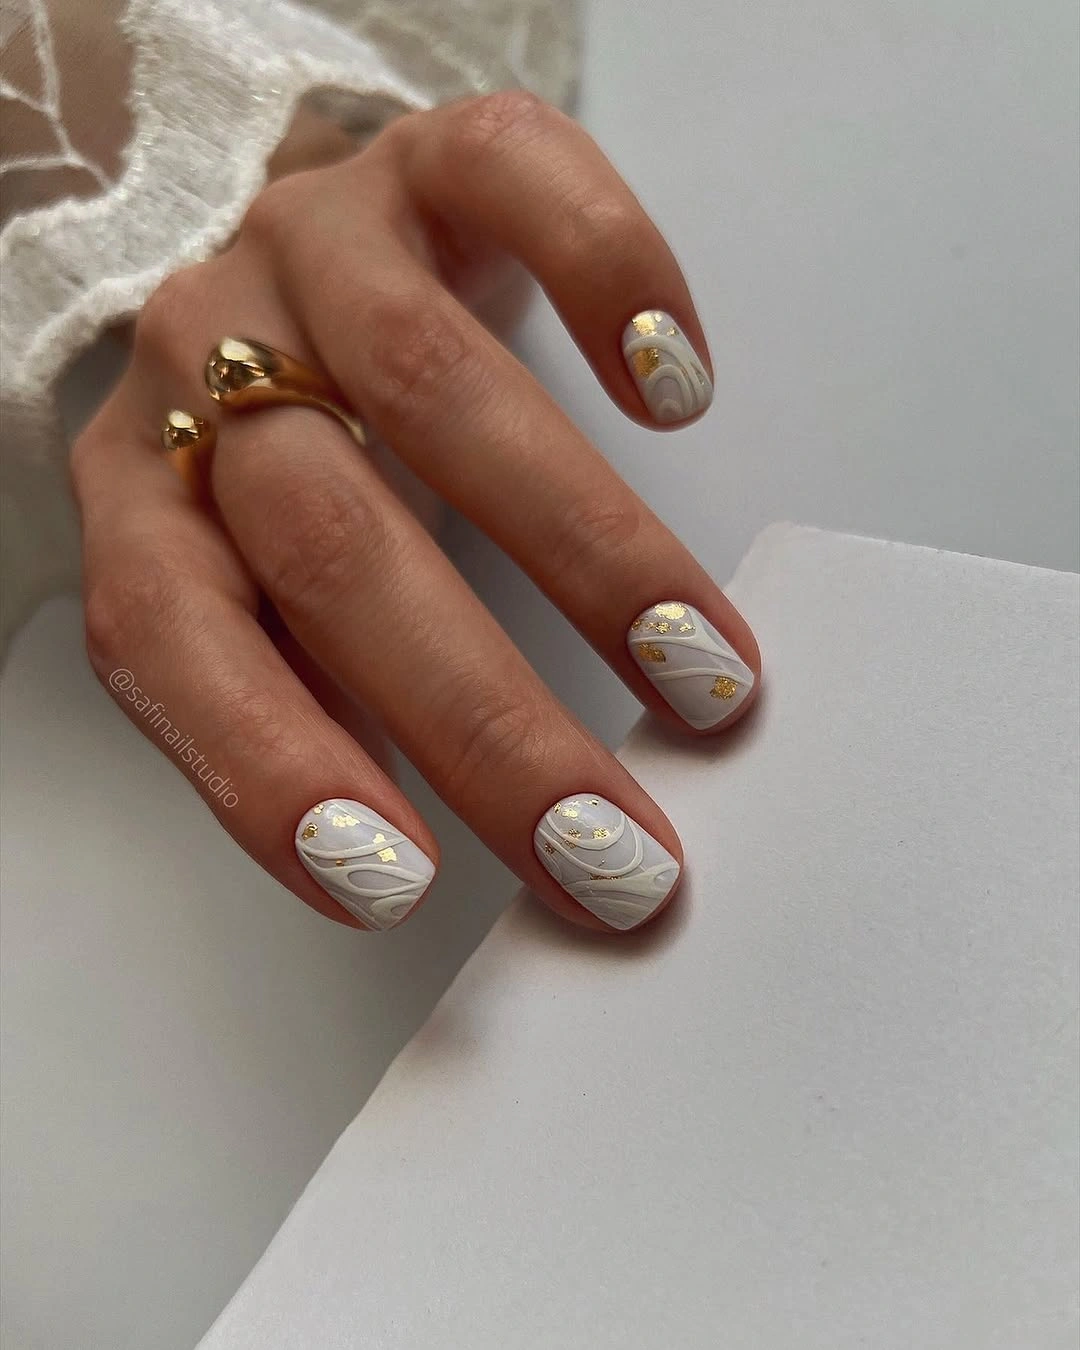
I would use a milky ivory gel, a sheer beige nude, a taupe shade, gold foil, and a fine liner brush. I would keep the colors close in tone so the marble stays soft rather than graphic. A glossy top coat gives the layered design its smooth finish.
I would create the curved lines with a very light hand, adding different shades gradually instead of trying to draw everything at once. Small pieces of foil can be placed between the lines before the final top coat. I think this is one of the easiest ways to make short nude nails feel special without adding too much decoration.
Classic Nude Nails With Soft White French Tips
This manicure gives the classic French idea a softer, more relaxed update. The almond-shaped nails have a translucent nude-pink base and bright white tips that follow the natural curve of the nail. The tips are slightly irregular and organic rather than perfectly geometric, which makes the set feel fresh. For fall, I would wear this with denim, cream knits, and oversized coats.
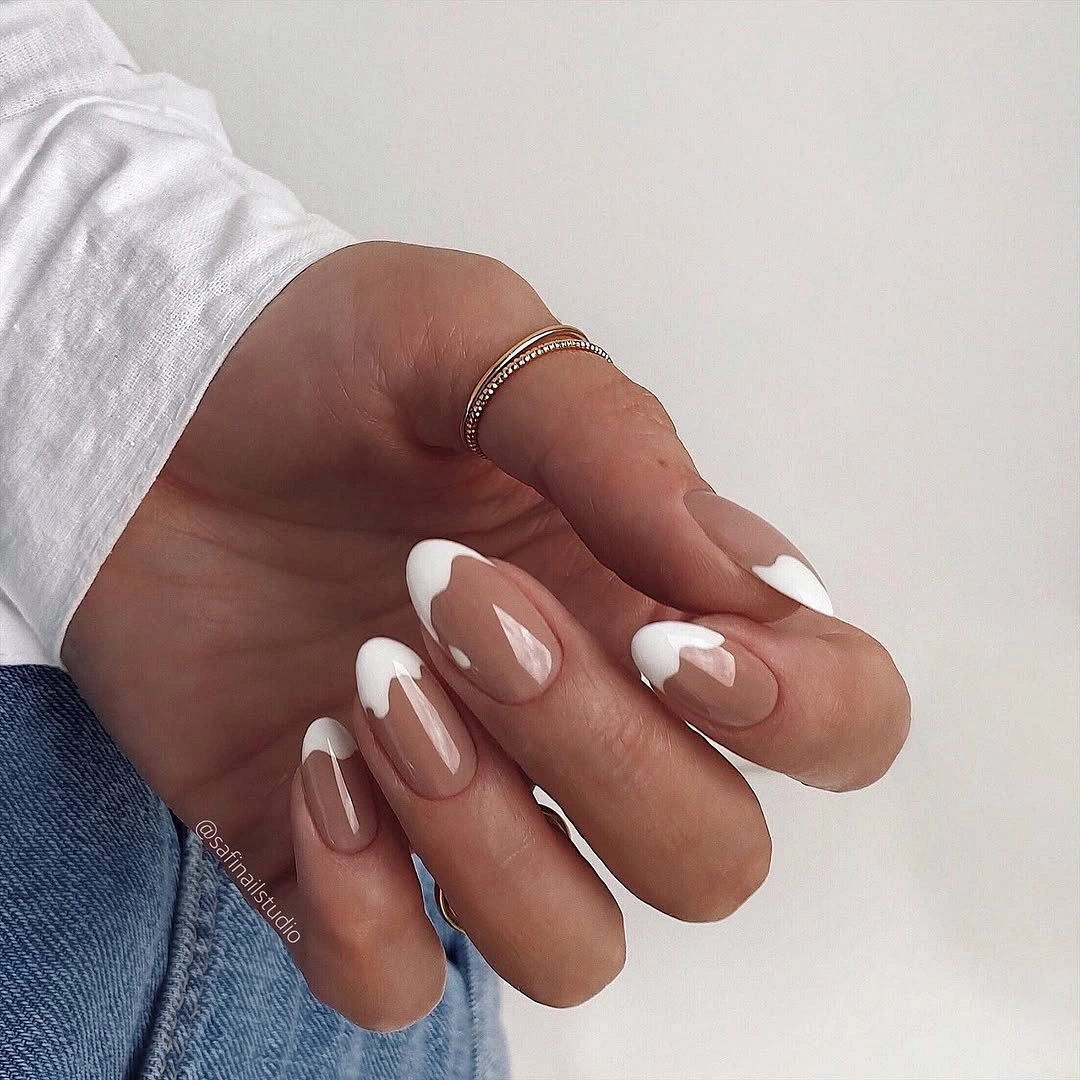
I would choose a sheer pink nude, a clean white gel, a fine brush, and a glossy top coat. The most important part is finding a nude that allows the natural nail to show through slightly. That transparency keeps the French manicure delicate instead of heavy.
At home, I would apply the nude base first and then create the white tips with short strokes, following the natural shape of each nail. I would not try to make every tip identical. A little variation actually makes this simple manicure look more natural.
Sheer Nude Nails With Botanical Gold Details
Here, the manicure is almost bare, which is exactly what makes it so elegant. The short rounded nails have a translucent pink-nude finish, while fine white botanical shapes curve across selected nails. Small pieces of gold foil sit along the delicate leaves, creating tiny flashes of light. I would call this a perfect soft neutral manicure for someone who wants nail art that whispers rather than shouts.
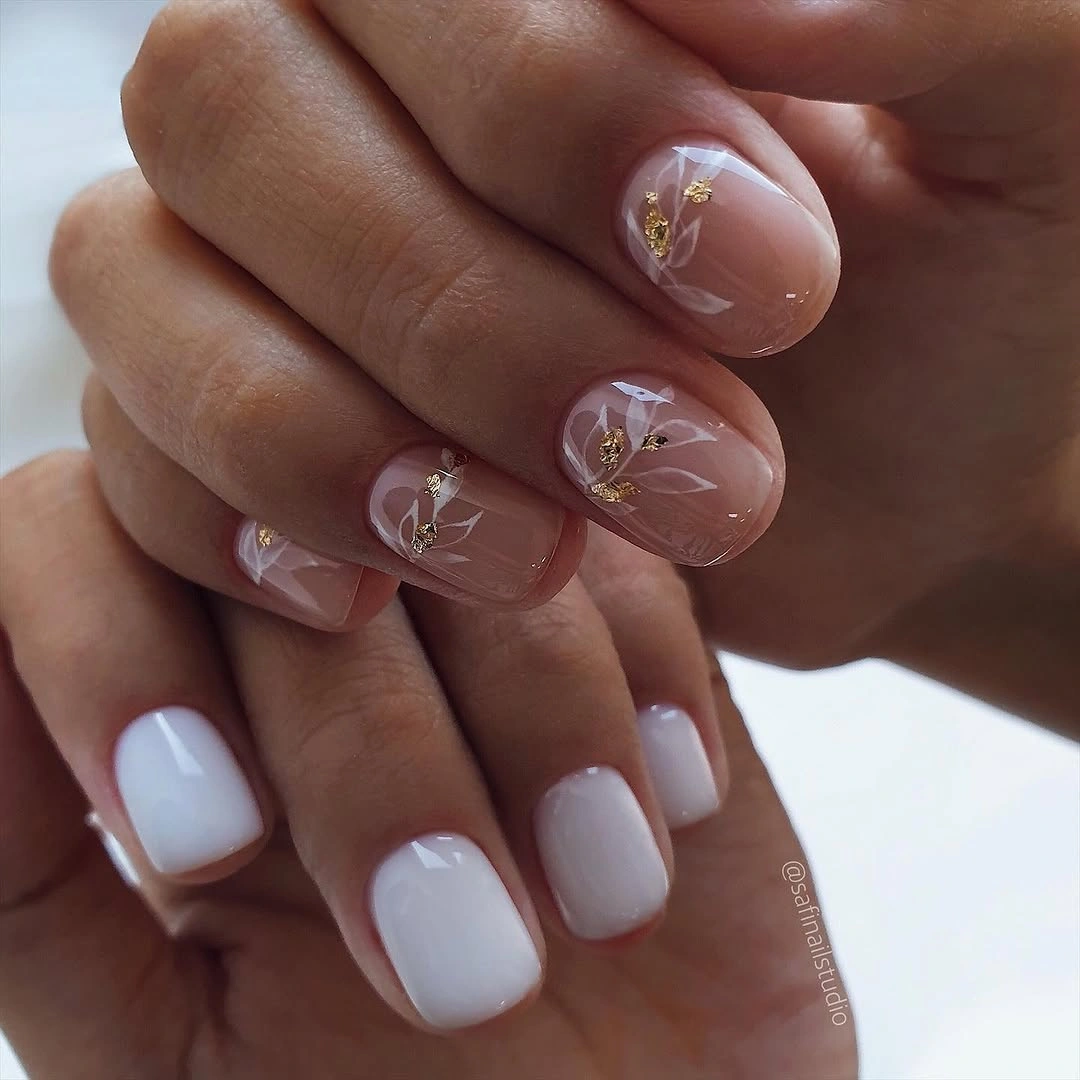
I would use a sheer blush nude, white gel paint, gold foil, and an ultra-fine liner brush. The artwork needs very little product, so the materials can stay simple. A high-shine top coat will preserve the glassy finish.
I would draw the botanical strokes in thin, curved movements and place the foil sparingly along selected lines. I especially like this approach for fall because the gold adds warmth while the translucent base keeps the manicure light. It would also be lovely for an understated wedding or special dinner.
Milky White Nude Nails With Golden Flakes
Sometimes I want my manicure to be almost completely neutral but still have a little sparkle. This short rounded set does exactly that, combining a translucent milky beige base with scattered gold flakes across every nail. The flakes vary in size, so the result feels organic rather than glittery. It is simple, polished, and incredibly easy to wear.
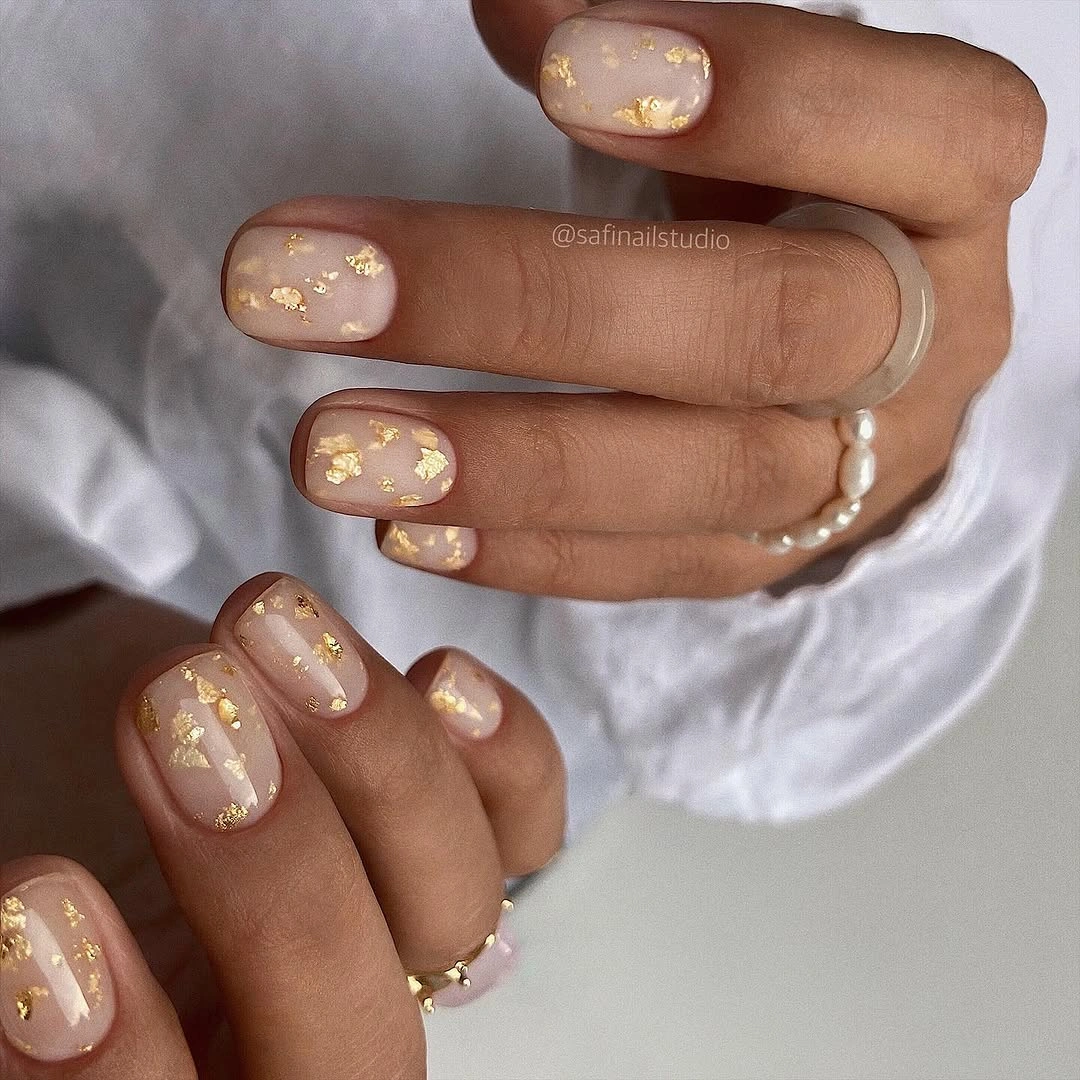
I would use a sheer beige-pink gel, small gold foil flakes, a silicone tool or tweezers, and a glossy top coat. I would choose a warm champagne gold rather than a bright yellow metallic because it blends more naturally with the nude base.
I would apply the base in thin layers, place the gold flakes randomly while the surface is ready to hold them, and seal everything generously with top coat. I would not overthink the placement. The beauty of this design is that every nail can look slightly different.
Pink Glazed Nude Nails With a Soft Glow
This is the minimalist option I would save for days when I want my hands to look effortlessly polished. The short square-rounded nails have a translucent milky base with a diffused pink glow concentrated through the center. There is no visible artwork, no glitter, and no complicated detail – just a glossy, softly dimensional finish. It has that clean-girl simplicity but feels warmer and more delicate for fall.
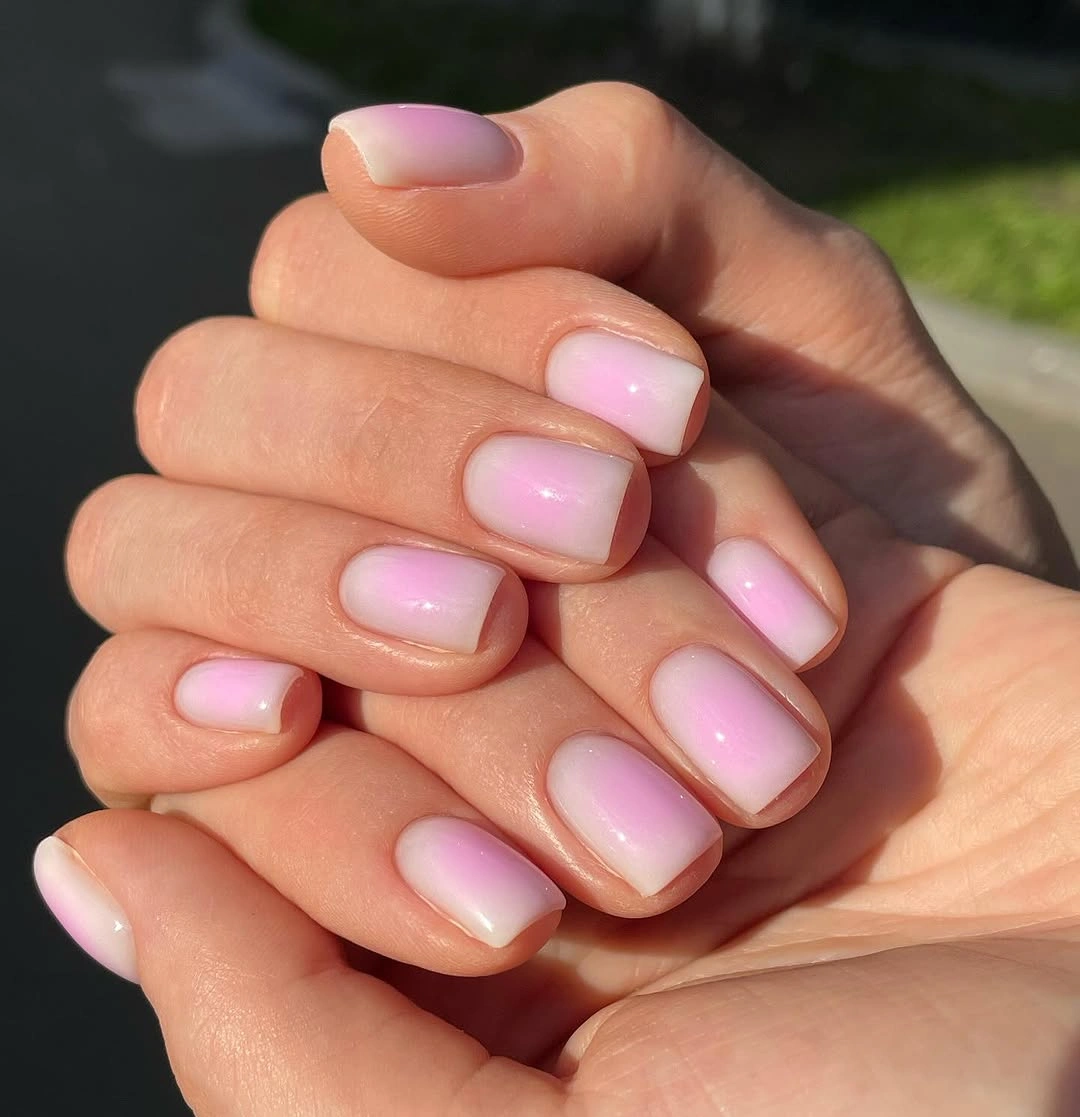
I would use a sheer milky white or nude base and a translucent pink gel or sheer chrome powder to create the subtle glow. The finish should remain glossy and smooth. I would skip heavy chrome because the charm is in the barely-there color shift.
For me, this is the easiest manicure to live with because it works with absolutely everything. I would choose it when I want elegant nude fall nails without obvious nail art, especially with cozy neutrals and soft pink accessories. Sometimes the most beautiful design is simply a really good nude with a little glow.